
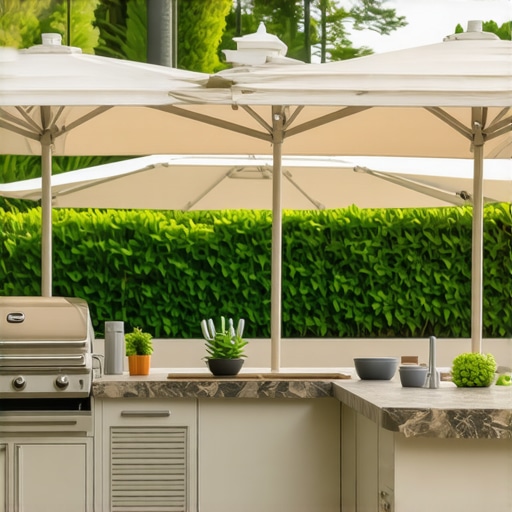
4 Ways to Stop Your Outdoor Kitchen from Overheating
The Engineering of Thermal Management in Outdoor Hardscaping
To stop your outdoor kitchen from overheating, you must prioritize cross-ventilation, select materials with low thermal conductivity, install insulated jackets for appliances, and utilize passive shading combined with strategic horticultural cooling. These technical adjustments prevent structural cracking and dangerous gas accumulation in masonry enclosures.
I recently got called out to tear up a $30,000 outdoor kitchen that was literally falling apart because the previous contractor failed to understand thermodynamics. The homeowner was complaining that the granite countertops were too hot to touch and the stucco was spider-webbing. When I brought the jackhammer in, I found the problem immediately: zero ventilation. The heat from a 42-inch professional grill had nowhere to go, so it absorbed into the CMU blocks and the concrete footer. The thermal expansion was so violent it snapped the mortar bonds. It was a $30,000 lesson in why you don’t hire a ‘mow-and-blow’ crew to build an engineering project. Landscaping is not just about aesthetics; it is about managing physical forces like hydrostatic pressure and thermal energy. If you ignore the science, the earth will eventually reclaim your investment. 80% of the work in a high-end kitchen happens before the first stone is set. You have to plan for the heat sink effect. Masonry is a battery for heat. Once it is charged, it stays hot for hours. You have to break that cycle with airflow and material science.
1. Implementing High-Low Cross-Ventilation Systems
Proper ventilation in an outdoor kitchen requires a dual-vent system placed at high and low points of the cabinetry to allow convection currents to flush out trapped heat and prevent propane or natural gas pooling. This is a non-negotiable safety and structural requirement for all hardscape builds.
When we talk about airflow, we are talking about CFM (Cubic Feet per Minute) and gas density. Propane is heavier than air. If you have a leak and no bottom vents, that gas pools at the base of your island like water in a bucket. One spark from the grill ignitor and the whole thing is a claymore mine. From a structural standpoint, vents allow the hot air generated by the grill’s firebox to escape. Without them, the internal temperature of the island can exceed 200 degrees Fahrenheit. This causes the metal frames to expand at a different rate than the stone veneer, leading to delamination. I install vents every 4 to 6 feet. It is cheap insurance.
“Adequate ventilation for outdoor cooking appliances is not merely a performance issue; it is a critical safety requirement to prevent the accumulation of combustible gases and excess thermal energy.” – Hardscape Engineering Axiom
Don’t let a contractor tell you it ‘ruins the look.’ A cracked countertop ruins the look much faster.
2. Thermal Barrier Integration and Insulated Jackets
An insulated jacket acts as a stainless steel thermal break between the high-heat grill head and the combustible or non-combustible surrounding structure, effectively reducing heat transfer to the cabinetry by up to 70%. This prevents the ‘heat-soak’ effect in stone and wood frames.
If you are dropping a professional grill into a stone island, you need an insulated jacket. Even if your island is made of non-combustible CMU block, the jacket is vital. Why? Because it protects the chassis of the grill and prevents the surrounding stone from becoming a radiator. I have seen 3cm granite slabs snap in half because the grill was installed directly against the stone. The localized heat caused a differential expansion that the stone’s tensile strength couldn’t handle. Use 304-grade stainless steel jackets. They are corrosion-resistant and engineered to handle the 50,000+ BTUs these modern grills pump out. We also use Type S mortar with high lime content for these areas because it has a better modulus of elasticity than high-strength cements. It can flex slightly when things get hot. If you use a rigid, high-PSI grout, it will turn to dust under the stress of heat cycles.
How do you vent an outdoor kitchen grill?
You vent an outdoor kitchen by installing stainless steel vent plates on at least two sides of the island to create a cross-breeze. For natural gas, vents should be placed high near the countertop; for propane, they must be placed low near the finished floor.
3. Material Selection and the Albedo Effect
Choosing materials with a high Albedo rating and low thermal mass, such as light-colored natural pavers or porcelain slabs, reduces the amount of solar radiation absorbed by the outdoor kitchen surfaces. This keeps the workspace cooler for the cook and the equipment.
Not all stone is created equal. Dark basalt or deep grey granite might look sleek in a magazine, but in the July sun, they become griddles. I’ve measured surface temperatures on dark pavers at 160 degrees. You can’t stand on that, and you certainly can’t prep food on it. We recommend light-colored travertine or specialized outdoor porcelain. Porcelain is dense and doesn’t hold onto thermal energy the way a thick slab of concrete does. Below is a comparison of common materials we use in our builds:
| Material Type | Heat Retention | Expansion Rate | Recommended Use |
|---|---|---|---|
| 304 Stainless Steel | Low | High | Cabinetry & Appliances |
| Light Travertine | Low | Low | Flooring & Patios |
| Dark Granite | Very High | Medium | Countertops (Requires Shade) |
| Concrete Slabs | High | High | Footers & Bases |
It is also about the base layer. We use a 6-inch compacted base of 3/4-inch modified gravel. This allows for slight movement and drainage. Water trapped under a kitchen that gets hot will turn to steam and blow your tiles off. Physics always wins. Don’t fight it.
4. Passive Cooling via Horticultural Shading
Strategic placement of deciduous trees and high-transpiration plants around an outdoor kitchen creates a micro-climate through evaporative cooling and seasonal shading. This biological layer can lower ambient temperatures by 10-15 degrees without mechanical intervention.
Don’t just think about the hardscape. The softscape is your air conditioner. I see guys clear-cut a lot to build a kitchen and then wonder why it’s a furnace. You want plants with a high transpiration rate. As plants ‘breathe,’ they release water vapor, which cools the air. I’m a fan of using Japanese Maples or structured pergolas with climbing vines like Wisteria (if maintained). The shade from a leaf is ‘cooler’ than the shade from a plastic umbrella because the leaf isn’t just blocking light; it’s actively processing energy.
“The strategic use of vegetation in urban micro-climates can reduce peak cooling loads by significantly altering the convective heat transfer around built structures.” – Agricultural Extension Research
Just watch your root flares. Don’t plant large trees within 10 feet of your footers, or the roots will heave your kitchen faster than a frost cycle. Use drip irrigation to keep the soil moisture consistent. Dry soil shrinks; wet soil expands. That movement is the enemy of a level kitchen.
What is the best material for a heat-resistant outdoor countertop?
The best material is outdoor-rated porcelain or light-colored granite with a honed finish. Porcelain is particularly effective because it is UV-resistant, non-porous, and has a very low thermal expansion coefficient compared to concrete or engineered quartz.
Pre-Build Thermal Safety Checklist
- Verify minimum clearance to combustible requirements per manufacturer specs.
- Install high-flow vent plates (minimum 20 sq. inches per vent).
- Specify 304-grade stainless steel for all internal framing.
- Ensure GFCI outlets are placed away from direct heat zones.
- Apply heat-resistant sealant to all masonry joints.
- Check 811 / Dig Safe before excavating for gas lines or footers.
Stop treating your yard like a hobby and start treating it like a job site. If you skip the ventilation or the insulated jackets, you are just building expensive compost. The heat will find the weakest point in your design and exploit it. Do the math on your BTUs. Measure your thermal gaps. Use a level on every course of stone. It’s not about ‘vibrant’ spaces; it’s about structural integrity and safety. Build it once. Build it right. Keep it cool. It will rot if you don’t.
![Build a $80 Gravel Fire Pit Area [2026 Budget]](https://lawnmajesty.com/wp-content/uploads/2026/07/Build-a-80-Gravel-Fire-Pit-Area-2026-Budget.jpeg)
![Build a $400 2026 Outdoor Kitchen Island [Budget DIY]](https://lawnmajesty.com/wp-content/uploads/2026/05/Build-a-400-2026-Outdoor-Kitchen-Island-Budget-DIY.jpeg)
![Why Your 2026 Deck is Turning Black [3 Fixes]](https://lawnmajesty.com/wp-content/uploads/2026/06/Why-Your-2026-Deck-is-Turning-Black-3-Fixes.jpeg)