![Build a $250 2026 Brick Fire Pit [Weekend DIY]](https://lawnmajesty.com/wp-content/uploads/2026/07/Build-a-250-2026-Brick-Fire-Pit-Weekend-DIY.jpeg)
Build a $250 2026 Brick Fire Pit [Weekend DIY]
Why Most DIY Fire Pits Fail Before the First Burn
Building a budget-friendly brick fire pit requires a deep understanding of structural engineering and thermal dynamics to ensure the installation remains level and safe over multiple freeze-thaw cycles. I recently got called out to tear up a $30,000 patio that was sinking because the previous contractor ignored the sub-base compaction and hydrostatic pressure. This same lack of care ruins $250 DIY projects too. If you do not excavate properly and manage your soil grading, your fire pit will become a leaning pile of rubble within two seasons. Most homeowners think they can just stack pavers on the grass. They are wrong. You are building a civil engineering project on a micro scale. Soil is alive and constantly moving; your job is to pin it down.
The Engineering Behind the Heat
A fire pit is not just a hole for wood; it is a thermal reactor. Standard clay bricks contain moisture trapped within their pores. When you subject them to 400 degrees Fahrenheit, that moisture turns to steam. Because the steam has no exit, it creates internal PSI that causes the brick to spall or explode. This is why we use refractory fire bricks for the inner liner. They are rated for high-heat environments and protect your decorative outer layer from thermal shock. Do not cut corners here. Cheap bricks are for garden borders, not for fire.
“A retaining wall doesn’t fail because of the stone; it fails because of the water trapped behind it.” – Hardscape Engineering Axiom
Site Selection and the 811 Protocol
Choosing a location for your 2026 brick fire pit requires analyzing prevailing wind patterns, utility line depth, and clearance zones to prevent property damage or local ordinance violations. Do not guess where your gas or electric lines are buried. Call 811. It is free and it saves lives. I have seen crews hit lines that were only six inches deep because of soil erosion over time. Position your pit at least 15 feet from any structure or low-hanging canopy. Check your local HOA covenants. Some regions with heavy red clay or high peat content have specific drainage requirements for any permanent hardscape structure. If your yard has a slope of more than 2%, you must incorporate a French drain or adjust the finish grade to prevent water from pooling at the base.
How much modified gravel do I need for a patio base?
For a standard 4-foot diameter fire pit, you need approximately 0.5 cubic yards of 3/4-inch modified gravel (also known as 21A or CR-6) to create a 6-inch compacted base. This material provides the structural integrity needed to resist heaving. Gravel without fines will not compact; you need the dust to lock the stones together. Calculate your volume by multiplying the square footage by the depth in feet, then divide by 27 to get cubic yards. Round up. You will always need more than you think.
The $250 Material Breakdown for 2026
Achieving a professional result for under $250 in the 2026 economy requires sourcing ASTM-rated materials from local masonry yards rather than big-box retail markups. Buying in bulk or selecting “seconds” from a brickyard can save you 40% on material costs. Below is the budget allocation for a high-performance build.
| Material | Quantity | Estimated Cost | Purpose |
|---|---|---|---|
| Fire Bricks (Refractory) | 25 Units | $75 | Inner Heat Liner |
| Common Red Bricks | 80 Units | $80 | Exterior Aesthetic |
| 3/4″ Modified Gravel | 0.5 Yards | $40 | Structural Base |
| Polymeric Sand | 1 Bag | $25 | Joint Stabilization |
| High-Heat Adhesive | 2 Tubes | $30 | Structural Bond |
[image placeholder]
The Execution: From Excavation to First Light
The secret to a permanent hardscape install lies in the compaction density of the sub-grade and the precision of the screeding process. Start by marking a circle 6 inches wider than your intended pit. Dig down 10 inches. This depth allows for 6 inches of compacted gravel and 2 inches of bedding sand. Use a plate compactor. A hand tamper is for amateurs. The gravel should literally bounce the tamper off the surface when it reaches 98% Proctor density. Leveling is the most tedious part. If your first course is off by even an 1/8th of an inch, your final course will look like the Leaning Tower of Pisa. Use a 4-foot level. Check every brick. Don’t skip this.
Building the Thermal Liner
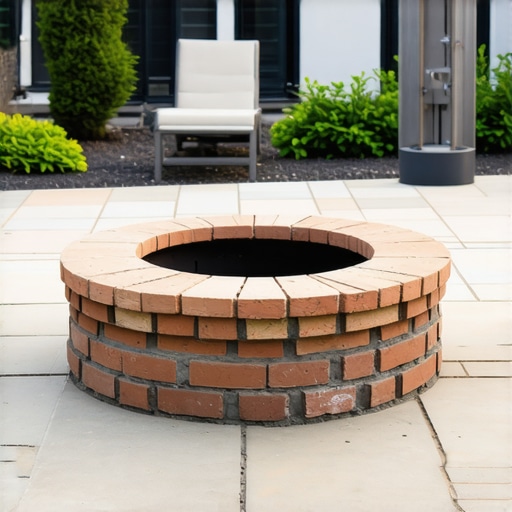
Once your base is set, lay your refractory bricks in a circle. These should not be glued. They need to expand and contract. Leave 1/4-inch gaps between them to allow for airflow. This oxygenates the fire, leading to a cleaner burn with less smoke. Outside of this, lay your decorative bricks using high-heat masonry adhesive. This prevents the wall from shifting when people inevitably kick it or lean their feet on it. If you are in a freeze-thaw climate, ensure you use polymeric sand in the exterior joints to prevent weed growth and water infiltration. Water is the enemy. Keep it out of the joints.
“Effective soil stabilization is the primary determinant of hardscape longevity in temperate climates.” – USDA Soil Mechanics Manual
Can I use standard bricks for a fire pit?
Standard clay bricks are not designed for direct fire contact and can spall or crack violently when the internal moisture reaches boiling points. Always use a steel fire ring or refractory fire bricks as a barrier between the flame and the decorative exterior bricks. Ignoring this step leads to structural failure within months. It is a safety hazard. Do not do it.
The Critical Maintenance Checklist
Maintaining a DIY fire pit involves managing ash acidity and checking for joint degradation every spring to prevent long-term structural rot. Ash is highly alkaline and, when mixed with rain, becomes caustic. This can eat away at lower-quality mortars or adhesives. Clean it out. Do not let it sit all winter.
- Ash Removal: Clear the pit after every three burns to maintain airflow.
- Joint Check: Inspect polymeric sand for washouts; top off as needed.
- Stone Integrity: Look for hairline cracks in the fire bricks. Replace immediately if found.
- Drainage: Ensure the surrounding soil grade has not shifted to direct water into the pit.
Landscape engineering is about persistence. A fire pit is a permanent heavy object sitting on shifting earth. Respect the physics of the site. Use the right materials. Build it once, and build it right. Your future self will thank you when you aren’t digging it out in two years. It will rot if you don’t drain it. Remember that.