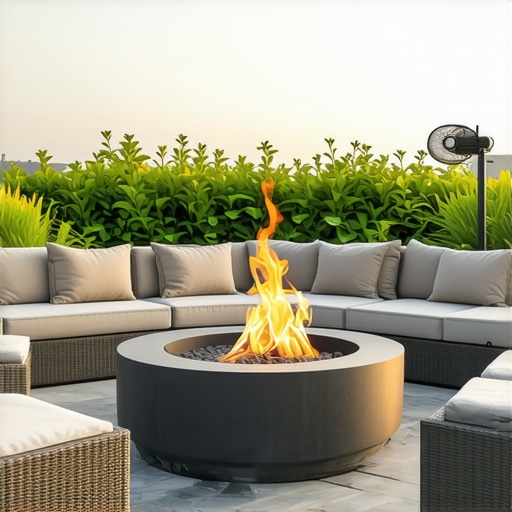
![Build a $300 2026 Stone Fire Pit Area [Weekend]](https://lawnmajesty.com/wp-content/uploads/2026/07/Build-a-300-2026-Stone-Fire-Pit-Area-Weekend.jpeg)
Build a $300 2026 Stone Fire Pit Area [Weekend]
Building a Fire Pit Area That Actually Lasts
Building a $300 2026 stone fire pit area requires more than just stacking blocks; it demands an understanding of soil mechanics and thermal dynamics to prevent the typical settling and cracking seen in amateur installs. I recently got called out to tear up a $30,000 patio that was sinking because the previous contractor ignored the subgrade compaction and didn’t account for hydrostatic pressure. It was a mess. The homeowner thought they were getting a premium build, but within two seasons, the pavers were tilting like a bad deck of cards. This is why I tell my crew that whether the budget is $300 or $30,000, the physics of the earth does not change. If you don’t prep the base, you are just throwing money into a hole. You need to think like an engineer before you pick up a shovel. Focus on the base layer. That is the secret. Most hacks skip it.
Site Assessment: Why Drainage Dictates Design
Site assessment for a fire pit involves evaluating the topography, soil composition, and utility locations to ensure a stable, safe, and long-lasting hardscape installation that resists frost heave. You must verify that the area has a 2 percent slope away from structures to prevent water pooling. Water is the enemy of stone. If water sits under your fire pit, the freeze-thaw cycle will expand that moisture and shatter your masonry from the inside out. I have seen it a thousand times. Check for underground utilities by calling 811 before you break ground. It is free and prevents you from hitting a gas line. Also, look at your soil. Is it heavy clay, silty loam, or sandy? Clay holds water and requires a deeper gravel base. Sand drains well but needs more mechanical compaction to provide a stable footing. Do not guess. Dig a test hole. If the water doesn’t drain in an hour, you have a drainage problem that needs a French drain or a thicker modified gravel base.
“A retaining wall doesn’t fail because of the stone; it fails because of the water trapped behind it.” – Hardscape Engineering Axiom
How deep should I dig for a stone fire pit base?
For a standard DIY stone fire pit, you should excavate to a depth of at least 8 to 10 inches to allow for 6 inches of compacted 21A or CR-6 gravel and 1 to 2 inches of coarse leveling sand. This depth ensures that the static load of the stones is distributed across a wider surface area of the subgrade. If you are in a region with severe freeze-thaw cycles, you might need to go 12 inches deep. Most people just scrape the grass off and start stacking. That is a mistake. The organic matter in the grass will rot, creating voids. Those voids lead to sinking. You need to reach the native subsoil and compact it until it is rock hard. If the dirt feels soft under your boots, keep digging. You are looking for structural integrity, not just a flat spot.
The $300 Inventory: Engineering on a Budget
Selecting fire-rated materials and structural aggregates within a $300 budget requires prioritizing functional quality over aesthetics, specifically focusing on ASTM C144 sand and crushed stone. You can save money by using trapezoidal wall blocks from a local supply yard instead of high-end natural fieldstone. Avoid river rocks at all costs for the interior of the pit. They contain moisture and can explode when heated. Stick to concrete masonry units or fire-rated bricks. Here is the breakdown for a 10-foot diameter circle with a 3-foot pit.
| Material Item | Quantity | Estimated Cost | Technical Specification |
|---|---|---|---|
| 21A Crushed Stone Base | 0.75 Cubic Yards | $45 | 3/4-inch minus with fines |
| Coarse Bedding Sand | 5 Bags | $25 | ASTM C33 Leveling Sand |
| Retaining Wall Blocks | 36-45 Blocks | $160 | Concrete Masonry Units (CMU) |
| High-Temp Adhesive | 2 Tubes | $15 | Polyurethane Construction Grade |
| Lava Rock/Fire Glass | 2 Bags | $40 | Porous Volcanic Rock |
| Total Estimated Cost | — | $285 | — |
Notice I didn’t include a steel fire ring. While nice, you can build a refractory brick lining for cheaper if you find a local supplier. The goal here is heat dissipation. Concrete blocks can crack over time if they are exposed to direct, sustained high heat without a liner or fire-rated mortar. If you spend the extra $15 on a polyurethane adhesive, your wall won’t shift when someone kicks it. Use the good stuff.
What is the best stone for a DIY fire pit?
The best stone for a DIY fire pit is dense igneous rock like granite or basalt, or manufactured concrete blocks specifically designed for high-temperature environments. Sandstone and limestone are porous and can spall or crack when moisture inside the stone turns to steam. If you use concrete pavers, ensure they are dry-cast and have a high compressive strength (at least 8,000 PSI). Using polymeric sand in the joints of the surrounding patio area will also prevent weed growth and ant hills from undermining the structural base of the pit. Always look for stones that are uniform in height. It makes the leveling process significantly easier for a weekend warrior.
The Installation: The Compaction Protocol
Successful hardscape installation hinges on mechanical compaction of the base materials, achieving a Standard Proctor Density that prevents future settlement and stone shifting. Start by clearing all vegetation and roots. Organic material is compressible and will fail. Once you reach the subgrade, use a plate compactor. You can rent one for $60. It is the best money you will spend. Run it over the bare dirt until it doesn’t move. Then, add your 21A gravel in 2-inch lifts. Do not pour all 6 inches at once. Compact each lift. The gravel should be slightly damp, which helps the fines lock together. When you are done, the tamper should literally bounce off the compacted base. It should sound like you are hitting a concrete sidewalk. If it sounds dull or thuddy, you aren’t done compacting. This is where most DIYers fail. They get tired and quit. Don’t be that guy.
“Soil compaction is the most critical step in any hardscaping project; without it, the structural load will inevitably cause shear failure in the subgrade.” – Penn State Agricultural Extension
- Step 1: Layout the perimeter using a center stake and string line.
- Step 2: Excavate to a depth of 10 inches, ensuring a slight slope for drainage.
- Step 3: Compact the subsoil with a heavy hand tamper or plate compactor.
- Step 4: Install 6 inches of crushed stone in 2-inch increments, compacting each layer.
- Step 5: Add 1 inch of leveling sand and screed it perfectly flat using a 2×4 board.
- Step 6: Lay the first course of blocks, checking for level on every single stone.
- Step 7: Adhere the subsequent courses using high-heat construction adhesive.
- Step 8: Fill the center with lava rock to protect the base and provide airflow.
Precision is key in the first course. If the first layer of stone is off by even an eighth of an inch, the fourth layer will look like the Leaning Tower of Pisa. Use a rubber mallet to seat the stones into the sand. Do not hit them with a metal hammer or you will chip the face. Check level across the diameter of the pit, not just stone to stone. You want a perfectly horizontal plane. It is a game of inches and PSI. Once the stones are set, wait 24 hours for the adhesive to cure before starting your first fire. The heat can affect the chemical bond of the glue if it hasn’t fully gassed out. This is a weekend project that requires patience and persistence. Your back will hurt, but the pit will stay level for the next decade. Don’t skip the details. The dirt knows when you are lazy.