Build a $250 Gravel Path That Blocks 2026 Weeds
Why Most DIY Gravel Paths Fail by Year Two
Building a gravel path that resists weed germination and soil migration requires a deep understanding of subgrade compaction, non-woven geotextile fabric, and angular aggregate selection. By prioritizing structural integrity and drainage over aesthetics, you create a hardscape feature that remains stable and weed-free for years.
I recently got called out to tear up a $30,000 patio that was sinking because the previous contractor thought he could skip the compaction of the sub-base. The homeowner was devastated. The pavers were undulating like a frozen sea. When we excavated, we found the ‘compacted’ gravel was sitting on raw, unamended clay that had turned into a sponge. This is the same mistake people make with a simple gravel path. They think gravel is just ‘decorative rocks.’ It isn’t. It is a structural layer. If you don’t treat your $250 path with the same engineering respect as a $30,000 patio, you are just throwing money into the dirt. Most DIYers buy that thin, woven plastic from big-box stores. It is garbage. It tears under the weight of the stone and lets the soil pump up through the gaps. You need to understand the physics of the ground if you want to win.
“A retaining wall doesn’t fail because of the stone; it fails because of the water trapped behind it.” – Hardscape Engineering Axiom
The Physics of Weed Growth in Stone
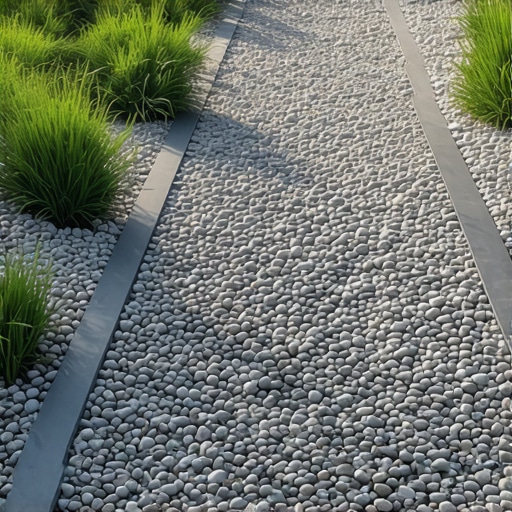
Weeds in gravel do not usually come from the ground up; they come from the top down. Over time, organic matter, dust, and grass clippings blow into the crevices of your stone. This creates a microscopic layer of ‘new soil’ sitting on top of your barrier. By 2026, a poorly built path is just a very expensive planter box for dandelions. To block 2026 weeds, you must use angular crushed stone that interlocks, reducing the space where organic fines can accumulate.
The $250 Material Strategy: Engineering on a Budget
Allocating a $250 budget for a landscaping project requires precise material estimation and a focus on non-woven geotextile and crushed aggregate rather than rounded river pebbles. Investing in high-quality weed barriers and landscape edging ensures the hardscape remains contained and functional.
| Material | Quantity (approx. 20ft path) | Estimated Cost |
|---|---|---|
| 3/4-inch Crushed Limestone | 2 Tons | $80 – $110 |
| Non-Woven Geotextile Fabric (4oz) | 1 Roll (3′ x 50′) | $50 – $70 |
| Steel or Heavy Plastic Edging | 40 Linear Feet | $40 – $60 |
| 6-inch Steel Landscape Staples | 1 Pack (100 ct) | $15 |
Skip the ‘Pea Gravel.’ It looks nice in magazines, but it is the ball bearings of the landscaping world. Because it is rounded, it never locks together. Every time you walk on it, you push the stones around, creating low spots where dirt collects and weeds thrive. Use 3/4-inch minus or ‘crushed’ stone. The jagged edges bite into each other. This creates a stable ‘crust.’ When you walk on it, it shouldn’t move. It should feel solid under your boot. That is the goal.
How much modified gravel do I need for a path?
To calculate gravel volume, multiply the length x width x depth (in feet) and divide by 27 to get cubic yards. A standard gravel path should be at least 3 inches deep to provide structural stability and effectively block photosynthesis for any dormant seeds in the subgrade.
The Ground-Up Build: Step-by-Step Execution
Successful hardscaping starts with excavation and soil grading to manage hydrostatic pressure and prevent water pooling. Proper subgrade preparation is the only way to ensure the gravel path does not settle or become a muddy mess during freeze-thaw cycles.
- Excavate to 4 Inches: Remove the turf and the top layer of organic soil. You need to hit the mineral soil (clay or silt). If it’s soft, keep digging.
- Grade the Sub-base: Ensure the dirt floor of your trench slopes away from your house foundation at a 2% grade. Water is the enemy.
- Manual Compaction: Use a hand tamper. The dirt should be so hard that you can’t push a screwdriver into it easily. Don’t skip this.
- Lay the Fabric: Use a 4oz non-woven needle-punched geotextile. This is not the plastic stuff. It lets water through but keeps the dirt from mixing with your stone. Overlap seams by 12 inches.
- Install Edging: Secure your borders. This keeps the gravel from migrating into your lawn care zone.
- Layer the Stone: Fill in 2-inch lifts. Level it. Walk on it. Repeat.
“Soil compaction is the single most important factor in determining the longevity of any exterior paved or unpaved surface.” – Penn State Agricultural Extension
What is the best weed barrier for gravel?
The best weed barrier for a gravel path is a non-woven geotextile fabric with a weight of at least 4 ounces per square yard. Unlike woven plastic, these fabrics allow gas exchange and moisture infiltration while providing the tensile strength necessary to prevent aggregate sinkage.
Maintenance: Preventing the 2026 Weed Invasion
Long-term weed control in landscaping depends on preventing the buildup of organic fines within the crushed stone matrix. Regularly removing leaf litter and using a leaf blower to clear dust prevents the formation of a seedbed on top of your geotextile layer.
Listen. No path is 100% ‘maintenance-free.’ If you let your mower blow grass clippings onto the gravel, you are planting a crop. By 2026, those clippings will have decayed into a perfect compost. Once or twice a year, use a blower to clear out any debris. If a stray weed pops up, pull it immediately. It will be easy because the roots can’t penetrate the heavy fabric. If you see ‘fines’ (dust) building up, hit the path with a high-pressure hose to wash the sediment down through the fabric into the subgrade. Keep the stones clean, and you keep the weeds out. It is simple biology. No light and no dirt equals no weeds. Stick to the plan. Stop buying the cheap stuff. Build it right once.
![Repair 2026 Cracked Concrete Walkways for $40 [Fast]](https://lawnmajesty.com/wp-content/uploads/2026/05/Repair-2026-Cracked-Concrete-Walkways-for-40-Fast.jpeg)