![Build a $400 2026 Outdoor Kitchen Island [Budget DIY]](https://lawnmajesty.com/wp-content/uploads/2026/05/Build-a-400-2026-Outdoor-Kitchen-Island-Budget-DIY.jpeg)
Build a $400 2026 Outdoor Kitchen Island [Budget DIY]
The Engineering Reality of a $400 DIY Outdoor Kitchen
I recently got called out to tear up a $30,000 patio that was sinking because the previous contractor decided that a 2 inch sand bed was sufficient for a 4 ton outdoor kitchen assembly. It was a disaster. The mortar joints had sheared, the gas lines were stressed to the point of leaking, and the entire structure was listing five degrees toward the house foundation. This is why I tell my crew that the pretty stones on top do not matter if the engineering below is flawed. If you want to build a functional 2026 outdoor kitchen island on a $400 budget, you have to stop thinking like a decorator and start thinking like a civil engineer. We are going to build this from the dirt up, ensuring that every dollar spent goes toward structural integrity and long term durability.
Engineering the $400 Outdoor Kitchen Base
Building a $400 outdoor kitchen island requires a compacted 4 inch modified gravel base topped with a reinforced CMU block frame to ensure structural stability and prevent frost heave. By focusing on 2A modified limestone and recycled granite remnants, you avoid the high costs of prefabricated kits while maintaining professional grade durability. The base is where most DIY projects fail. You cannot simply set heavy concrete blocks on top of turf grass. The organic matter in the grass will rot, the soil will compress unevenly, and your $400 investment will be a pile of rubble in two seasons. You must excavate down to the subgrade, removing all root systems and organic topsoil until you hit the harder mineral layer of the earth.
“A retaining wall doesn’t fail because of the stone; it fails because of the water trapped behind it.” – Hardscape Engineering Axiom
How much modified gravel do I need for a patio base?
For a standard 6 foot by 3 foot kitchen island, you need approximately 0.25 cubic yards of 2A modified gravel. This allows for a 4 inch compacted lift that provides the necessary drainage and load bearing capacity for the CMU blocks. Do not use play sand or rounded pea gravel. You need angular aggregates that lock together under pressure. When you use a manual tamper, it should literally bounce off the surface of the gravel once you reach maximum compaction. If the tamper sinks, you are not done. This mechanical interlocking of the stone is what creates the foundation for the entire kitchen.
Low-Cost Materials That Won’t Fail by 2027
To stay under a $400 budget, you must prioritize standard 8x8x16 CMU blocks for the internal structure and Type S mortar for its high compressive strength. Sourcing a granite remnant from a local countertop fabricator allows you to install a premium heat resistant cooking surface for less than 10 percent of the retail cost of a full slab. I see guys trying to build these things out of pressure treated 2x4s and plywood. In an outdoor environment, wood is a ticking time bomb. Even the best treated lumber will expand and contract at a different rate than the stone or stucco you put on top of it. This differential movement causes the finish to crack and peel. We use masonry because it is inert. It does not rot, it does not burn, and it matches the thermal expansion rates of your finish materials.
| Structure Frame | $250 (Metal Kit) | $110 (8x8x16 CMU Blocks) | 50+ Years |
| Countertop | $1,200 (New Slab) | $75 (Fabricator Remnant) | Lifetime |
| Exterior Finish | $400 (Stone Veneer) | $65 (Stucco Finish) | 15+ Years |
| Base Material | $80 (Bagged Gravel) | $45 (Bulk 2A Modified) | Infinite |
How deep should a concrete pad be for an outdoor kitchen?
If you choose to pour a solid concrete pad instead of using a gravel base, the slab must be at least 4 inches thick with 4000 PSI concrete reinforced with rebar or wire mesh. For a $400 budget, a gravel base with a thick mortar bed for the first course of block is often more cost effective and provides better drainage. If you are in a heavy freeze thaw climate, like Pennsylvania or Ohio, the gravel base is actually superior because it allows for slight movement without cracking the entire structure. The goal is to manage the hydrostatic pressure in the soil. When water freezes, it expands by nine percent. That force will snap a thin concrete slab like a dry cracker. A properly drained gravel base mitigates this risk entirely.
The Ground-Up Build Process
Step one is the layout. Use a string line and a 3-4-5 triangle to ensure your island is perfectly square. Even a 1/2 inch deviance at the base will look like a 2 inch mistake once the countertop is set. Once the area is excavated and the gravel is compacted, you set your first course of CMU. This is the most critical part of the build. Use a level on every single block. The first course must be perfect. If it is not level, every subsequent course will lean, and your kitchen will look like it was built by a drunk amateur. Butter the joints with Type S mortar, keeping the thickness to a consistent 3/8 of an inch. As you stack, check for plumb. A slight lean in the wall will create massive stress points once you drop a 200 pound granite remnant on top.
- Locate all underground utilities by calling 811 before you dig a single inch.
- Excavate the footprint to a depth of 6 inches to accommodate the gravel and first block.
- Compact the subgrade soil using a heavy manual or plate tamper.
- Install 4 inches of 2A modified gravel in 2 inch lifts, compacting each layer.
- Lay the first course of CMU blocks on a 1 inch mortar bed for final leveling.
- Install cement board or stucco mesh to the exterior of the blocks before finishing.
“The stability of any masonry structure is directly proportional to the density of its foundation material.” – Agronomy and Soils Manual Section 4
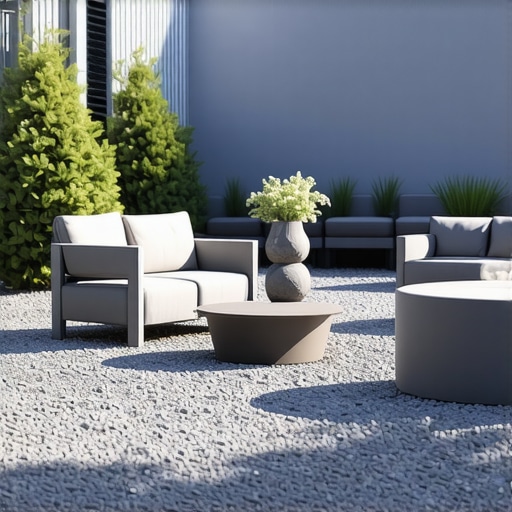
The transition from the kitchen island to your lawn is where the horticulture comes in. The heat radiating from a masonry island can desiccate the root zones of nearby turf grass. If you have Kentucky Bluegrass or Tall Fescue within 12 inches of the island, you need to increase your irrigation frequency in that specific zone. The stone acts as a thermal mass, holding heat long after the sun goes down, which can raise the soil temperature to 90 degrees or higher. This heat stress leads to localized dry spots and fungal issues. I recommend a 12 inch decorative gravel border between the kitchen and the grass. This acts as a heat buffer and prevents your string trimmer from damaging the stucco finish of your island.
The Informational Gain: Why Most DIY Islands Fail
The internet tells you to use construction adhesive to hold your blocks together. Do not do this. While adhesives have their place, they do not provide the structural leveling capabilities of mortar. More importantly, adhesives can fail under the intense heat of a charcoal grill or a pizza oven. Mortar is a mineral product that thrives in heat. Furthermore, you must consider the pH of the runoff. Mortar and concrete are highly alkaline. During the first few rains, the runoff from your new island can spike the soil pH to 8.0 or higher. If you have acid loving plants like Azaleas or Blueberries nearby, this will turn their leaves yellow through iron chlorosis. Always neutralize the area with a bit of elemental sulfur or ensure the drainage moves away from sensitive plant beds.