![Fix Sinking Garden Steps with Poly-Sand [2026 DIY]](https://lawnmajesty.com/wp-content/uploads/2026/06/Fix-Sinking-Garden-Steps-with-Poly-Sand-2026-DIY.jpeg)
Fix Sinking Garden Steps with Poly-Sand [2026 DIY]
The Anatomy of a Failed Garden Step
To fix sinking garden steps, you must excavate the failed base, install 6 inches of compacted 2A modified gravel, and reset the masonry units before sealing joints with high-performance polymeric sand. This process addresses hydrostatic pressure and prevents future subgrade settlement or lateral movement in the masonry. Don’t just pour more sand in the cracks. It won’t work.
I recently got called out to tear up a $30,000 patio and a set of natural stone steps that were sinking because the previous contractor thought he could get away with using stone dust as a structural base. Stone dust holds water like a sponge. When that water freezes, it expands by 9 percent. That expansion pushed those $400 limestone treads out of alignment until they were a trip hazard that could break a hip. I spent three days excavating what was basically expensive mud. If you don’t fix the soil grading and the base first, every plant or stone you put in the ground is just expensive compost. Physics doesn’t lie. If the base moves, the steps move.
“A retaining wall doesn’t fail because of the stone; it fails because of the water trapped behind it.” – Hardscape Engineering Axiom
The Science of Soil Compaction and Base Materials
The primary reason garden steps sink is poor Proctor density in the subgrade. Most DIYers and low-bid contractors dig a shallow trench, throw in some sand, and call it a day. In the world of real hardscaping, we use 2A modified gravel. This is a specific mix of crushed limestone ranging from 3/4-inch down to fine dust. The variety of sizes is critical because the smaller particles fill the voids between the larger stones. When you hit this with a 3,000-lb plate compactor, it locks together into a semi-impermeable crust that can support thousands of pounds of pressure. If you’re using clean stone, you’re building on marbles. It will move. Use 2A modified. No excuses.
How much modified gravel do I need for a patio base?
To calculate your gravel needs, multiply the square footage by the depth in feet (0.5 feet for a 6-inch base) and divide by 27 to get cubic yards. Always add a 20 percent buffer for compaction loss, as the material will shrink in volume as the air pockets are removed. For a standard set of three garden steps, you are usually looking at 1 to 1.5 tons of aggregate. Don’t skimp on the depth. If you live in a climate with heavy freeze-thaw cycles, you might need to go 8 or 10 inches deep to get below the frost line’s impact on the topsoil.
| Material | Compaction Rating | Drainage Capability | Best Use |
|---|---|---|---|
| 2A Modified Gravel | 98% | Moderate | Structural Base |
| Stone Dust | 90% | Poor | Leveling Only |
| #57 Clean Stone | 85% | Excellent | Drainage/Backfill |
| Polymeric Sand | N/A | High (Stabilized) | Joint Locking |
The Role of Polymeric Sand in 2026 Hardscaping
Modern polymeric sand is a marvel of material science, but it’s often used incorrectly. This isn’t just sand. It is a blend of graded silica and polymeric binders (usually a mix of organic and synthetic polymers) that activate when exposed to water. Once cured, it forms a flexible yet firm joint that prevents weed growth and ant hills while allowing for micro-movements caused by thermal expansion. However, if the joint is too shallow or the sand is too old, the bond fails. You need at least 1 inch of depth for the sand to achieve structural integrity. Anything less and it will simply flake out like dried oatmeal. Buy the high-performance stuff. The cheap bags at the big-box stores have low polymer content and will wash away in the first heavy rain.
How long does polymeric sand take to cure?
Typically, polymeric sand requires 24 to 48 hours of dry weather to achieve a full chemical set. High humidity or premature rainfall can cause the polymers to emulsify and wash onto the face of your stone, creating a permanent, ugly white haze known as poly-haze. Always check the 48-hour forecast before opening a bag. If rain is coming, wait. Patience is cheaper than acid-washing a haze off your pavers. Once it’s set, it’s rock hard. Until then, it’s vulnerable.
“Proper compaction of the aggregate base is the single most critical factor in the longevity of any segmental pavement system.” – ICPI Tech Spec No. 2
Step-by-Step Remediation: The Professional Way
- Excavate and Grade: Dig out the steps and go 6 inches deeper than the bottom tread. Slope the subgrade 1/4 inch per foot away from any structures.
- Filter Fabric: Lay down a non-woven geotextile. This prevents the gravel from migrating into the soil over time.
- Base Layers: Add 2A modified gravel in 2-inch lifts. Compact each lift until the plate compactor literally bounces off the surface.
- Set the Units: Place your steps or pavers. Use a dead blow hammer to set them. Use a 4-foot level. Precision matters here.
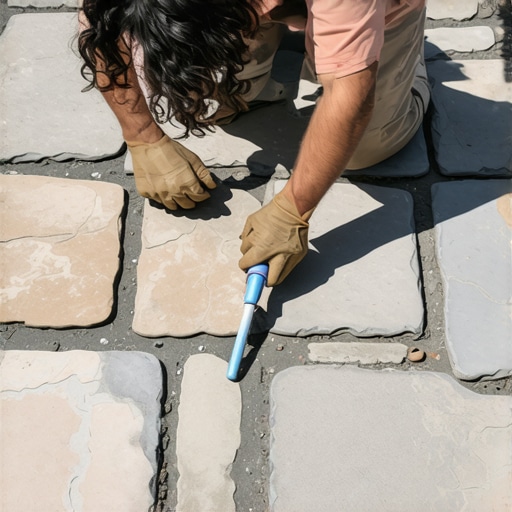
- Jointing: Sweep the polymeric sand into the joints. Use a vibratory plate or tap the stones to shake the sand down to the bottom. Refill.
- Cleaning: Use a leaf blower to remove EVERY speck of dust from the surface. If you don’t, that dust will turn into permanent spots.
- Hydration: Mist the joints lightly. Do not flood them. You want to activate the polymer, not wash it out.
Maintaining the Structural Integrity
Maintenance is where most homeowners fail. Even with poly-sand, you need to keep organic debris off the joints. Leaves that rot on top of the sand create acidic tannins that can break down the polymer chains. Also, stop using high-pressure power washers directly on the joints. You’ll blast the sand right out. Use a garden hose and a soft brush. If you see a crack, patch it immediately. Water is the enemy. Once it gets under the stone, the clock starts ticking on your next failure. Keep it sealed. Keep it dry.
![Repair 2026 Cracked Concrete Walkways for $40 [Fast]](https://lawnmajesty.com/wp-content/uploads/2026/05/Repair-2026-Cracked-Concrete-Walkways-for-40-Fast.jpeg)