
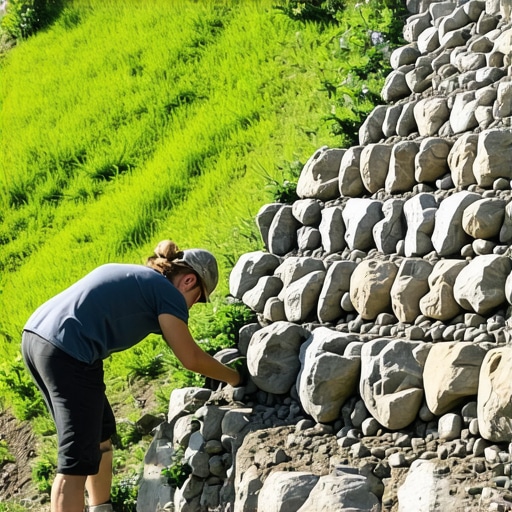
How to Build a Natural Stone Retaining Wall on a Slope
Why Gravity Always Wins Without Proper Engineering
Building a natural stone retaining wall on a slope requires a mastery of hydrostatic pressure, soil shear strength, and structural batter to ensure long-term stability. Most DIY failures occur because homeowners treat stone like furniture rather than a functional retaining system that must manage thousands of pounds of lateral earth pressure. I recently got called out to tear up a $30,000 patio that was sinking because the previous contractor ignored the hydrostatic pressure building up behind a dry-stack wall. The wall had bowed six inches toward the pool because they used ‘dirt’ as backfill instead of clean angular stone. It was a complete structural autopsy that could have been avoided with a 6-inch compacted gravel base and proper geotextile separation. Don’t be that guy. This guide breaks down the physics of holding back a hill using raw stone and grit.
The Critical Physics of Site Assessment and Slope Hydrology
To successfully build a natural stone retaining wall on a slope, you must first calculate the angle of repose and the surcharge load acting upon the retained soil. This assessment determines the necessary wall thickness and the depth of the structural footer required to prevent toe failure or global sliding. Most slopes sit at a natural angle. When you cut into that slope, you create a failure plane. You aren’t just stacking rocks; you are replacing a missing piece of the earth’s crust. I look at the soil type immediately. Heavy clay holds water like a sponge, increasing weight exponentially. Sandy loam drains better but lacks the cohesive strength of clay. You need to know which one you’re fighting before you move a single shovel of dirt.
“A retaining wall doesn’t fail because of the stone; it fails because of the water trapped behind it.” – Hardscape Engineering Axiom
How much modified gravel do I need for a wall base?
For a standard wall, you need a 6-inch deep base of 2B modified stone or CR6, extending 6 inches in front of and behind the wall’s width. To calculate the volume, multiply the trench length by the total width and depth in feet, then divide by 27 to get cubic yards. Always add 10 percent for mechanical compaction loss.
Excavation and the Foundation Trench
The foundation trench for a natural stone wall must be excavated below the frost line or at least 12 inches deep to provide a non-frost-susceptible base. A compacted subgrade is the only thing standing between your wall and a catastrophic settlement crack during the first freeze-thaw cycle. I see guys digging shallow trenches and throwing stone on top of grass. It will fail. Period. You need to strip all organic matter. Use a plate compactor on the native soil until it rings. If the soil is mushy, you keep digging. I use a laser level to ensure the trench follows the contour of the slope while maintaining a perfectly level bottom. We are talking about 98 percent standard proctor density. That is the industry standard for a reason. If the dirt is loose, the wall is a ticking time bomb.
| Stone Type | Max Height (Unreinforced) | Required Base Depth | Backfill Requirement |
|---|---|---|---|
| Fieldstone | 3 Feet | 6 Inches | Clean 3/4″ Stone |
| Flagstone (Stacked) | 2 Feet | 4 Inches | Clean 3/4″ Stone |
| Large Boulders | 5 Feet+ | 12 Inches | Structural Fill |
| Ledgerock | 4 Feet | 8 Inches | Clean 3/4″ Stone |
Managing Hydrostatic Pressure and Drainage Systems
Effective retaining wall drainage utilizes non-woven geotextile fabric, a 4-inch perforated drain pipe, and a drainage chimney of 12 inches of clean angular stone to eliminate hydrostatic pressure. Without a clear path of least resistance for water, your wall will eventually heave or collapse under the immense weight of saturated soil. Water is the enemy. It is heavier than you think. A cubic foot of saturated soil can weigh 120 pounds. Multiply that by the height of your wall and you see the problem. I always wrap my drainage stone in a geotextile envelope. This prevents fines (tiny dirt particles) from clogging the gaps between the stones. If the gaps clog, the water stops moving. If the water stops moving, the wall starts moving.
“Water-saturated backfill can double the lateral pressure on a retaining structure, leading to premature structural displacement.” – USDA Soil Mechanics Manual
Do I need a permit for a 3-foot retaining wall?
In most jurisdictions, retaining walls under 4 feet do not require a building permit or engineered drawings, but local zoning codes and HOA regulations may vary. Always check with your local building department regarding setback requirements and utility easements before beginning excavation.
The Art of the Batter: Stacking for Structural Integrity
Proper wall batter involves leaning the wall back toward the slope at a rate of 1 inch for every 1 foot of height to ensure the center of gravity remains over the footing. This inward slope uses gravity to pull the stone into the hill rather than allowing it to tip forward under lateral earth pressure. When I’m training a new crew, I tell them to think of the wall as a person leaning into a heavy wind. If you stand straight up, you’re going over. I use a custom batter jig or a spirit level with a shim to keep the angle consistent. Every stone must have three points of contact with the stones below it. No wobbles. If a stone rocks, it’s a pivot point for a future failure. Use shims (small flat rocks) only on the back side of the wall, never the front. You want the weight to drive the stones together, not apart.
- Excavate the trench 18-24 inches wide.
- Install 4-ounce non-woven geotextile fabric against the soil face.
- Compact 6 inches of 2B modified stone in 2-inch lifts.
- Lay the largest ‘base’ stones first, burying them 50 percent.
- Install the 4-inch perforated pipe with a daylight exit.
- Backfill with clean stone as you climb, layer by layer.
- Cap the wall with heavy, flat stones to prevent water infiltration.
Backfilling and Finishing for the Long Haul
The final stage of landscaping a slope involves mechanical compaction of backfill in 4-inch lifts to prevent future settling and ensures the surface drainage is directed away from the wall face. Never use topsoil for backfill; its organic content decomposes and creates voids. I use a hand tamper or a jumping jack for every layer. You should see the stone lock together. The last 6 inches of the wall should be capped with a low-permeability soil like clay or a heavy mulch layer to keep surface water from dumping directly into your drainage chimney. This forces the water to run over the top of the wall or into a swale. Maintenance is simple: check the weep holes or the drainage outlet after every major storm. If water is coming out, the system is working. If the outlet is dry but the wall is wet, you have a clog. Fix it immediately. It’s cheaper to clean a pipe than to rebuild a wall.


![Fix Standing Water: Why Your Yard Needs a Swale [DIY]](https://lawnmajesty.com/wp-content/uploads/2026/06/Fix-Standing-Water-Why-Your-Yard-Needs-a-Swale-DIY.jpeg)
![Stop Hillside Soil Washout for $200 [2026 DIY Fix]](https://lawnmajesty.com/wp-content/uploads/2026/05/Stop-Hillside-Soil-Washout-for-200-2026-DIY-Fix.jpeg)