3 Budget 2026 Ways to Hide Ugly Foundation Walls
Exposed concrete foundations are the scar tissue of residential construction. While these gray monoliths provide the structural integrity required to keep your home from sinking into the subgrade, they are aesthetically sterile and biologically cold. Most homeowners ignore them until the visual weight of the concrete drags down their property value, or worse, until they realize that improper foundation management is leading to moisture intrusion. Hiding these walls isn’t just about cosmetics; it is about managing the transition between your home’s envelope and the living soil of your landscape.
The Hardscape Autopsy: Why Foundation Cover-Ups Often Fail
I recently got called out to tear up a $30,000 patio that was sinking because the previous contractor tried to hide a foundation line by piling uncompacted fill dirt directly against the concrete without a moisture barrier. They ignored the hydrostatic pressure and the capillary action of the soil. By the time I arrived, the homeowner had three inches of standing water in their basement and a patio that looked like a topographical map of the Andes. We had to excavate 48 inches down, install a proper French drain, and seal the foundation with a rubberized membrane before we could even think about the finish. This is the reality of the dirt: if you don’t respect the engineering of the foundation, any aesthetic fix you apply is just a temporary mask for a structural disaster. You have to understand that concrete is porous. It breathes, it wicks water, and it expands. If you trap moisture against it with the wrong materials, you are inviting rot, mold, and structural failure into the very bones of your house.
How can I hide my foundation on a budget without damaging the concrete?
To hide a foundation on a budget, use engineered trellising systems, breathable stone veneers, or strategic soil berming. These methods provide high visual impact while ensuring proper drainage, airflow, and structural protection, preventing common issues like moisture trapping, efflorescence, or foundation wicking that lead to long-term damage.
| Method | Estimated Cost (per sq ft) | Required Maintenance | Average Lifespan |
|---|---|---|---|
| Trellis & Woody Climbers | $4.00 – $9.00 | Pruning (Bi-annual) | 15+ Years |
| Cementitious Parging | $6.00 – $12.00 | Sealing (Every 5 years) | 10-15 Years |
| Strategic Grading/Berming | $8.00 – $15.00 | Mulching (Annual) | Permanent |
1. The Engineered Trellis: Vertical Horticultural Shielding
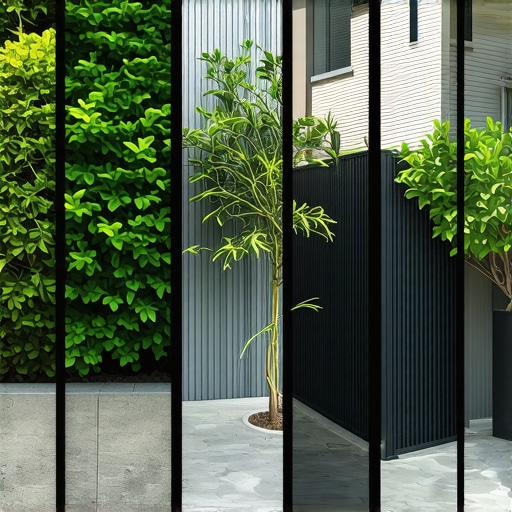
Using a trellis is the most cost-effective way to break up the monotonous gray of a foundation, but you cannot simply lean a piece of wood against the house. You need an offset. We use 14-gauge stainless steel cable systems or heavy-duty cedar lattices mounted at least 4 to 6 inches away from the concrete. This gap is critical. It allows for airflow, preventing the growth of mold and mildew on the foundation wall. When selecting plants, avoid invasive species like English Ivy (Hedera helix) or Trumpet Vine (Campsis radicans). These plants use adventitious roots or suckers that can penetrate hairline cracks in your foundation and expand them over time. Instead, opt for twining climbers like Clematis or Lonicera (Honeysuckle). These plants require the physical structure of the trellis to climb and do not exert mechanical pressure on the concrete. From a horticultural perspective, ensure your planting hole is twice the width of the root ball and that the soil pH is tested. Concrete often leaches lime into the surrounding soil, spiking the pH and potentially killing acid-loving plants. Use an elemental sulfur amendment if your pH exceeds 7.5.
“A retaining wall doesn’t fail because of the stone; it fails because of the water trapped behind it.” – Hardscape Engineering Axiom
2. Faux-Stone Parging and Breathable Veneers
If you want the look of stone without the $40-per-square-foot price tag of full-bed masonry, parging with a stone-textured finish is your best bet for 2026. This isn’t your grandfather’s smooth stucco. Modern parging involves a scratch coat of Type N mortar, which has a lower compressive strength but higher flexibility than Type S. This flexibility is vital because foundations move. A rigid coat will crack. After the scratch coat, we apply a finish layer and use a stamping tool or a hand-carved technique to mimic the appearance of fieldstone or slate. This creates a thermal break and a moisture-resistant barrier that still allows the concrete to ‘breathe.’ You must ensure the parging stops at least 2 inches above the final grade to prevent ‘wicking’ where water travels up the mortar. If you are in a freeze-thaw climate, use a polymer-modified mortar to increase the bond strength and prevent spalling during the winter months. Do not use cheap big-box store premixed bags; they often lack the necessary fiber reinforcement to prevent hairline fractures.
How much modified gravel do I need for a patio base?
For a standard foundation-adjacent patio or walkway used to hide the wall base, you need a minimum of 4 to 6 inches of compacted 2A modified gravel. Calculate the volume by multiplying the square footage by the depth in feet, then divide by 27 to get the total cubic yardage required for stability.
3. Strategic Berming and Hydro-Logic Grading
Berming involves creating a raised mound of soil to physically obscure the lower 12 to 24 inches of the foundation. However, you cannot just shovel dirt against the house. This is where most DIYers fail and end up with a rotten sill plate. You must first install a 60-mil HDPE (High-Density Polyethylene) vertical moisture barrier against the foundation. This barrier acts as a root shield and a water block. The berm itself should be constructed with a ‘heavy’ soil core (higher clay content) and topped with 4 inches of shredded hardwood mulch. The grade must slope away from the house at a minimum rate of 1 inch of fall for every 4 feet of run. This ensures that the water is directed into the lawn and not into your crawlspace. I prefer using ‘step-down’ berming where we integrate small, 6-inch dry-stack stone walls. This adds texture and hides the foundation while creating pockets for perennials like Nepeta (Catmint) or Echinacea (Coneflower). Remember: keep the mulch at least 6 inches below the top of the concrete to prevent termite bridges.
“Soil compaction is the foundation of every successful landscape; without 95% Proctor density, your hardscape is just a slow-motion landslide.” – Agronomy Field Manual 4.2
How do I stop water from pooling near my foundation?
Stopping water pooling requires a positive grade of at least 2% away from the foundation and the installation of a catch basin or French drain. Ensure all downspouts are piped at least 10 feet away from the structure to prevent soil saturation and hydrostatic pressure buildup.
The Master Landscaper’s Foundation Checklist
- Test soil pH at the foundation line to check for lime leaching.
- Ensure all vegetation is at least 12 inches away from the wall to allow airflow.
- Install a vertical moisture barrier if you are raising the soil grade.
- Check that the weep holes in brick siding are not covered by mulch or soil.
- Use stainless steel hardware for any trellis mounting to prevent rust staining.
- Verify that the foundation coating is intact before applying any veneers.
Landscape design is a game of inches and engineering. If you treat your foundation like a canvas and respect the physics of water and soil, you can turn a structural necessity into a design asset. Don’t skip the prep work. The soil never lies, and a poorly executed fix will reveal itself during the first heavy rain of the season. Maintain your grade, choose the right plant species, and always leave a gap for the house to breathe. That is the difference between a hack job and a professional install.
![Building a Hidden Trash Can Screen [DIY 2026]](https://lawnmajesty.com/wp-content/uploads/2026/09/Building-a-Hidden-Trash-Can-Screen-DIY-2026.jpeg)

![Best 2026 Groundcover for Steep Slopes [No-Mow]](https://lawnmajesty.com/wp-content/uploads/2026/07/Best-2026-Groundcover-for-Steep-Slopes-No-Mow.jpeg)