
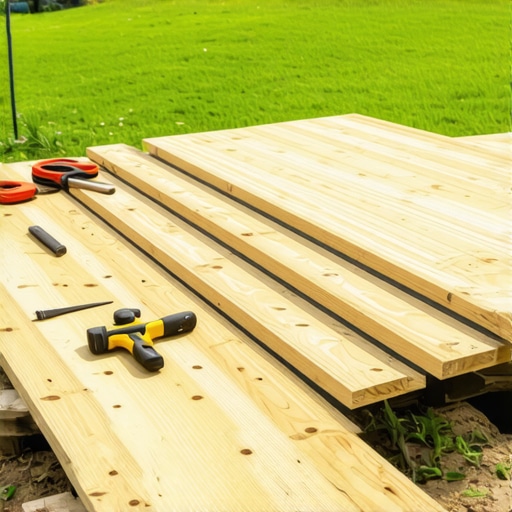
How to Build a Floating Deck in One Weekend for Under $500
The Hardscape Autopsy: Why Most Weekend Decks Fail
Building a floating deck is a masterclass in managing hydrostatic pressure and soil mechanics. Most DIYers think they can throw some wood on the ground and call it a day. I recently got called out to tear up a $30,000 patio and an adjacent ‘weekend deck’ that were sinking because the previous contractor failed to account for the capillary action of the soil. The wood was sitting directly on wet clay, acting as a wick that pulled moisture into the core of the joists. Within three years, the entire structure was a biohazard of fungal decay and structural instability. If you do not fix the soil grading and drainage first, every dollar you spend on lumber is just expensive compost. A floating deck must be an island, disconnected from the house and supported by a system that allows for seasonal frost heave and airflow.
“A retaining wall doesn’t fail because of the stone; it fails because of the water trapped behind it. The same logic applies to any ground-level timber structure: moisture management is the only metric of success.” – Hardscape Engineering Axiom
The Physics of the Ground-Level Foundation
A floating deck is a free-standing structure that rests on deck blocks or piers without being anchored into the frost line or the home’s ledger. To stay under a $500 budget, you must prioritize structural integrity over aesthetics. This starts with the subgrade. You are looking for a compacted gravel base that prevents the deck blocks from sinking into the loam or clay. You must excavate at least 4 inches of topsoil, replace it with grade 2A modified stone, and compact it until the vibratory plate tamper bounces off the surface. This creates a non-frost-susceptible base that protects your framing from the literal tons of pressure exerted by freezing groundwater.
How much modified gravel do I need for a patio base?
To calculate the modified gravel needed for a 10×10 floating deck, you multiply the square footage by the depth (0.33 feet for 4 inches), resulting in roughly 1.25 cubic yards. Using crushed limestone or recycled concrete ensures maximum particle interlock and superior load-bearing capacity for the deck blocks.
| Material Component | Specification | Estimated Cost |
|---|---|---|
| Pressure Treated 2×6 Joists | UC4A Ground Contact Rated | $180 |
| Deck Blocks | 4,000 PSI Pre-cast Concrete | $60 |
| Modified Gravel Base | 2A Crushed Stone (1.5 tons) | $75 |
| Common Decking Board | Standard 5/4-in x 6-in x 10-ft | $140 |
| Corrosion Resistant Fasteners | 3-in Hot-Dipped Galvanized | $40 |
The Chemistry of Wood Selection: UC4A vs UC3B
Do not buy the cheapest wood at the big-box store. You must look at the end tags. For a floating deck, everything must be UC4A rated (Ground Contact). Most ‘decking’ is rated UC3B, which is only for above-ground use. If UC3B wood touches the soil or is trapped in a high-moisture environment with limited airflow, the fungal hyphae will colonize the cellulose and lignin within 24 months. The chemicals used in modern pressure-treated lumber, typically Micronized Copper Azole (MCA), are designed to inhibit this biological breakdown, but they only work if the concentration levels are high enough for ground immersion. Copper-based preservatives are highly corrosive to standard steel, so you must use hot-dipped galvanized or 304-grade stainless steel fasteners. Anything else will dissolve in the wood like a sugar cube in hot coffee.
How do I prevent wood rot in a ground-level deck?
Preventing wood rot requires maintaining a ventilation gap of at least 2 inches between the joists and the gravel bed. Use joist tape (a butyl-based membrane) over the top of the framing to prevent water from sitting in the screw holes, which is the primary site for internal wood decay.
“Wood decay is a biological process requiring oxygen, favorable temperatures, and moisture content above 20 percent. Eliminating any one of these factors, specifically moisture through proper drainage, halts the decay cycle.” – Forest Products Laboratory Research Manual
Step-by-Step Installation Protocol
The installation is an exercise in precision leveling. First, clear the vegetation. If you leave grass under the deck, it will rot and release methane and excessive moisture, creating a micro-climate that kills your boards. Lay down a heavy-duty landscape fabric (non-woven geotextile) to prevent silt migration into your gravel base. Then, follow this checklist:
- Excavate: Remove 4 to 6 inches of organic material to reach undisturbed subsoil.
- Base Layer: Spread 3 inches of crushed stone and use a hand tamper for compaction.
- Block Placement: Set deck blocks at 4-foot intervals. Use a laser level or transit to ensure all blocks are on the same horizontal plane.
- Framing: Install your outer rim joist first. Square it using the 3-4-5 triangle method.
- Joist Spacing: Space inner joists at 16 inches on-center. If using composite decking later, reduce this to 12 inches to prevent sagging.
- Fastening: Drive two fasteners through the rim joist into every stringer. Don’t over-sink the heads.
- Decking: Leave a 1/8-inch expansion gap between boards to allow for thermal expansion and water shedding.
The Long-Term Maintenance Schedule
A floating deck is a living system. Because it is close to the ground, it will experience higher humidity levels than an elevated deck. Every spring, you must inspect the ventilation ports around the perimeter. If mulch or leaves have built up against the rim joist, clear them out immediately. Airflow is your only defense against surface mold. Once a year, check the levelness. If the ground has shifted, you can use a car jack to lift the frame and shim the deck blocks with composite shingle scraps or pressure-treated plywood. It will move. It is floating. That is the point. Don’t fight the earth; work with it. Avoid film-forming stains that peel. Use a penetrating oil-based sealer that allows the wood to breathe while repelling liquid water.
Will a floating deck attract termites?
Termites are attracted to cellulose in contact with moist soil. By using UC4A ground-contact lumber and maintaining a gravel barrier between the wood and the dirt, you create a hostile environment for subterranean termites. However, keeping the area clear of organic debris is essential for long-term prevention.
The Final Word on Engineering Integrity
The $500 budget is achievable, but it leaves no room for re-work. You must get the base compaction right the first time. If the tamper doesn’t feel like it’s hitting concrete, keep tamping. The structural load of the deck must be distributed evenly across the bearing surface of the concrete blocks to prevent point-load failure. This isn’t just a weekend project; it is an infrastructure installation in your backyard. Treat it with the same respect you would a foundation wall. Avoid the temptation to skip the geotextile fabric. Avoid the temptation to use untreated wood. Your future self, and your wallet, will thank you when the deck is still level and rot-free a decade from now.

![Build a $250 2026 Brick Fire Pit [Weekend DIY]](https://lawnmajesty.com/wp-content/uploads/2026/07/Build-a-250-2026-Brick-Fire-Pit-Weekend-DIY.jpeg)