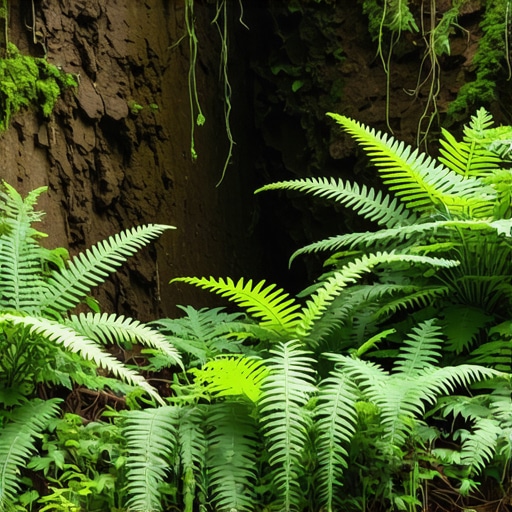
Converting a Muddy Corner into a Fern Glen
The Hard Reality of Saturated Soil Hydraulics
I always drill into my new crew members: if you don’t fix the soil grading first, every plant you put in the ground is just expensive compost. You cannot simply drop a fern into a puddle and expect it to survive. A muddy corner is a symptom of a failure in surface drainage and subsurface compaction. To convert this into a Fern Glen, you must first address the hydrostatic pressure and soil aeration issues that turn backyards into swamps. It is about engineering, not just aesthetics.
“A retaining wall doesn’t fail because of the stone; it fails because of the water trapped behind it.” – Hardscape Engineering Axiom
The Physics of Mud: Why Your Corner Stays Wet
Muddy corners occur when soil infiltration rates are lower than precipitation rates, often caused by heavy clay particles or high water tables. Remediating this requires topographical grading to ensure a 2% minimum slope away from structures, combined with soil amendments that break up anaerobic layers for better gas exchange. You must find the outlet. If the water has nowhere to go, it stays.
How do I stop my backyard corner from being muddy?
Fixing a muddy corner requires a three-step approach: identifying the water source (downspouts or runoff), installing subsurface drainage like a French drain or dry creek bed, and amending the soil with expanded shale or coarse organic matter to increase porosity. Never add sand to clay. It creates a substance similar to concrete. Use 4-inch perforated HDPE pipe for drainage.
Drainage Infrastructure: Moving Water with Precision
Moving water requires an understanding of gravitational flow and hydraulic head, where perforated pipes and aggregate envelopes facilitate the removal of excess moisture from the root zone. A French drain is often the best solution for a fern glen because it allows for subsurface water movement without disrupting the landscape design. We use No. 57 washed stone. It provides the necessary void space for water to travel.
| Material Type | Function | Benefit |
|---|---|---|
| No. 57 Stone | Drainage Aggregate | 95% Void Space for water flow |
| Non-Woven Geotextile | Separation Layer | Prevents soil fines from clogging pipe |
| Perforated HDPE Pipe | Conveyance | Moves water to a legal discharge point |
| Expanded Shale | Soil Amendment | Provides permanent aeration in clay |
Soil Chemistry in Saturated Zones: The pH and Nitrogen Factor
Waterlogged soils lead to denitrification and the buildup of toxic sulfides, which effectively suffocate plant root systems by denying them oxygen. To prepare for a Fern Glen, you must balance the pH levels (typically aiming for 5.5 to 6.5 for most species) and ensure the cation exchange capacity (CEC) is high enough to support nutrient uptake. High water levels often leach nitrogen. You need to replenish it slowly. We use leaf mold for this. It mimics the forest floor.
“Proper drainage is the foundation of all sustainable landscape architecture; without it, soil biology reverts to an anaerobic state that is hostile to most ornamental species.” – Penn State Agricultural Extension
The Fern Selection Matrix: Choosing Hydric Species
Selecting the right fern species depends on the hydrology of the site, as some varieties like Matteuccia struthiopteris (Ostrich Fern) thrive in wet feet, while others require damp but well-drained conditions. You must map the sun exposure and moisture gradients of your corner before purchasing nursery stock. Don’t buy from big-box stores. Their plants are often root-bound and stressed. Look for rhizome health.
- Ostrich Fern: Best for deep shade and heavy moisture. Spreads via rhizomes.
- Cinnamon Fern: Handles acidic soils and very wet conditions. Distinctive fertile fronds.
- Japanese Painted Fern: Provides color contrast. Needs better drainage than others.
- Autumn Fern: Semi-evergreen. Good for the drier edges of the glen.
The Ground-Up Build: Step-by-Step Installation
The installation of a Fern Glen begins with site excavation to a depth of at least 12 inches, followed by the placement of drainage infrastructure and the backfilling of a custom soil mix. You are creating a micro-environment. The soil should be 50% native soil, 25% compost, and 25% aeration components like perlite or shale. Tamping must be precise. Don’t over-compact. The soil should feel like a firm sponge.
Which ferns grow best in standing water?
Few ferns survive in permanent standing water, but the Royal Fern (Osmunda regalis) and Sensitive Fern (Onoclea sensibilis) are the most flood-tolerant options available for landscape use. These species have adapted to low-oxygen environments. They will rot if the water is stagnant. Flow is key. Even slow flow prevents root rot.
Arboriculture Standards: The Root Flare Rule
When planting woody ornamentals or larger ferns in your garden design, you must never bury the root flare, as this leads to stem girdling roots and eventual pathogen entry. Most DIYers plant too deep. It is a death sentence. The transition zone between the roots and the stem must be visible at the soil surface. This is non-negotiable. Mulch should be kept 3 inches away from the base. No mulch volcanoes here. They kill trees. They kill ferns.
The Long-Term Maintenance Cycle
Maintaining a Fern Glen requires consistent moisture monitoring, especially during the establishment phase in the first 12 to 18 months. You must check the soil moisture at a depth of 4 inches using a tensiometer or a simple finger test. If it is dry, water deeply. Frequent, shallow watering is a mistake. It keeps roots near the surface. You want them deep. In the fall, leave the fronds. They provide a natural mulch and winter protection for the crown.