The Best Way to Edge Your Garden Beds for a Professional Look
The Fundamental Principles of Effective Landscape Edging
The best way to edge garden beds for a professional look involves creating a clean vertical separation between turfgrass and mulch using either a Victorian trench or high-grade steel edging. This physical barrier must reach a depth of four inches to effectively terminate grass rhizomes and prevent turf encroachment into your ornamental planting zones.
I always drill into my new crew members: if you don’t fix the soil grading first, every plant you put in the ground is just expensive compost. I have seen countless $50,000 installations fail because the contractor focused on the color of the flowers instead of the structural integrity of the bed edges. When you ignore the mechanical reality of how roots travel, you are just inviting a maintenance nightmare that will swallow your garden in two seasons. Edging is not a suggestion. It is a mandatory structural component of a managed biome. You are drawing a line in the dirt and telling the grass: stay on your side.
Why Most DIY Edging Fails Within One Year
Most homeowners head to the local big-box store and buy the cheapest rolls of thin green plastic. This is a mistake. Plastic has a high thermal expansion coefficient. It expands in the sun and contracts in the cold. Within one winter cycle, those cheap stakes will fail, and the plastic will heave out of the ground like a sea monster. It looks terrible. It interferes with mower blades. It serves no biological purpose because it is usually only an inch or two deep. To stop Poa pratensis (Kentucky Bluegrass) or Stenotaphrum secundatum (St. Augustine), you need depth. Roots are opportunistic. If they find a gap, they will exploit it. You need a consistent, deep barrier that actually severs the root path. Cheap materials cannot provide this.
“A proper landscape edge acts as a mechanical root barrier, preventing the lateral spread of rhizomatous grasses while facilitating better moisture retention within the mulched zone.” – Agricultural Extension Agronomy Manual
How deep should I dig a garden bed edge?
To achieve professional results, you must dig your edge to a depth of four to six inches to successfully block the root systems of common turfgrasses. This depth ensures that rhizomes and stolons cannot easily pass under the barrier, effectively reducing maintenance labor and maintaining the visual definition of your garden design.
The Physics of the Victorian Trench Edge
The Victorian trench, or the ‘spade edge,’ is the gold standard for high-end estates. It costs nothing in materials but requires a specific mechanical technique. You aren’t just digging a hole. You are creating a 90 degree vertical wall on the grass side and a 45 degree slope on the bed side. This creates a literal ‘no-mans land’ for roots. When grass roots hit that air pocket in the trench, they stop. It is called air pruning. It is biology working in your favor. This trench also serves as a collection point for excess water, preventing mulch from washing onto your lawn during heavy rain events. You must maintain this twice a year. Use a sharpened half-moon edger. Don’t use a rounded shovel. You need a flat blade to get that crisp, structural line. It should look like it was cut with a laser.
| Edging Material | Typical Depth | Expected Lifespan | Primary Failure Mode |
|---|---|---|---|
| Heavy-Gauge Steel | 4-6 inches | 25+ years | Oxidation (if non-galvanized) |
| Victorian Trench | 4-5 inches | 6 months | Erosion/Sedimentation |
| Natural Stone (Set in Concrete) | 8-10 inches | 50+ years | Hydrostatic pressure heaving |
| Polymer Plastic Rolls | 2-3 inches | 1-2 years | UV degradation/Frost heave |
Is plastic or metal edging better for flower beds?
For a permanent, professional installation, heavy-gauge steel edging is vastly superior to plastic because it resists UV degradation and maintains its structural rigidity against frost heaving. Steel provides a clean, slim profile that disappears into the landscape while providing a rigid mechanical barrier that plastic simply cannot match in high-traffic or freeze-thaw climates.
The Engineering of Hardscape Borders
If you want something more permanent than a trench, you move into the realm of hardscape edging. We are talking about 14-gauge steel or pavers set on a modified gravel base. If you are using pavers, do not just set them on the dirt. They will sink. They will tilt. They will look like a broken fence within months. You must excavate a trench, pack in three inches of 21A or 3/4-inch minus crushed stone, and compact it with a hand tamper until it is rock hard. Set your pavers on a thin bedding layer of sand or stone dust. This creates a ‘mow strip.’ You can run your mower’s wheel right over the stone. No string trimming required. That is how you design for efficiency. You spend more time on the install to spend less time on the maintenance.
“Successful hardscaping relies on the management of water; without a compacted aggregate base, even the heaviest stone will succumb to the forces of hydrostatic pressure and soil expansion.” – ICPI Hardscape Engineering Axiom
The Professional Tool Checklist
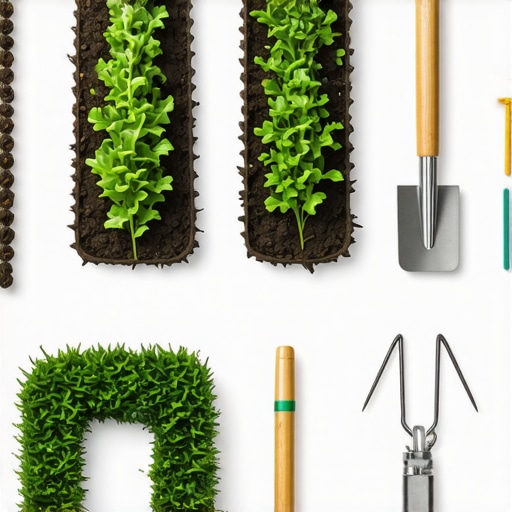
- Half-Moon Edger: For cutting the initial vertical sod line.
- Sharpened Flat-Head Spade: For removing the ‘wedge’ of soil in a trench edge.
- Line Level and Stakes: To ensure long, straight runs don’t look like a snake.
- Dead Blow Mallet: For driving steel edging without mushrooming the top rail.
- Angle Grinder: For custom-cutting steel or aluminum sections.
Step-by-Step: Cutting the Perfect Edge
First, lay out your line using a garden hose or a heavy rope. Avoid tight, jagged turns. Landscapes look better with sweeping, organic curves that follow the natural topography. Once your line is set, take your half-moon edger and cut vertically into the turf. Do not saw at it. Use your body weight. Step on the tool. Drive it five inches deep. Work your way down the entire line. Next, use your flat-head spade to cut a 45 degree angle from the bed side toward the bottom of your vertical cut. Remove the wedge of sod. This sod goes in the compost pile, not back in the bed. Finally, hand-tuck your mulch into the trench. The mulch should not be flush with the grass. It should be recessed. This creates the shadow line. The shadow line is what gives it that ‘professional’ look. It is high-contrast. It is clean. It is intentional.
Soil Mechanics and Moisture Control
We need to talk about soil pH and moisture. When you edge a bed, you are changing the micro-climate. A deep edge helps prevent the fertilizer you put on your lawn from leaching into your garden beds. Turfgrass is nitrogen-hungry. Most garden ornamentals, especially woody shrubs, don’t want that much nitrogen in the late summer. By creating a physical break, you are managing the chemistry of your soil. Furthermore, a proper edge prevents ‘mulch creep.’ Mulch is organic matter. As it breaks down, it becomes soil. If that mulch spills onto your grass, it creates a seedbed for weeds. You are literally planting weeds in your lawn. Keep the mulch in the bed. Keep the grass in the lawn. It sounds simple, but 90% of contractors get this wrong because they are in a hurry. Don’t be in a hurry. The dirt remembers.
Maintenance: The Seasonal Reset
An edge is not a ‘one and done’ project. It is a living boundary. In the spring, after the ground thaws, your edges will have softened. Some soil will have washed into the trench. This is when you do your ‘Heavy Reset.’ Re-cut the vertical line. Re-define the shadow. In the fall, check for ‘bridge’ roots. Some grasses, like Bermuda or Zoysia, are aggressive. They will try to leap over the edge. You need to be vigilant. If you see a runner, pull it immediately. A professional landscape is defined by its margins. If the margins are blurry, the whole design feels sloppy. Sharp edges make even a mediocre garden look like a botanical showpiece. It’s about discipline and the right tools for the job. Stop buying junk. Start digging deep.