How to Install a Simple Backyard Pond for Under $100
The Hard Reality of Low-Budget Water Features
I always drill into my new crew members: if you don’t fix the soil grading first, every plant you put in the ground is just expensive compost. The same logic applies to water features. Most homeowners think a pond is just a hole filled with water, but without understanding hydrostatic pressure and soil compaction, your $100 project will become a $1,000 drainage nightmare within one season. I have seen countless DIY ponds turn into stagnant mud pits because the builder ignored the site’s natural topography. Success in landscaping and hardscaping isn’t about how much money you throw at a project; it is about the physics of the install. If you want a pond for under a hundred bucks, you have to trade cash for sweat and precise engineering.
Planning Your Low-Cost Water Feature Layout
To install a simple backyard pond for under $100, you must prioritize site selection, excavation depth, and liner integrity to ensure the system manages stormwater runoff without collapsing. You need a location with less than a 2-percent grade to prevent sedimentation from burying your aquatic ecosystem during heavy rain. Don’t guess. Use a line level.
“A retaining wall doesn’t fail because of the stone; it fails because of the water trapped behind it.” – Hardscape Engineering Axiom
How deep should a backyard pond be for gold fish?
For a budget pond, aim for a minimum depth of 18 to 24 inches. This depth provides a thermal buffer against summer heat and prevents total freeze-over in winter. If you go shallower, the water temperature will fluctuate wildly, killing your beneficial bacteria and turning your garden design into an algae farm. Deep water is safer for fish from predators like herons. Dig a shelf at 6 inches deep for marginal plants. This provides structural stability to the pond walls. It prevents cave-ins.
The $100 Material Breakdown
You cannot buy a professional-grade 45-mil EPDM liner and a 2000 GPH pump for $100. To stay under budget, you must scavenge for hardscaping materials and use high-quality PVC or HDPE liners. The table below outlines how to allocate your lawn care and construction budget effectively.
| Material Item | Estimated Cost | Source Strategy |
|---|---|---|
| Pond Liner (7×10 ft) | $45.00 | Heavy-duty 20-mil PVC or factory seconds |
| Underlayment | $0.00 | Recycled old carpet or thick layers of newspaper |
| Perimeter Stone | $0.00 | Scavenged fieldstone or construction site leftovers |
| Submersible Pump | $35.00 | Small 200-300 GPH fountain pump |
| Aquatic Plants | $20.00 | Native species or divisions from neighbors |
| Total | $100.00 | Strict Budget Management |
Step-By-Step Excavation and Installation
Start by marking your perimeter with a garden hose. Excavate the center first. Work your way outward to create a mechanical bond between the soil and the liner. If your soil has high clay content, the walls will hold better, but you must still compact the base. Use a hand tamper. The dirt should feel like concrete before the liner touches it. Loose soil leads to settling. Settling leads to leaks.
[IMAGE_PLACEHOLDER]
What is the cheapest way to line a pond?
While EPDM rubber is the industry standard for landscaping professionals, the cheapest viable option is a 20-mil PVC liner or a reinforced polyethylene tarp. To prevent punctures, you must use underlayment. Do not skip this. Old carpet padding is the best budget-friendly defense against sharp rocks and roots. If you ignore the underlayment, the hydrostatic pressure of the water will push the liner against a pebble until it pierces. Then you have a hole. You can’t fix that easily. It will leak.
“Water chemistry in small volumes is volatile; the nitrogen cycle must be managed through mechanical filtration and plant uptake.” – Agronomy Extension Manual
Biological Balance and Maintenance
A $100 pond needs biological filtration more than an expensive one. Since you aren’t buying a $500 pressurized filter, you must use aquatic plants like Anacharis or Hornwort to consume excess nitrates. These are oxygenators. They keep the water clear. Without them, nutrient loading from lawn fertilizer runoff will cause an algae bloom. Avoid over-watering the surrounding turf grass, as this can wash NPK fertilizers into the pond. Maintain a pH level between 6.5 and 8.0 for a stable microbiome. Check it weekly. It takes five minutes.
The Importance of the Coping Stone
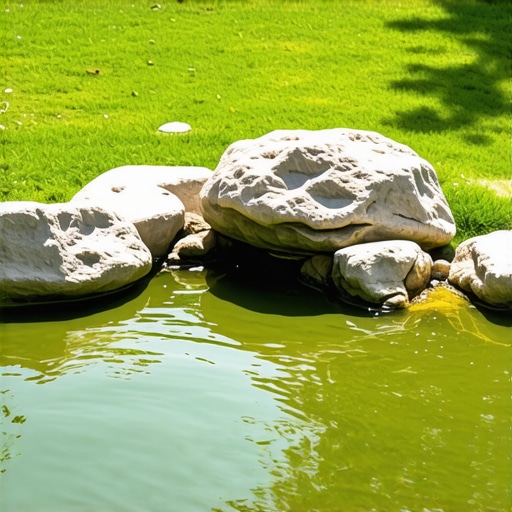
The coping stone is the ring of rock around the edge. It holds the liner in place. In hardscaping, we call this the anchor course. Use heavy, flat stones. They must overhang the water by at least two inches. This protects the liner from UV degradation. Sunlight kills plastic. Cover it up. Ensure the stones are set on a level plane. If one side is lower, water will spill out before the pond is full. This ruins the aesthetic and the soil moisture balance of your yard. Be precise. Use a level. Don’t be a hack. Check your work twice.