How to Build a Custom Stone Fire Pit for Under $200
The Hardscape Autopsy: Why Cheap Fire Pits Fail
Building a custom stone fire pit for under $200 is entirely possible if you stop paying for the marketing fluff of pre-packaged kits and start understanding the civil engineering of a small-scale heat-producing structure. I recently got called out to tear up a $30,000 patio that was sinking because the previous contractor failed to account for the thermal expansion of the fire pit at its center. The heat had desiccated the subsoil, causing the uncompacted base to shift, which eventually buckled the entire flagstone radius. Most DIY fire pits fail because homeowners focus on the aesthetics of the stone rather than the physics of the base. If you do not fix the soil grading and compaction first, your $200 project will become $500 worth of rubble in two seasons. Don’t be that homeowner. Building it right means respecting the dirt.
“A retaining wall doesn’t fail because of the stone; it fails because of the water trapped behind it.” – Hardscape Engineering Axiom
The Answer Capsule: How do you build a fire pit for under $200?
Building a low-cost custom stone fire pit requires sourcing local fieldstone or reclaimed masonry, excavating a 6-inch deep drainage pit, and backfilling with compacted 3/4-inch minus crushed stone. By avoiding expensive retail kits and focusing on thermal-resistant materials and proper soil compaction, you create a permanent, safe hardscape feature for minimal capital outlay.
The Ground-Up Build: Site Analysis and Soil Mechanics
Before you move a single shovelful of dirt, you need to understand what you are digging into. Most people think soil is just dirt. It isn’t. It is a complex matrix of minerals, organic matter, and air pockets. In my 20 years of hardscaping, the biggest mistake I see is ignoring the soil’s load-bearing capacity. If you have heavy clay, you have a drainage nightmare. If you have sand, you have a stability issue. You must call 811 before you dig. It is free. It is the law. Do not hit a gas line for a $200 project. It will ruin your day. Every fire pit should be at least 10 to 15 feet away from any structure or low-hanging trees. Heat rises. Embers fly. Keep your house safe.
How much modified gravel do I need for a fire pit base?
For a standard 4-foot diameter fire pit, you will need approximately 0.25 cubic yards of modified gravel to create a stable 4-to-6-inch deep base. This prevents the stone from settling unevenly due to freeze-thaw cycles or soil saturation. Do not use pea gravel. Pea gravel is round and rolls like ball bearings. You need angular, crushed stone that locks together under pressure. This is the foundation of your engineering. Without it, the pit will heave. It will tilt. It will look like a mess.
Material Science: Sourcing Stone Without Breaking the Bank
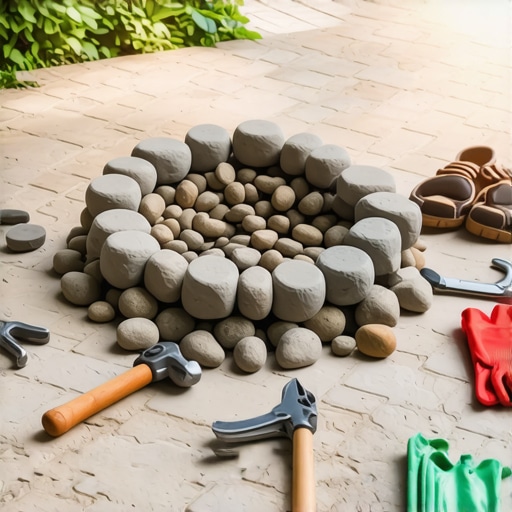
The secret to staying under $200 is sourcing. Big-box stores sell “landscape blocks” for $4 to $6 a piece. A 48-inch pit needs about 40 to 60 blocks. That kills your budget immediately. Instead, look for local quarries or masonry supply yards that sell “seconds” or irregular fieldstone. Fieldstone is often sold by the ton. A half-ton of irregular fieldstone will usually cost you less than $100 and gives you a much more authentic, high-end look. Avoid river rocks. River rocks are often sedimentary or have high moisture content. When they get hot, the water inside turns to steam. The rock explodes. Use metamorphic or igneous rocks like granite, basalt, or slate. Science matters here.
| Material Type | Estimated Cost | Pros | Cons |
|---|---|---|---|
| Irregular Fieldstone | $80 – $120 | Natural look, high heat resistance | Requires more labor to fit |
| Reclaimed Brick | $0 – $50 | Extremely cheap, classic look | Must be fire-rated (kiln-fired) |
| Standard CMU Blocks | $40 – $70 | Very stable, easy to level | Ugly without a veneer |
| 3/4″ Minus Gravel (Base) | $30 – $50 | Essential for drainage | Requires heavy manual tamping |
The Installation Process: Precision and Compaction
Once you have your site and stones, you dig. You are digging a circle 6 inches wider than your intended pit diameter. This extra space is for your gravel shoulders. Excavate 6 to 8 inches deep. If you hit heavy clay, go deeper. Fill the hole with your 3/4-inch minus crushed stone in 2-inch lifts. A lift is just a layer. After each layer, use a manual tamper. You should hit it until the tamper literally bounces off the stone. This is how you achieve the necessary Proctor density. If the base isn’t solid, the fire pit is just a pile of rocks waiting to move. Leveling is the next critical step. Your first course of stone must be perfectly level. If the first layer is off by a quarter inch, the third layer will be off by an inch. It is cumulative. It is math. Use a 4-foot level. Check it twice.
What is the safest distance for a fire pit from a house?
The industry standard for fire pit safety distance is a minimum of 10 to 20 feet from any combustible structures, including wooden decks, vinyl siding, and overhanging branches. Local municipal codes often dictate this distance to prevent radiant heat damage or accidental ignition from wind-blown sparks. Check your local fire marshal’s guidelines before finalizing the location. You do not want a fine. You do not want a fire.
Thermal Management and Airflow
A fire needs oxygen. Most DIY builds create a solid bowl that chokes the flame. You get smoke. You get a smoldering mess. You need to leave small gaps in the first or second course of stone. These are your intake vents. They allow cool air to be pulled into the base of the fire as hot air rises. It is the chimney effect. Also, consider the interior lining. While you can build with just stone, a cheap steel fire ring (often found for $50 online) will protect your stone from direct flame contact. This extends the life of the stone. It prevents cracking. It makes the pit safer. If you don’t use a ring, ensure your stones are thick. Thin stones will shatter under high heat. It is physics. Thermal shock is real.
“Ensure that any stone used in a fire feature is free of trapped moisture to prevent spalling or explosive fracturing when subjected to rapid temperature changes.” – Agricultural Extension Safety Manual
The Fire Pit Pre-Flight Checklist
- Check for overhead power lines or low branches.
- Verify 811 utility markings are clear of the dig zone.
- Ensure you have a 4-foot level and a heavy manual tamper.
- Source only metamorphic or igneous stones to avoid explosions.
- Plan for at least 4 inches of compacted gravel base.
- Keep a dedicated water source or fire extinguisher within 10 feet.
Year One: The Settling Period
After your first few fires, the pit will settle. This is normal. The weight of the stone and the vibration of the earth will compact the gravel even further. If you built your base correctly, it will settle evenly. If you cheated on the gravel, you will see leaning stones. Don’t skip the maintenance. Clear out the ash after every few fires. Ash is acidic. When it gets wet, it turns into a paste that can eat away at certain types of stone or mortar. Keep the center clear to allow for proper drainage. If water pools in the bottom, it will freeze in the winter. Ice expands with immense force. It will push your stones apart. Proper drainage is the only way to save your hard work. Landscaping is a battle against the elements. You win by being smarter than the rain and the frost. Enjoy your fire. You earned it. Just keep an eye on the base. It tells the truth about your work.
![Build a $500 Outdoor Kitchen Frame with Steel Studs [DIY]](https://lawnmajesty.com/wp-content/uploads/2026/05/Build-a-500-Outdoor-Kitchen-Frame-with-Steel-Studs-DIY.jpeg)