Build a $150 2026 Boulder Border [DIY Guide]
The Engineering Realities of a Low-Cost Stone Border
To build a boulder border for $150, you must source raw materials from a local aggregate quarry rather than a retail center, excavate a 4-inch trench, and install a compacted modified gravel base to prevent seasonal shifting or soil erosion. Most homeowners fail because they place stones directly on top of turf grass. This is a recipe for disaster. Within one season, the weight of the stone will compress the underlying organic matter, leading to uneven settling, or worse, the stones will disappear into the soil during a heavy thaw. We are building a structural element, even if it is only 12 inches high. That requires an understanding of hydrostatic pressure and soil density.
I always drill into my new crew members: if you don’t fix the soil grading first, every plant you put in the ground is just expensive compost. I remember an apprentice who tried to skip the compaction phase on a small limestone edging job. He thought the weight of the rocks would do the work for him. Three weeks later, after a standard 1-inch rainfall, the entire line had slumped two inches into the clay, creating a ponding effect that drowned the client’s boxwoods. Stone doesn’t move itself; the water underneath it moves the stone. If you don’t provide a non-compressible mineral base, the earth will reclaim your investment.
“A retaining wall doesn’t fail because of the stone; it fails because of the water trapped behind it.” – Hardscape Engineering Axiom
How deep should I dig for a stone border?
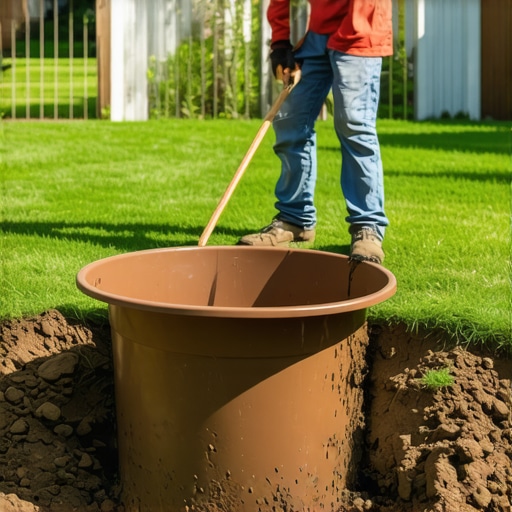
For a permanent boulder border, you must excavate a trench at least 6 inches deep and 2 inches wider than your largest stone to accommodate a 4-inch compacted aggregate base. This depth ensures that you bypass the organic horizon of the soil, which is prone to shrinking and swelling. In regions with heavy freeze-thaw cycles, this base acts as a drainage chimney, allowing moisture to move away from the stone rather than freezing and heaving it upward. Don’t eyeball it. Use a string line and a line level to ensure your trench floor follows the desired grade of the yard.
[image_placeholder_1]
What is the best material for a stone border base?
The gold standard for any hardscape base is 2A Modified crushed limestone or a 3/4-inch minus quarry process stone that contains both crushed rock and fines. The fines act as a binder, filling the voids between the larger stones to create a solid, non-compressible surface once hit with a hand tamper. Avoid using round river pebbles or pea gravel for a base. These materials act like ball bearings under the weight of a boulder, causing the border to shift laterally under the slightest pressure from a lawnmower or foot traffic. You want angular stone that locks together under PSI (pounds per square inch) pressure.
The $150 Material Sourcing Strategy
Achieving a professional look on a $150 budget requires bypassing the big-box garden centers where fieldstone is marked up by 400%. You need to find a local landscape supply yard or, better yet, a direct-to-consumer quarry. Many quarries have a “seconds” pile or “riprap” section where smaller boulders (6-12 inches) are sold by the ton at a fraction of the cost of palletized stone. One ton of fieldstone is usually enough for a 20-25 linear foot border, depending on the diameter of the stones. If you have a pickup truck, you can save the $75 delivery fee, which is often more than the cost of the stone itself.
| Material | Big-Box Retail Price | Local Quarry Price | Savings Impact |
|---|---|---|---|
| Fieldstone (1 Ton) | $380.00 | $85.00 | 77% Reduction |
| 2A Modified Base (5 Bags) | $45.00 | $18.00 (Bulk) | 60% Reduction |
| Landscape Fabric (Pro-Grade) | $60.00 | $35.00 | 41% Reduction |
| Total Estimated Cost | $485.00 | $138.00 | DIY Success |
The Critical Role of Compaction and Grading
Compaction is not optional. When you lay down your modified stone base, you must do it in 2-inch “lifts.” This means you spread two inches of gravel, wet it slightly to lubricate the particles, and then hit it with a hand tamper until it rings when you strike it. Then, add the next two inches. This process ensures that the base reaches maximum proctor density. If you throw 4 inches of loose gravel in a hole and walk on it, you aren’t compacting it; you’re just making it look flat. The air pockets remain, and those air pockets will eventually fill with water or collapsing soil. Use a pickaxe to break up any heavy clay subsoil before adding your base, as clay can act like a waterproof bowl, trapping water under your rocks and causing hydrostatic lift.
“Soil stability is contingent upon the removal of organic matter and the introduction of non-compressible mineral aggregates.” – Civil Engineering Standards
- Call 811: Never break ground without a utility mark-out. Even a shallow trench can sever a fiber-optic line or a shallow-buried gas lead.
- Calculate Your Tonnage: (Length x Width x Depth) / 27 gives you cubic yards. Multiply by 1.5 for the tonnage of stone needed.
- Angle of Repose: When stacking stones, lean them slightly back toward the garden bed at a 5-degree angle to resist the weight of the soil behind them.
- Root Flare Awareness: If your border runs near trees, do not bury the root flare. This will cause fungal rot and eventually kill the tree.
Installation Step-by-Step: The Professional Approach
Start by marking your line with high-visibility marking paint. Do not use a garden hose to mark the line; it’s too thick and imprecise. Once marked, use a square-point spade to cut a clean edge against the turf. This prevents the grass from migrating into your new stone border. After excavating to your 6-inch depth, lay down a non-woven geotextile fabric. This is the secret to a long-lasting border. The fabric allows water to pass through but prevents the native soil from mixing with your clean gravel base. Without this separation layer, the gravel will eventually sink into the mud, a process known as soil migration.
Place your largest, flattest stones first. These are your anchor stones. Every stone should be buried for at least 1/3rd of its height. This is a common mistake; DIYers want to see the whole rock, so they sit it on top like a potato on a table. By burying the bottom third, you create a mechanical bond with the earth. It makes the border look like a natural outcropping rather than something dropped from a truck. Use a rubber mallet to seat each stone into the gravel base. If a stone wobbles, it’s not set. Pull it out, add a handful of gravel to the low spot, and reset it. A professional border doesn’t move when you step on it. It should feel as solid as a concrete sidewalk.
Once the stones are set, backfill the garden side with screened topsoil and the lawn side with a mix of soil and grass seed. For the gaps between the boulders, don’t use mulch. Mulch washes away. Use river jacks or smaller cobbles to fill the voids. This creates a secondary filtration layer that keeps the soil behind the border from leaking onto your lawn. If you are dealing with a slope, ensure your border has a daylight exit for water to escape, or you will create a swamp in your flower bed. Precision matters. The difference between a $150 masterpiece and a $150 mess is about four hours of extra labor in the trenching phase. Don’t skip it. Do it once, and do it right.
![Build a $300 Cedar Privacy Fence [2026 DIY]](https://lawnmajesty.com/wp-content/uploads/2026/06/Build-a-300-Cedar-Privacy-Fence-2026-DIY.jpeg)