Build a $200 2026 Gravel Seating Area for Front Yards
The Reality of Front Yard Hardscaping
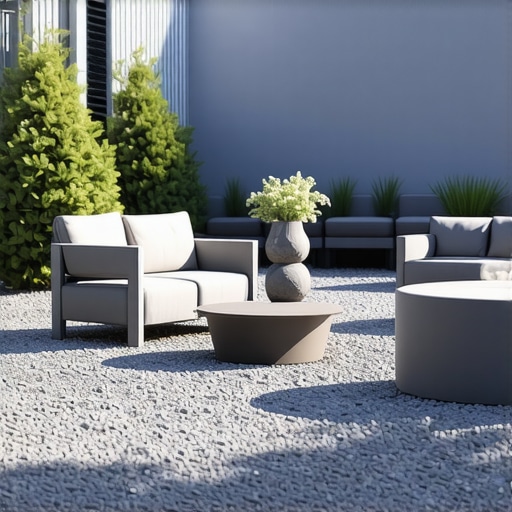
Building a front yard gravel seating area for under $200 requires a focus on excavation depth, geotextile fabric, and proper drainage to prevent sinking and weed growth. By using crushed stone and local materials, homeowners can create a functional hardscape without professional contractor costs or structural failure. Most homeowners think they can just dump some stone over grass and call it a day. It will fail. Within six months, that gravel will be swallowed by the subgrade, and you will have a mud pit. I recently got called out to tear up a $30,000 patio that was sinking because the previous contractor skipped the compaction of the sub-base and ignored the hydrostatic pressure building up behind the retaining wall. If a $30k project can fail from laziness, your $200 weekend project definitely will if you do not respect the physics of the ground.
“A retaining wall doesn’t fail because of the stone; it fails because of the water trapped behind it.” – Hardscape Engineering Axiom
The Physics of Sub-Grade Preparation
Before you touch a shovel, you need to understand what you are digging into. Soil is not just dirt; it is a complex matrix of minerals, organic matter, and pore space. In most regions, you are dealing with either heavy clay or sandy loam. Clay holds water, which means it expands and contracts with moisture levels. This movement is the enemy of a flat seating area. You must excavate at least 4 inches. Do not skip this. If you place gravel on top of organic topsoil, the microbial breakdown of that organic matter will create voids. The gravel will fill those voids. Your seating area will become uneven. It is inevitable. You need to reach the sub-base, which is the denser, mineral-heavy layer below the topsoil. This is where your structural integrity lives. Use a plate compactor if you can rent one, but for a $200 budget, a hand tamper and some elbow grease will suffice. The goal is to reach a 95 percent Proctor density. If the tamper bounces, you are getting close. If it thuds, keep hitting it.
Material Selection: Why Gravel Choice Matters
Not all stone is created equal. For a seating area, you want angular stone, not rounded river rock. Rounded stones act like ball bearings; they will roll under your feet and your furniture will never be stable. Angular stones, like #57 crushed limestone or decomposed granite, have jagged edges that lock together under pressure. This is known as friction-angle stability.
“Aggregate interlock is the primary mechanism by which a gravel surface resists shear deformation under load.” – ICPI Manual of Structural Standards
How much modified gravel do I need for a patio base?
To calculate your gravel volume, multiply the square footage of your seating area by the depth in feet (e.g., 4 inches is 0.33 feet) to get cubic feet, then divide by 27 for cubic yards. For a 10×10 area at 3 inches deep, you need roughly 1 cubic yard of stone. Buying in bulk from a local quarry is the only way to stay under a $200 budget. Bags from big-box stores are a scam; they cost 400 percent more per pound. Contact a local yard and ask for ‘crushed fines’ or ‘3/4 minus.’ The ‘minus’ means it includes the dust, which acts as a binder. This is what makes the surface hard enough to walk on without sinking.
The Essential Material Breakdown
| Material Item | Estimated Cost | Purpose |
|---|---|---|
| #57 Crushed Stone (1 Yard) | $45 – $60 | Main structural layer and drainage |
| Non-Woven Geotextile Fabric | $30 – $40 | Separates stone from soil / prevents sinking |
| Timber Edging (4×4 or 2×6) | $60 – $80 | Perimeter containment and lateral support |
| Steel Landscape Stakes | $15 – $20 | Securing the edging in place |
Step-by-Step Installation Protocol
- Mark the Perimeter: Use marking paint and string lines. Check for square using the 3-4-5 triangle method.
- Excavation: Remove 4 inches of soil. Keep the floor of the pit level or slightly sloped away from the house (1 inch of drop for every 4 feet of run).
- Compaction: Tamp the bare soil until it is rock hard.
- Fabric Layer: Lay down non-woven geotextile. Do not use the cheap plastic ‘weed barrier’ from the garden aisle; it will tear. You need structural fabric.
- Edging Installation: Secure your timbers. Without a firm edge, the gravel will migrate into your lawn.
- Gravel Fill: Spread the stone in 2-inch lifts. Tamp each lift before adding the next.
How do I prevent weeds in a gravel patio?
The best way to prevent weeds in a gravel patio is to install a heavy-duty non-woven geotextile fabric and ensure your gravel depth is at least 3 inches to block sunlight from reaching the soil. Most ‘weeds’ in gravel are actually wind-blown seeds that germinate in the dust between the stones. You cannot stop the wind, but you can stop the roots from hitting the soil. A quick blast with a propane torch or a high-strength vinegar solution once a month keeps it clean. Never use rock salt; it will leach into the surrounding soil and kill your lawn’s root system for years. Be smart. Be precise.
The Maintenance Cycle
Your gravel will settle. This is normal. In the first year, you may need to add a few shovels of stone to low spots. Check your edging stakes after the first freeze-thaw cycle. If they have heaved, drive them back down. If you notice water pooling, your slope is wrong. You must fix it immediately or the hydrostatic pressure will turn your sub-grade into soup. This isn’t a ‘set it and forget it’ project. It is a piece of engineering. Treat it like one. Don’t be the homeowner who calls me in three years to fix a mess that could have been avoided with a $40 roll of fabric and an afternoon of proper tamping. Work hard now so you don’t have to work twice as hard later.
![Build a $300 2026 Stone Fire Pit Area [Fast]](https://lawnmajesty.com/wp-content/uploads/2026/07/Build-a-300-2026-Stone-Fire-Pit-Area-Fast.jpeg)