The Best Solar Lights for Highlighting Garden Statues at Night
The Engineering of Illumination: Why Professional Solar Lighting Matters
Highlighting garden statues with solar lights requires an understanding of luminous flux, photovoltaic conversion rates, and beam spread to create a professional-grade aesthetic. Cheap, big-box store lights fail because they lack the battery capacity and color rendering index (CRI) necessary to reveal the texture of stone or the patina of bronze after the sun sets.
I always drill into my new crew members: if you don’t fix the soil grading first, every plant you put in the ground is just expensive compost. The same logic applies to hardscaping and landscape design. You can invest $10,000 in a hand-carved marble fountain, but if you try to illuminate it with a flimsy plastic stake light from a bargain bin, you are doing a disservice to the craft. I’ve seen homeowners spend thousands on garden design only to have the entire project disappear into a black hole at night because they didn’t understand Kelvin temperatures or lumen output. Lighting is not an ornament; it is a structural component of the nighttime landscape. It requires the same precision as a retaining wall base or a drainage system. If the light isn’t calculated, it’s just clutter. Don’t skip the math.
“Effective outdoor lighting relies on the principle of ‘less is more’ to prevent glare and light pollution while highlighting architectural features.” – Texas A&M AgriLife Extension
Selecting the Right Luminous Intensity for Outdoor Sculpture
To properly light a garden statue, you must calculate the lumens required based on the height of the object and the reflectivity of its material. For a standard 3-foot statue, a professional solar spotlight should provide at least 150 to 300 lumens to overcome the ambient light of the moon and surrounding lawn care fixtures.
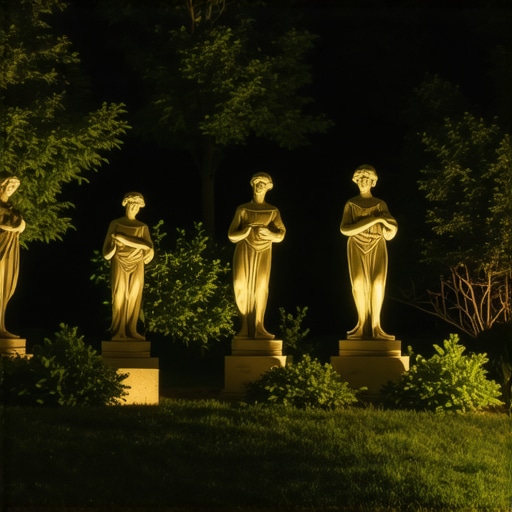
When we talk about light, we are talking about photons hitting a surface. Stone statues, especially those made of granite or limestone, are porous and absorb light. You need a higher candela rating to make these features pop. Conversely, a polished bronze or copper statue is highly reflective. If you blast it with a direct, narrow beam, you create a “hot spot” that blinds the viewer. We use diffuser lenses or adjust the angle of incidence to 15 degrees off-center to catch the shadows in the drapery of the stone or the muscles of the sculpture. This is where hardscaping meets art. You are not just aiming a light; you are sculpting with shadows.
How many lumens do I need to light a garden statue?
For most residential landscape design applications, a statue under 4 feet requires 100-200 lumens, while larger focal points or ornamental trees may require 300-500 lumens to achieve visual depth. The goal is to highlight the texture, not to wash out the details. Most “decorative” solar lights produce less than 10 lumens, which is why they fail for anything other than path marking.
The Engineering Behind Solar Battery Capacity and Longevity
The success of solar lighting in a professional landscaping project depends entirely on the Lithium Iron Phosphate (LiFePO4) battery’s ability to store energy and the monocrystalline panel’s efficiency in converting UV rays. High-end fixtures utilize MPPT (Maximum Power Point Tracking) controllers to maximize charging even on overcast days.
In the field, we see a lot of “solar fatigue.” This happens when a client buys a light with a Polycrystalline panel. These are the blue-tinted, speckled panels you see at hardware stores. They are inefficient. I only install Monocrystalline panels—the solid black ones. They have a higher silicon purity and can convert up to 22% of sunlight into usable power, compared to the measly 13% of the cheap stuff. Furthermore, the battery must be sized to handle at least three nights of discharge. If you have a rainy Tuesday, your garden statues shouldn’t go dark on Wednesday. We look for batteries with at least 2000 charge cycles. Anything less is a temporary fix, not a permanent landscape solution. It will fail.
| Feature | Cheap Stake Lights | Professional Solar Spotlights |
|---|---|---|
| Battery Type | Ni-Cd (Nickel-Cadmium) | LiFePO4 (Lithium Iron Phosphate) |
| Panel Technology | Polycrystalline | Monocrystalline (Grade A) |
| Lumen Output | 5 – 15 Lumens | 150 – 450 Lumens |
| Housing Material | Thin Plastic | Die-cast Aluminum / Brass |
| IP Rating | IP44 (Splash proof) | IP65 – IP67 (Waterproof) |
Placement Strategy: Avoiding the “Ghosting” Effect
Proper placement of solar lights involves staggering the fixtures to create three-dimensional modeling rather than a flat, two-dimensional silhouette. We use the rule of thirds in garden design, placing the primary light source at a 45-degree angle from the primary viewing point.
One of the biggest mistakes I see in lawn care and hardscaping setups is placing the light directly at the base of the statue pointing straight up. This creates “ghosting,” where the shadows are cast upward, making the statue look distorted and eerie. Instead, pull the light back about 3 to 5 feet. This allows the beam angle to widen, covering the entire piece. If the statue is taller than 6 feet, you need two lights: one key light for the face and one fill light to soften the shadows on the back. Also, keep the solar panel remote. A high-end fixture will allow you to mount the panel 10 feet away in the sun while the light sits in the shade of a canopy tree. This is non-negotiable for woodland gardens.
“The durability of an outdoor electrical component is determined by its Ingress Protection (IP) rating, with IP65 being the minimum standard for moisture resistance in landscaping.” – International Electrotechnical Commission (IEC) Standards
Where should I place solar panels for the best garden lighting?
Solar panels must be oriented toward the True South at an angle equal to your local latitude plus 15 degrees to maximize winter sun exposure. Ensure no turf grass or shrubbery casts a shadow on the panel between 10 AM and 4 PM, as even a 10% shadow can reduce power output by 50% due to cell shading effects.
The “Settling In” Period and Maintenance Schedule
Once your solar lights are installed, the first 48 hours are critical for battery conditioning; the fixtures should be allowed to charge in the “off” position to reach full chemical saturation. Professional landscaping doesn’t end with the installation; it requires a rigorous maintenance protocol to ensure the photovoltaic cells don’t degrade.
- Clean the solar panel covers every 90 days with a microfiber cloth to remove pollen, dust, and hard water deposits.
- Check the IP67 seals for cracks after the first hard freeze/thaw cycle to prevent internal condensation.
- Prune any encroaching foliage that might block the panel’s 30-degree sky view.
- Apply a thin layer of dielectric grease to any external wire connections to prevent galvanic corrosion.
Remember, the soil microbiology and moisture levels around your statue will affect the ground stakes. If you have heavy clay, the freeze-thaw cycle will try to “heave” your lights out of the ground. I recommend set-screwing the fixtures to a 4×4-inch concrete footer buried 12 inches deep. This keeps your lighting design stable regardless of soil compaction or hydrostatic pressure. A professional job stays where you put it. Period.