
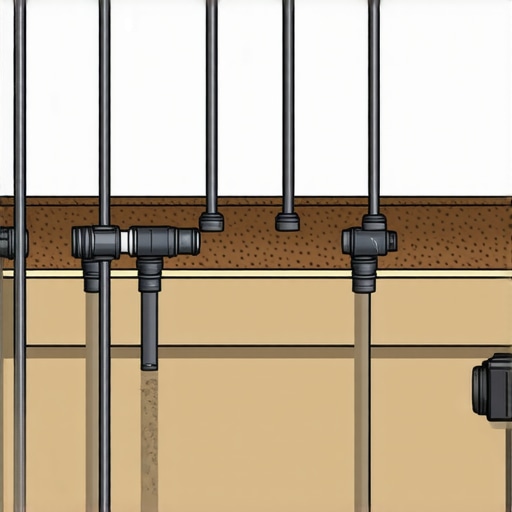
Build a $50 DIY Drip System for 2026 Raised Beds
Engineering the Hydraulic Foundation: Why Planning Trumps Planting
I always drill into my new crew members: if you don’t fix the soil grading first, every plant you put in the ground is just expensive compost. The same logic applies to irrigation. Most homeowners wait until July when their heirloom tomatoes are wilting to think about water. By then, it is too late. You have already stressed the root systems and invited blossom end rot. Building a 2026-ready irrigation system for your raised beds requires thinking like a civil engineer, not a hobbyist. You are managing hydrostatic pressure and flow rates, not just splashing water. Planning for the 2026 season means accounting for increased heat cycles and the need for precision delivery. 80% of your success happens before a single drop of water hits the soil. You must map your layout, calculate your total GPH (Gallons Per Hour) requirements, and ensure your mainline can handle the load without a massive pressure drop at the end of the run.
The $50 Bill of Materials: Sourcing Professional Grade Hardware
To build a DIY drip system for under $50, you must bypass the overpriced kits at big-box stores and source commercial-grade polyethylene tubing and pressure-compensating emitters. These components ensure that the first plant in the row gets the same 1.0 gallon per hour as the last plant, regardless of elevation changes or friction loss within the pipe. Cheap kits use non-compensated emitters that lead to over-watering at the start and drought at the end. Don’t buy the garbage. Focus on 1/2-inch mainlines and 1/4-inch distribution lines. This hybrid approach keeps your costs low while maintaining structural integrity across multiple raised beds. Your budget goes toward the heart of the system: the pressure regulator and the filter. Skip these, and your emitters will clog with mineral deposits or blow off the line during a midnight pressure spike. It is that simple.
| Component | Quantity | Unit Cost | Function |
|---|---|---|---|
| 1/2″ Poly Mainline (50′) | 1 | $12.00 | Primary water transport |
| Pressure Regulator (25 PSI) | 1 | $8.00 | Prevents line blowouts |
| 150 Mesh Filter | 1 | $7.00 | Protects emitters from clogs |
| 1/4″ Vinyl Micro-tubing (50′) | 1 | $6.00 | Delivery to individual plants |
| PC Emitters (Pack of 50) | 1 | $10.00 | Precision water release |
| Fittings & End Caps | Various | $7.00 | System closure and routing |
“Uniformity in drip irrigation depends on maintaining pressure within the manufacturer’s specified range, typically 10 to 30 PSI for thin-wall tapes and poly tubes.” – Hardscape Engineering Axiom
How much water does a raised bed actually need?
A standard 4×8 raised bed requires approximately 0.5 to 1 inch of water per week, depending on evapotranspiration rates and soil composition. In a $50 DIY system, this is achieved by running 1.0 GPH emitters for 30 minutes every other day, ensuring the moisture penetrates the root zone deeply rather than just wetting the surface mulch.
The Installation Protocol: Laying the Mainline with Precision
Installing a drip system requires more than just laying hose; it requires understanding the capillary action of your soil. When you run your 1/2-inch poly mainline, you must secure it with 6-inch sod staples every three feet. Polyethylene has a high thermal expansion coefficient. It will move. It will shift. If you don’t stake it, your emitters will end up watering your cedar planks instead of your peppers. Use a punch tool for clean entries into the mainline. Ragged holes lead to slow leaks that erode the soil around your hardscaping footings. Once the mainline is set, run your 1/4-inch micro-tubing to the base of each plant. Do not use “soaker hoses” inside raised beds. They are inefficient, they break down under UV light within one season, and they lack the precision required for intensive garden design. Use point-source emitters. They are the only way to ensure your water goes to the roots, not the weeds. Check every connection. The system should be tight. It should be silent. If you hear hissing, you have a leak. Fix it immediately. Water is the most destructive force in the landscape when left uncontrolled.
- Flush the system: Run water through the mainline before adding end caps to clear out plastic shavings.
- Check PSI: Use a gauge to ensure you are hitting exactly 25 PSI at the furthest point.
- Emitter Placement: Position emitters 2 inches away from the stem to encourage outward root growth.
- Mulch Overlay: Cover your tubing with 2 inches of wood chips or straw to prevent UV degradation.
- Timer Setup: Install a basic battery-operated timer to automate the 5:00 AM watering window.
“Evapotranspiration rates dictate the irrigation frequency; in high-heat cycles, a raised bed can lose 0.25 inches of water daily through soil surface evaporation and plant transpiration.” – Agronomy Manual 104
Can I run a drip system off a rain barrel?
You can run a drip irrigation system from a rain barrel, but you will likely need a booster pump to achieve the 15 to 25 PSI required for pressure-compensating emitters to function correctly. Gravity alone rarely provides enough head pressure for a multi-bed landscaping layout unless the barrel is elevated significantly above the garden grade.
Troubleshooting and Maintenance: Ensuring 2026 Longevity
A $50 system only stays a $50 system if you don’t have to replace it in 2027. Maintenance is the difference between a pro and a hack. At the end of the season, you must winterize the lines. In many regions, the freeze-thaw cycle will shatter polyethylene fittings if they are full of water. Open the end caps and use a small air compressor to blow out the moisture. Check your filter mesh every month. If you see a green slime or fine silt, your plants are starving for water. Clean it with a soft brush. Inspect the emitters for salt buildup, especially if you have hard water. A quick soak in white vinegar will clear them. Don’t let your lawn care equipment nick the lines. Use mulch to hide the tubing, but keep a mental map of where the lines run. If you puncture a line with a trowel, don’t use duct tape. Use a proper 1/2-inch coupler. It costs 50 cents and lasts a decade. Build it right. Monitor it often. Let the biology do the rest.
![2026 Pollinator Garden Setup [Bee-Friendly]](https://lawnmajesty.com/wp-content/uploads/2026/09/2026-Pollinator-Garden-Setup-Bee-Friendly.jpeg)

![5 Vertical Garden Layouts for Small 2026 Patios [DIY]](https://lawnmajesty.com/wp-content/uploads/2026/05/5-Vertical-Garden-Layouts-for-Small-2026-Patios-DIY.jpeg)