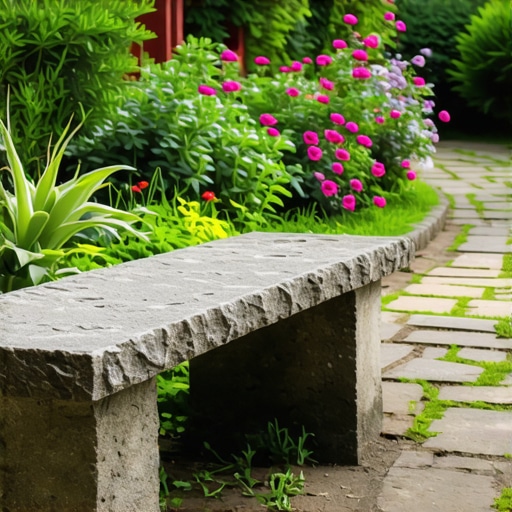
Build a $300 2026 Stone Bench for Garden Paths
Engineering the Garden Bench: Why Most DIY Seating Fails
To build a $300 2026 stone bench that survives a decade, you must prioritize sub-grade compaction and hydrostatic pressure management over aesthetics. A proper build requires a 4-inch deep 21A modified gravel base, mechanical tamping to 95% Proctor density, and industrial-grade polyurethane masonry adhesive to prevent lateral shifting during freeze-thaw cycles.
I recently got called out to tear up a $30,000 patio that was sinking because the previous contractor thought he could skip the base prep and just ‘set things on the dirt.’ Within two winters, the entire surface looked like a topographical map of the Himalayas. The homeowner was furious. It was a classic hardscape autopsy: the lack of a proper drainage layer caused the soil to saturate, expand, and heave the stones. If you don’t respect the physics of the ground, the ground will win every time. This $300 bench project follows the exact same engineering principles as that $30,000 patio. It is all about what you don’t see beneath the surface.
“A retaining wall doesn’t fail because of the stone; it fails because of the water trapped behind it.” – Hardscape Engineering Axiom
How deep should a stone bench foundation be?
For a standard garden bench, you need to excavate at least 6 inches: 4 inches for the compacted gravel base and 2 inches for the leveling sand or the first course of stone. If you live in a region with heavy clay soil, increase the gravel base to 6 inches to allow for better drainage and to mitigate the risks of frost heave. You are building a footer, not just a hole.
The $300 Material Breakdown and Physics of Load
Allocating a $300 budget for a stone bench requires choosing pre-cast concrete wall units or natural fieldstone while investing heavily in the base material. Avoid ‘decorator stones’ that lack structural density; instead, source #57 stone for drainage and a natural bluestone or granite slab for the seat to ensure high PSI resistance and long-term durability.
| Material Item | Quantity Required | Estimated Cost |
|---|---|---|
| #57 Crushed Stone (Base) | 5-7 Bags | $45 |
| Structural Wall Blocks | 12-18 Units | $140 |
| Polyurethane Adhesive | 2 Tubes (10oz) | $22 |
| Natural Stone Cap/Slab | 1 Piece (48″) | $85 |
| Total Project Estimate | – | $292 |
Do not buy your stone from a big-box store if you can help it. Go to a dedicated masonry yard. The ‘hacks’ buy the porous, lightweight blocks that crumble after three years of rain. You want high-density concrete or natural igneous rock. These materials handle the compressive strength requirements of a 250-pound adult sitting down with a 2x impact force. It is basic civil engineering. If the stone is too soft, it cracks. If the base is too soft, it tilts. It is that simple.
The Step-By-Step Ground-Up Build
Installation of a stone bench begins with site excavation and the removal of all organic matter, including grass, roots, and topsoil, to reach the mineral layer. Once the 4-inch modified gravel base is installed in 2-inch lifts, use a hand tamper to achieve maximum density before applying masonry adhesive to the structural piers in a zigzag pattern for optimal surface contact.
- Step 1: The Cut. Dig a trench 6 inches wider than the bench footprint. Remove all sod.
- Step 2: The Base. Fill with 2 inches of 21A modified stone. Tamp it until the tamper literally bounces off the surface. Repeat for the next 2 inches.
- Step 3: Leveling. Use a 4-foot level. This is the most critical stage. If you are off by 1/8th of an inch now, the bench will look crooked from the street.
- Step 4: The Piers. Stack your blocks. Apply a 1/4-inch bead of adhesive between every layer. This prevents the stones from ‘walking’ over time.
- Step 5: The Cap. Set the top slab. Ensure a slight 1% pitch toward the back so water doesn’t pool where you sit.
What is the best adhesive for outdoor stone?
Never use standard construction adhesive for hardscaping. You must use a polyurethane-based masonry adhesive specifically rated for wet conditions and temperature fluctuations. These adhesives remain flexible enough to handle the coefficient of thermal expansion in the stone without snapping the bond. If the label doesn’t say ‘masonry’ or ‘landscape block,’ put it back on the shelf.
“Proper drainage and soil stability are the foundations of all sustainable agricultural and structural installations.” – Penn State Agricultural Extension
Soil Mechanics and Why Your Bench Might Walk
The primary enemy of any garden path installation is lateral movement caused by soil creep and moisture saturation. To prevent your bench from shifting, you must ensure the screed layer is perfectly flat and the surrounding soil is graded to move water at least 3 feet away from the foundation. One inch of water per week is standard for turf, but for hardscape, that same water is a structural threat.
While the internet tells you to use pea gravel for everything, that is a lie. Pea gravel is round; it acts like ball bearings. It will never compact. It will shift under the weight of the bench. You need crushed stone with fines (angular edges). These lock together under pressure. It is the difference between a foundation and a pile of marbles. Don’t skip the compaction. It will rot the aesthetic of your garden if you do. Your tools should be a pickaxe, a level, and a heavy tamper. If your hands aren’t calloused by the end of the day, you probably didn’t pack the base tight enough.