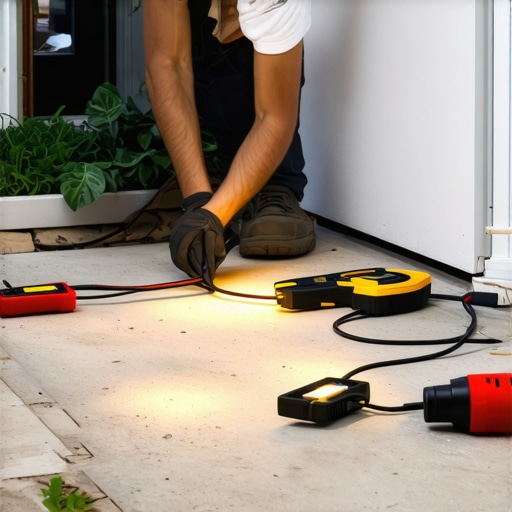
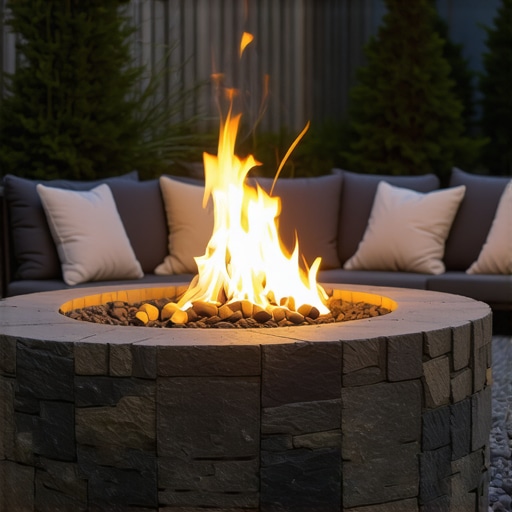
Build a $300 2026 Stone Fire Pit Area for Small Back Deck
The Expert Guide to Building a $300 Stone Fire Pit Area
I recently got called out to tear up a $30,000 patio that was sinking because the previous contractor thought he could save time by skipping the subgrade compaction. It was a disaster. The pavers were literally swimming in the mud after a heavy rain because there was no capillary break and the soil had reached its saturation point. This is why I am telling you now: if you do not respect the physics of the ground, your $300 project will be a pile of loose rocks in six months. Landscaping is not just about aesthetics; it is about managing water and pressure. I have spent twenty years fixing the mistakes of ‘mow and blow’ crews who do not know the difference between topsoil and subgrade. Building a fire pit area for a small back deck requires specific engineering to ensure safety and longevity. You must account for soil density, thermal expansion, and hydrostatic drainage. If you think you can just throw some stones in a circle and call it a day, you are wrong. It will settle. It will crack. It will fail. But if you follow these technical protocols, you can build a professional-grade hardscape for under three hundred dollars.
The Science of the Subgrade and Site Selection
To build a $300 stone fire pit area in 2026, you must prioritize site excavation, a compacted 4-inch 2A modified gravel base, and heat-resistant masonry units. This budget-conscious hardscape requires precise soil grading and polymeric sand to prevent settling and weed intrusion near your small back deck.
The first step is identifying where the fire pit will sit. You need at least 10 feet of clearance from your deck to comply with 2026 fire safety codes. Do not ignore the utility markings. Call 811. If you hit a gas line, your $300 project becomes a $10,000 emergency. Once cleared, you must excavate down to the subsoil. Most homeowners stop once they see dirt, but you must remove all organic matter. Grass, roots, and thatch will decompose. When they decompose, they create air pockets. Air pockets lead to settling. Dig deep. The ‘angle of repose’ for your excavation should be slightly wider than the final fire pit area to ensure the edges do not collapse under load. If your soil is heavy clay, you have to be even more careful about drainage. Clay holds water like a sponge, and when that water freezes, it expands with enough force to lift concrete. You need a 4-inch layer of crushed stone to act as a capillary break to stop this upward movement of moisture.
Selecting Materials for a $300 Hardscape Budget
Choosing materials for a low-cost fire pit involves sourcing 2A modified gravel, levelling sand, and concrete retaining wall blocks. By avoiding expensive ‘kit’ packages and buying bulk crushed stone, you ensure a structurally sound base that resists hydrostatic pressure and thermal expansion for under $300.
Do not go to a big-box store and buy the pre-made fire pit kits for $500. You are paying for the convenience of a cardboard box. Instead, go to a local masonry yard. Ask for ‘seconds’ or overstock retaining wall units. You can often find heavy, 2-inch thick concrete blocks for less than $3 a piece. You will need approximately 36 blocks for a standard 36-inch diameter pit. For the base, do not buy bags of ‘all-purpose gravel.’ You need 2A modified. This is a specific mix of crushed stone ranging from 3/4-inch down to dust. The dust particles fill the voids between the larger stones, creating a solid, interlocking mat when compacted. This is the same material used for road bases. It is cheap and effective. See the table below for a realistic 2026 cost breakdown based on bulk sourcing.
| Material Item | Technical Specification | Quantity Needed | Estimated Cost |
|---|---|---|---|
| 2A Modified Gravel | Crushed Limestone/Granite | 0.5 Cubic Yard | $45.00 |
| Concrete Wall Units | ASTM C140 Masonry Units | 36 Blocks | $115.00 |
| Geotextile Fabric | Non-woven Polypropylene | 100 Sq Ft | $25.00 |
| Polymeric Sand | ASTM C144 Graded Sand | 1 Bag | $35.00 |
| Steel Fire Ring | 14-Gauge Carbon Steel | 1 Unit | $55.00 |
| Tool Rental | Manual Plate Tamper | Daily Rate | $25.00 |
Total project cost: $300.00. This budget assumes you are doing the labor yourself and have access to a truck for hauling bulk materials. If you pay for delivery, your costs will rise. Don’t skip the steel ring. Concrete blocks are not designed for direct fire contact. Over time, the moisture inside the concrete will turn to steam and cause the blocks to explode. This is called spalling. The ring provides a thermal barrier.
Excavation and Base Preparation Protocols
Proper excavation for a stone fire pit area requires removing 8 inches of soil to accommodate geotextile fabric and a mechanically compacted stone base. This foundation prevents the freeze-thaw cycle from shifting the blocks and ensures the area remains level even during heavy rain near your garden design layout.
“A retaining wall doesn’t fail because of the stone; it fails because of the water trapped behind it.” – Hardscape Engineering Axiom
Once you have excavated the area, lay down your non-woven geotextile fabric. This is a critical step that many amateurs skip. The fabric acts as a separator. It keeps your expensive gravel from sinking into the soft mud. Without it, the soil and stone will eventually mix, and your base will lose its structural integrity. After the fabric is down, add your gravel in 2-inch increments. Do not dump all 4 inches at once. If you do, you cannot achieve proper compaction. Use a manual tamper or rent a plate compactor. The stone should be compacted until it is so dense that a screwdriver cannot be easily pushed into it. This is called achieving 95 percent Proctor density. If you skip this, the weight of the fire pit will cause the ground to sink over time. Leveling is the most tedious part of the job. Use a 4-foot level. Check every direction. If you are off by even a quarter-inch at the base, it will look like a leaning tower by the time you reach the third course of stone.
How much modified gravel do I need for a fire pit base?
To calculate the amount of 2A modified gravel required, multiply the total area square footage by the depth in feet and divide by 27. For a 6-foot diameter circular area with a 4-inch depth, you will need roughly 0.5 cubic yards of compacted stone to create a stable, drainable foundation.
Building the Fire Pit Structure and 2026 Codes
Constructing the fire pit walls involves dry-stacking concrete masonry units in a staggered pattern to ensure structural bond and ventilation. By following IRC fire codes for 2026, you maintain a safe distance from your small back deck and prevent thermal damage to nearby hardscaping elements.
“Compaction is the single most important factor in the longevity of any segmental pavement or fire pit installation.” – Interlocking Concrete Pavement Institute (ICPI) Technical Manual
When you start laying your blocks, start with the first course half-buried. This is called an ’embedded course.’ It provides lateral stability. If the first row of stones is just sitting on top of the ground, they can kick out. As you stack the subsequent rows, stagger the joints. This is basic engineering. A staggered joint distributes the load and prevents vertical cracks from forming. For the 2026 build, I recommend using a high-temperature masonry adhesive between the top two courses to prevent the stones from being knocked loose by someone resting their feet on the pit. Ensure there are small gaps or ‘weep holes’ in the bottom layer of the stone. Fire needs oxygen. Without airflow, your fire will be smoky and inefficient. The steel ring should sit inside the stone circle, with a small gap of about an inch between the steel and the stone. Fill this gap with lava rock or crushed stone to provide further insulation.
How do you protect a deck from a nearby fire pit?
Protecting a small back deck from fire requires a 10-foot clearance and the installation of a non-combustible ember guard or heat shield. In 2026, localized fire ordinances often mandate that wood-burning pits have a spark arrestor screen to prevent airborne embers from igniting composite decking or dry lawn care debris.
Preventing Thermal Expansion and Long-Term Cracking
The final stage of the fire pit build involves applying polymeric sand to the surrounding paver area to lock the units in place and resist weed growth. Managing thermal expansion through the use of fire-rated steel inserts ensures the stone masonry does not crack under the intense BTU output of a standard outdoor fire.
Thermal expansion is the silent killer of DIY fire pits. When stone gets hot, it expands. When it cools, it contracts. Over several seasons, this movement will push the stones apart. Using a steel liner is the only way to mitigate this at a $300 price point. Also, consider the area around the pit. You don’t want bare dirt or grass right up against the hot stones. Use the remaining gravel to create a small 2-foot apron around the pit. This serves as a ‘fire break’ and prevents your lawn from being scorched. If you are using pavers for this apron, sweep polymeric sand into the joints. Mist it with water to activate the polymers. This creates a flexible but hard joint that prevents ants and weeds from ruining your work. It also helps with drainage by shedding water away from the base. Don’t skip this. It’s a small detail that separates the pros from the hacks.
The 2026 Fire Pit Installation Checklist
- Call 811 to mark underground utility lines before any excavation.
- Excavate at least 8 inches deep to reach stable subsoil.
- Install non-woven geotextile fabric to separate soil from the stone base.
- Compact 2A modified gravel in 2-inch lifts until 95% density is reached.
- Ensure the first course of stone is at least 50% buried for lateral stability.
- Insert a 14-gauge steel fire ring to protect concrete from thermal spalling.
- Maintain a 10-foot minimum distance from all combustible structures and decks.
- Fill the base of the pit with 2 inches of lava rock for better drainage and heat dispersal.
The maintenance on a build like this is minimal but necessary. Every spring, check for settling. If the blocks have shifted, it means your compaction was insufficient or your drainage is blocked. Remove the ash regularly. Ash is acidic and, when mixed with rain, can eat away at the concrete over years. If you follow these technical steps, your $300 investment will outlast any $1,000 kit from a big-box store. You have built a piece of infrastructure, not just a backyard accessory. Treat it with the respect that structural engineering deserves. Keep your fires controlled, keep your base dry, and the stone will stay exactly where you put it.
![Why Your 2026 Deck is Turning Black [3 Fixes]](https://lawnmajesty.com/wp-content/uploads/2026/06/Why-Your-2026-Deck-is-Turning-Black-3-Fixes.jpeg)
![Build a $100 2026 Pea Gravel Fire Pit [Weekend DIY]](https://lawnmajesty.com/wp-content/uploads/2026/07/Build-a-100-2026-Pea-Gravel-Fire-Pit-Weekend-DIY.jpeg)