
Designing a 2026 Outdoor Kitchen on a $500 Budget
Professional 2026 Outdoor Kitchen Design: Engineering a $500 Hardscape
Building a functional outdoor kitchen on a $500 budget is an exercise in structural engineering rather than a shopping trip to a luxury showroom. To the uninitiated, $500 barely covers a stainless steel grill hood, but to a veteran hardscape foreman, that money is better spent on the base-layer compaction and drainage that prevents your project from becoming a pile of cracked masonry after the first frost. I recently got called out to tear up a $30,000 patio that was sinking because the previous contractor used ‘clean’ stone without any fines, leading to catastrophic internal erosion. That homeowner spent sixty times your budget and still failed because they ignored the physics of the ground. Your success depends on understanding that 80 percent of a kitchen’s lifespan is determined by what happens below the surface. We are looking at soil mechanics, hydrostatic pressure, and the precise chemistry of masonry bonding. If you think you can just throw some pavers on the grass and call it a day, stop reading now. You are building a permanent structure, and in the year 2026, where weather patterns are increasingly volatile, your garden design must account for extreme drainage and thermal expansion. This is about calloused hands and high-level engineering.
The Foundation: Why Your Budget Starts Underground
A $500 outdoor kitchen succeeds or fails based on base compaction and drainage, as improper site prep leads to shifting and structural collapse within two seasons. Prioritize excavation depth and crushed stone layers over aesthetic finishes to ensure the kitchen remains level and functional for years. Don’t skip this. We begin by analyzing the soil’s load-bearing capacity. If you are dealing with heavy red clay, you have a high plastic limit, meaning the soil will expand and contract like a sponge. To counter this, you must excavate at least 10 inches deep. You aren’t just digging a hole; you are creating a sub-grade vault for your aggregates. We use a modified gravel base—specifically 2A modified—which contains both the 3/4-inch angular stone and the ‘fines’ or dust. This mix is critical because the fines fill the interstitial voids between the larger stones, creating a locked, monolithic structure when compacted. Using a plate compactor is non-negotiable. You need to achieve at least 95 percent Proctor density. If the base doesn’t bounce the tamper back at you with a metallic ring, it isn’t ready. We are fighting the freeze-thaw cycle here. When water enters the sub-base and freezes, it expands by 9 percent. Without a properly compacted gravel base that allows for minimal capillary action, that expansion will heave your kitchen right out of the ground.
| Material Layer | Purpose | Estimated Cost (Bulk) |
|---|---|---|
| #57 Crushed Stone | Primary Drainage Layer | $45 – $60 |
| 2A Modified Gravel | Structural Base Compaction | $55 – $80 |
| Masonry Sand | Leveling and Screeding | $40 – $55 |
| Reclaimed Firebrick | Heat-Resistant Core | $0 – $100 (Sourced) |
Sourcing Materials: Reclaimed Hardscape vs. Big-Box Junk
Professional-grade outdoor kitchens on a strict budget require sourcing reclaimed materials like high-density clay bricks or cast-off granite remnants that offer superior thermal mass and durability compared to cheap, porous concrete blocks found at retail outlets. Big-box stores sell ‘decorative’ stones that are essentially compressed dust. They will spall and crumble within three years. To hit a $500 target, you need to be a scavenger with an engineer’s eye. Look for ‘seconds’ at local masonry yards—bricks that have slight color variations but are structurally sound. You want high-fired clay. These bricks have a density that resists moisture absorption, preventing the internal pressure that leads to cracking. For the countertop, ignore the $100-per-square-foot granite. Look for remnant pieces at fabrication shops. A 5-foot slab of ‘Uba Tuba’ granite is often tossed in the trash; for $50 and a 6-pack of beer, you can often secure a countertop that will outlast your house. This is where the budget lives or dies. You are trading your time and research for the high-end material quality that a $20,000 budget would normally buy.
“A retaining wall doesn’t fail because of the stone; it fails because of the water trapped behind it.” – Hardscape Engineering Axiom
This principle applies to your kitchen island too. If you build a solid masonry box without weep holes or a permeable base, the hydrostatic pressure from trapped moisture will blow the mortar joints out from the inside. Always plan for water exit strategies.
The Build: Managing Hydrostatic Pressure and Base Compaction
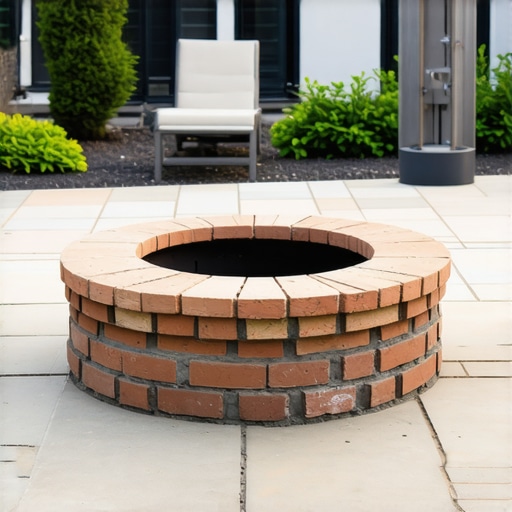
Constructing the kitchen carcass requires a level-plane methodology where each course of masonry is checked for plumb and thermal expansion joints are integrated to prevent cracking during high-heat operation. Use high-strength Type S mortar for any structural joints, as it offers the necessary lateral strength for outdoor applications. [image_placeholder_1] The actual assembly of your $500 kitchen should focus on a ‘dry-stack’ or ‘thin-set’ approach over a reinforced concrete pad. If you can’t afford the $300 for a 4-inch thick fiber-reinforced pad, you must use a ‘flexible’ base. This means your masonry sits on 2 inches of screeded sand over your 6 inches of compacted gravel. This allows the structure to micro-adjust to the earth’s movement. For the heat zone, you must use firebricks (refractory bricks) and fire clay. Regular red bricks will explode if they get too hot because they contain trapped moisture that turns to steam. Your $500 budget allows for a simple rocket stove or a wood-fired grill pit. This is superior to a cheap gas grill that will rust out in one season. You are building for 2026, where sustainability and self-reliance are key garden design trends. Use the following checklist to ensure your build stays on track:
- Call 811 to mark underground utility lines before any excavation.
- Excavate to a depth of 10 inches, extending 6 inches beyond the kitchen footprint.
- Install a non-woven geotextile fabric to separate sub-soil from gravel base.
- Layer gravel in 2-inch ‘lifts,’ compacting each lift with a mechanical plate tamper.
- Use a 1-inch pipe-and-board screed method to create a perfectly level sand bed.
- Butter the back of each stone with masonry adhesive for maximum shear strength.
How much modified gravel do I need for a patio base?
To calculate the gravel needed, multiply the square footage by the desired depth in feet, then multiply by 0.05 to convert to tons. For a standard 10-inch deep base for an outdoor kitchen, you will typically need about 1.5 tons of 2A modified gravel per 25 square feet. Do not eyeball this; under-ordering leads to weak spots, and over-ordering is a waste of your limited budget.
What is the best budget-friendly countertop for an outdoor kitchen?
The most cost-effective professional countertop is a poured-in-place concrete slab using high-early-strength mix and rebar reinforcement. When polished and sealed with a UV-resistant penetrating sealer, it provides a non-porous, food-safe surface that rivals expensive quartz for a fraction of the cost. Concrete is essentially man-made stone; treat it with the same respect for curing times and moisture content.
2026 Garden Design Integration: Low-Maintenance Functional Ecology
The outdoor kitchen of 2026 is not an island; it is an integrated part of a functional ecological landscape that uses native plantings and xeriscaping to reduce maintenance and provide natural cooling through transpiration. Plantings should be kept at least 3 feet away from the masonry base to prevent root girdling and moisture retention against the stone. Avoid the ‘mulch volcano’—piling mulch against your kitchen base will trap moisture and rot any wood components or degrade the mortar joints. Instead, use a 12-inch wide ‘splash strip’ of decorative river rock around the perimeter. This prevents soil from splashing up during heavy rains and aids in rapid drainage. Horticulture is just engineering with living materials. If you select the wrong species—like an invasive mint or a deep-rooting willow—you will find your $500 hardscape being uprooted by the very garden you designed to complement it. Focus on Mediterranean herbs like rosemary or lavender near the kitchen; they thrive in the high-drainage environment of a gravel-base perimeter and provide aromatics for your cooking.
“The success of any landscape installation is inversely proportional to the amount of maintenance it requires in year five.” – Penn State Extension Agronomy Manual
Building this way ensures that your $500 investment grows in value. It won’t be a pile of rubble in three years. It will be the structural anchor of your backyard. Don’t be a hack. Build it deep, build it heavy, and respect the soil.{“@context”:”https://schema.org”,”@type”:”Article”,”headline”:”Designing a 2026 Outdoor Kitchen on a $500 Budget”,”author”:{“@type”:”Person”,”name”:”Veteran Hardscape Foreman”},”datePublished”:”2024-05-20″,”description”:”Learn how to build a professional-grade outdoor kitchen on a $500 budget using engineering principles, base compaction, and reclaimed materials.”,”publisher”:{“@type”:”Organization”,”name”:”Landscaping Authority”}} {“@context”:”https://schema.org”,”@type”:”HowTo”,”name”:”How to Build a Budget Outdoor Kitchen Base”,”step”:[{“@type”:”HowToStep”,”text”:”Excavate the site to 10 inches depth.”},{“@type”:”HowToStep”,”text”:”Lay geotextile fabric to prevent soil mixing.”},{“@type”:”HowToStep”,”text”:”Add and compact 2A modified gravel in 2-inch lifts.”},{“@type”:”HowToStep”,”text”:”Screed a 1-inch bed of masonry sand.”},{“@type”:”HowToStep”,”text”:”Set pavers or masonry units and check for level.”}]}
![Build a $80 Gravel Fire Pit Area [2026 Budget]](https://lawnmajesty.com/wp-content/uploads/2026/07/Build-a-80-Gravel-Fire-Pit-Area-2026-Budget.jpeg)