
Build a $350 2026 Brick Walkway for Side Garden Paths
The Foundation of a 2026 Budget Hardscape
Building a budget-friendly brick walkway requires focusing on excavation depth, base compaction, and material sourcing. For $350, a DIY installer can manage a 20-foot path by prioritizing crushed stone aggregates and polymeric sand joints to prevent frost heave and weed penetration in various soil profiles.
I recently got called out to tear up a $30,000 patio that was sinking because the previous contractor thought they could skip the sub-base compaction. The pavers were expensive, high-end Italian porcelain, but they were sitting on top of soft, uncompacted organic topsoil. Within two seasons, the hydrostatic pressure and freeze-thaw cycles turned that $30,000 investment into a dangerous, trippable mess. It was a hardscape autopsy that proved one thing: the stone is only as good as the dirt beneath it. If you are working with a $350 budget for a side garden path in 2026, you cannot afford to waste money on aesthetics while ignoring the engineering. You have to be smart. You have to be precise. You have to respect the physics of the ground.
The Microscopic Reality of Your Side Garden
Before you touch a shovel, you must understand the soil mechanics. Most side gardens are drainage nightmares. They are often narrow corridors between a house foundation and a fence line where water collects and stagnates. If your soil has a high clay content, it will hold water like a sponge, leading to massive volume changes during temperature shifts. This is why we excavate. You aren’t just making a hole; you are removing the unstable organic material that will rot and settle over time. You need to reach the sub-grade, the raw mineral soil that hasn’t been disturbed in years.
“A retaining wall or pavement system does not fail because of the stone; it fails because of the water trapped behind or beneath it.” – Hardscape Engineering Axiom
How much modified gravel do I need for a patio base?
To calculate your gravel base needs, multiply the total square footage of your path by the depth of the base (minimum 4 inches) and divide by 27 to find the cubic yards required. For a 20-foot by 2-foot path, you need roughly 0.6 cubic yards of modified 21A stone.
The $350 Material Breakdown for 2026
Achieving a professional result on a shoestring budget in 2026 requires sourcing reclaimed bricks or contractor-grade concrete pavers. Do not buy your materials from a boutique landscaping showroom. Look for local masonry yards that have ‘overstock’ or ‘pallet returns.’ The following table breaks down the essential costs for a standard 40-square-foot garden path.
| Material Item | Quantity | Estimated Cost (2026) |
|---|---|---|
| Modified 21A/CR6 Gravel | 0.75 Cubic Yards | $65.00 |
| Concrete Sand (Bedding) | 0.25 Cubic Yards | $30.00 |
| Reclaimed Clay Bricks | 180 Units | $180.00 |
| Polymeric Sand (Joints) | 1 Bag (50lb) | $35.00 |
| Geotextile Fabric | 1 Roll (3’x50′) | $40.00 |
| Total Estimated Cost | — | $350.00 |
The Engineering of the Sub-Grade
You must dig. There is no shortcut. For a side garden path, you are looking at a total excavation depth of 7 to 8 inches. This account for 4 inches of compacted stone, 1 inch of bedding sand, and the 2.25-inch thickness of the brick itself. If you leave grass or roots in that pit, they will decompose. When they decompose, they leave voids. When voids exist, the path sinks. Use a square shovel to keep your sidewalls vertical. This prevents the surrounding soil from migrating into your clean stone base.
What depth to dig for a brick walkway?
For a residential garden path, you must excavate to a depth of 7 to 9 inches to accommodate a 4-inch aggregate base, a 1-inch sand setting bed, and the paver thickness. This depth ensures structural integrity and prevents surface shifting caused by soil expansion.
The Compaction Protocol
This is where the ‘mow-and-blow’ hacks fail. You cannot ‘walk’ the stone down. You need a plate compactor. Renting one for four hours might cost $80, but it is the difference between a path that lasts 20 years and one that lasts 20 months. Run the compactor over the modified stone in 2-inch lifts. If you put 4 inches of stone in at once and try to compact it, the bottom 2 inches will remain loose. Moisture is your friend here. Spray the stone lightly with a hose before compacting. It lubricates the particles, allowing them to slide into a tighter lock. The stone should literally bounce the machine back when it is fully compacted.
“Standard specifications for pedestrian pavements require a minimum of 95% Proctor density to ensure the longevity of the interlocking units.” – ICPI Technical Manual
- Step 1: Clear all vegetation and organic ‘duff’ from the area.
- Step 2: Excavate 8 inches deep, maintaining a 2% slope away from any house foundations.
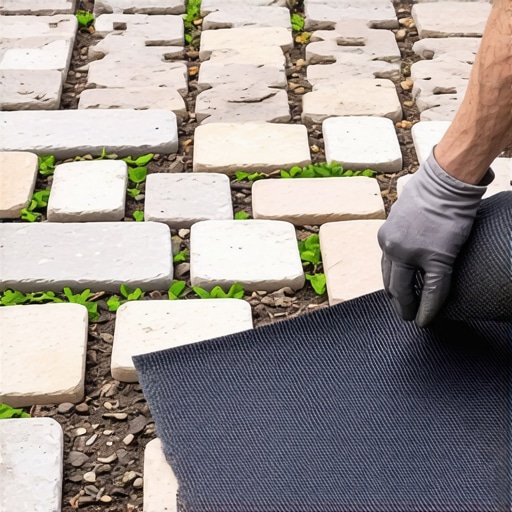
- Step 3: Lay non-woven geotextile fabric to separate the soil from the stone base.
- Step 4: Install 21A modified stone in two 2-inch layers, compacting each layer.
- Step 5: Set screed pipes (1-inch diameter) and pull concrete sand across to create a perfectly flat bed.
- Step 6: Place bricks in the desired pattern (Herringbone provides the best interlock).
- Step 7: Sweep polymeric sand into the joints and vibrate the bricks with the compactor (use a protective mat).
The Myth of the ‘No-Dig’ Walkway
Internet videos will tell you to just lay bricks on the grass. Don’t do it. It will rot. It will heave. You will be out $350 and a weekend of labor with nothing to show for it but a pile of muddy bricks. In a side garden, you are also dealing with root systems from nearby trees or hedges. If you hit a root thicker than 2 inches, do not just cut it if it belongs to a major tree. You may need to bridge over it using a thicker layer of gravel to avoid damaging the tree’s structural stability. However, for most small garden shrubs, clean cuts and a solid stone barrier will prevent roots from lifting your path later.
Advanced Screeding Techniques
The bedding sand layer is not for leveling; it is a cushion. Your leveling happens at the gravel stage. The sand layer should be exactly 1 inch thick, no more. If your sand is too deep, the bricks will shift horizontally under foot traffic. Use two lengths of 1-inch electrical conduit as your screed rails. Pour the sand, pull a straight 2×4 board across the rails, and then remove the pipes. Fill the pipe ‘grooves’ with a trowel before laying your bricks. Do not walk on the sand. Work from the top of the bricks as you lay them. This is called the ‘click and drop’ method. Place the brick against the edge of the previous one and drop it straight down. Do not slide it, or you will ruin the sand bed.
Finalizing with Polymeric Sand
In 2026, the quality of polymeric sand has improved, but the application rules remain the same. The pavers must be bone dry. If there is a hint of moisture on the surface, the polymers will activate and stain the brick face with a white, hazy residue. Sweep the sand into the joints, then use a leaf blower on low power to clear all dust from the surface. Only then do you mist it with water. The water triggers a chemical reaction that turns the sand into a flexible, mortar-like bond. This prevents ants from mining out the joints and keeps weed seeds from germinating in the gaps. It is the final insurance policy for your $350 investment.

![Repairing Cracking Concrete Walkways [Fast Fix]](https://lawnmajesty.com/wp-content/uploads/2026/09/Repairing-Cracking-Concrete-Walkways-Fast-Fix.jpeg)