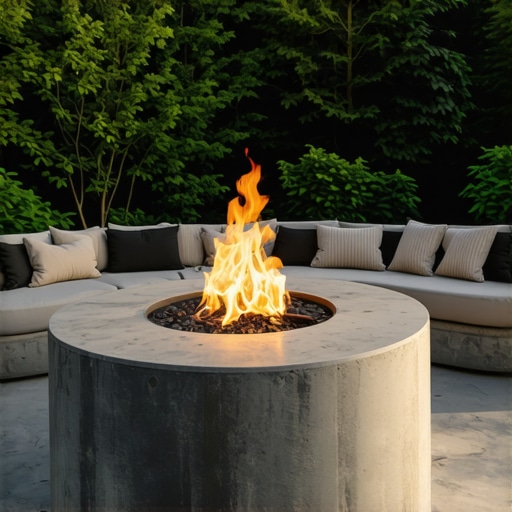
Build a $400 Fire Pit That Won’t Crack in 2026
The Foundation: Why 4 Inches of Modified Stone is Non-Negotiable
Constructing a fire pit foundation requires 4 inches of compacted 2A modified stone to prevent subsidence and frost heave. This structural base manages hydrostatic pressure and provides a stable platform for heavy masonry units, ensuring the pit remains level through multiple freeze-thaw cycles. It is the only way to avoid structural failure.
I recently got called out to tear up a $30,000 patio that was sinking because the previous contractor thought he could get away with using ‘clean stone’ without any fines and no mechanical compaction. Within two seasons, the pavers shifted, the fire pit cracked down the middle, and the homeowner was out five figures. I won’t let you make that mistake with a $400 DIY build. Landscaping is physics. If you ignore the sub-grade, the earth will eventually reclaim your work. Your fire pit isn’t just a place for marshmallows; it is a masonry structure subject to extreme thermal expansion and soil movement. You need to treat the ground like an engineer, not a gardener. Skip the big-box store ‘easy base’ foam pads. Use real stone. Pack it until your arms vibrate. That is how you build for the next decade.
“A retaining wall doesn’t fail because of the stone; it fails because of the water trapped behind it.” – Hardscape Engineering Axiom
How deep should a fire pit base be?
To ensure long-term stability, you must excavate at least 8 inches below the surface. This allows for 4 to 6 inches of compacted aggregate and 2 inches of sand or the thickness of your first course of stone. Do not skip the geotextile fabric. This layer prevents the expensive gravel from migrating into the native clay soil. Without it, your base disappears over time. It is a simple step. Do it right.
Material Selection: Fire Bricks vs. Concrete Pavers
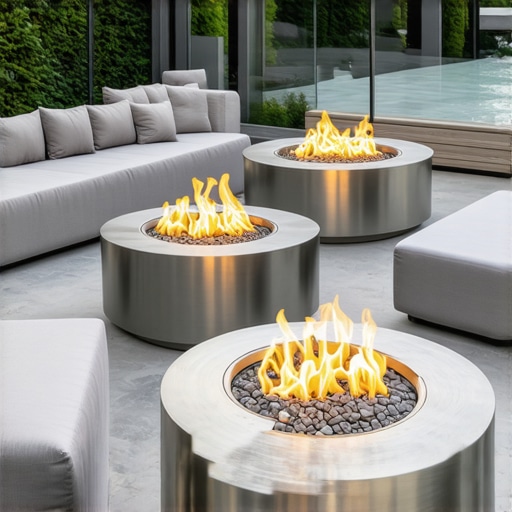
Selecting the right masonry materials involves understanding thermal shock and the coefficient of thermal expansion for concrete and refractory clay. Using fire-rated bricks or a heavy-duty steel ring protects outer decorative stones from direct flame contact, preventing the cracking and spalling common in cheap installations. Don’t use river rocks; they explode.
| Material | Estimated Cost | Heat Resistance | Lifespan |
|---|---|---|---|
| Standard Concrete Blocks | $120 – $180 | Low (May crack) | 2-4 Years |
| Refractory Fire Bricks | $250 – $350 | Extreme | 15+ Years |
| Steel Insert Ring | $50 – $150 | High | 10+ Years |
| ¾-inch Modified Stone | $40 – $60 | N/A (Base only) | Indefinite |
The biggest mistake DIYers make is buying decorative wall blocks and building a fire directly inside them. These blocks are held together by adhesives and compressed concrete that contains moisture. When that moisture hits 500 degrees, it turns to steam. The pressure has nowhere to go. The block cracks. You must line the interior with fire-rated material. If your budget is tight, a $50 steel ring acts as a heat shield. It creates an air gap. This gap is your best friend. It allows the heat to dissipate before it reaches the structural stone.
Will a DIY fire pit crack in the winter?
Cracking in winter is caused by water entering the joints and freezing. To prevent this, use high-heat mortar or leave the joints dry-stacked for drainage. A properly built pit with a gravel center allows water to escape the structure before it turns to ice. Ice expands by 9 percent. That expansion is enough to shatter 4000 PSI concrete. Drainage is the solution.
The Installation Process: Precision and Compaction
Executing a fire pit install requires mechanical compaction of the sub-base and leveling of the first course to ensure structural integrity. Using a plate compactor or a 10-pound hand tamper, you must reach a 95 percent Proctor density to ensure the weight of the stone doesn’t cause the pit to lean over time. Every inch matters. Level it twice.
“Base compaction is the single most critical factor in the longevity of any interlocking pavement or segmental wall system.” – ICPI Technical Manual
- Mark the diameter 12 inches wider than the actual pit.
- Excavate 8 inches deep and remove all organic material.
- Lay heavy-duty non-woven geotextile fabric.
- Add 2 inches of modified stone and tamp until rock hard.
- Repeat until the base is 4 inches thick and perfectly level.
- Set the first course of blocks below the finished grade.
- Insert the steel ring or firebrick liner.
- Fill the center with 3 inches of clean decorative stone for drainage.
When you are tamping the stone, the tamper should literally bounce off the surface. If it feels mushy, you have too much moisture or not enough compaction. Keep hitting it. This is the part people skip because it is hard work. It is also the reason their pits look like junk in three years. Your fire pit should be a monolithic structure that moves as one unit with the earth. Use a string level. A quarter-inch lean at the bottom becomes a two-inch lean at the top. It looks sloppy. Be a pro. Use a level on every single block.
The Critical Air Flow and Drainage Strategy
Proper fire pit ventilation and sub-surface drainage are essential to maintain combustion efficiency and prevent hydrostatic buildup within the masonry walls. By leaving weep holes in the bottom course, you allow oxygen to feed the fire and water to exit the structure, preventing moisture-related degradation. Oxygen is fuel. Without it, you just have a smoke pot.
I tell my crew: if you don’t fix the soil grading first, every plant or stone you put in the ground is just expensive compost. The same applies here. Make sure the area around the fire pit slopes away at a 2 percent grade. You don’t want a swimming pool under your fire. If water sits in the base, it softens the soil. Soft soil leads to leaning walls. It is a chain reaction. Use 1 inch of clean stone in the very center of the pit to allow ash and water to filter down. Don’t cap the bottom with concrete. It will trap water and eventually crack. Nature always wins against rigid structures. Build a flexible system instead.
How much modified gravel do I need for a fire pit base?
For a 48-inch diameter pit, you will need approximately 0.25 cubic yards of modified stone. This accounts for a 60-inch excavation area to provide a 6-inch over-run on all sides. Buying in bulk from a landscape supply yard is cheaper than buying bags. It will cost about $15. Don’t be cheap. Buy the extra bag. You will need it for leveling.
The first burn is a test of your patience. Don’t build a bonfire on day one. Start small. Let the materials acclimate to the heat cycles. In year one, you might see some settling. That is normal. If you built a proper base, it will be minimal. Adjust a block here or there. If you used a $400 budget wisely on the base and the liner rather than just the pretty stones, you will have a feature that lasts until 2036, not just 2026. Masonry is a legacy. Build it like you mean it.

![How to Build a $500 Flagstone Fire Pit Area [DIY 2026]](https://lawnmajesty.com/wp-content/uploads/2026/05/How-to-Build-a-500-Flagstone-Fire-Pit-Area-DIY-2026.jpeg)