
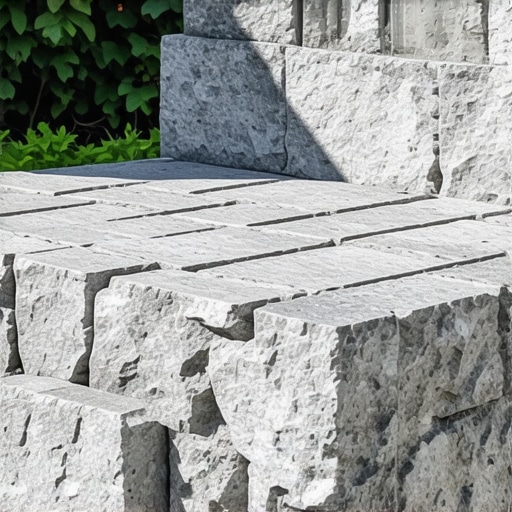
How to build a stone bench that lasts decades
Building a stone bench that truly lasts for decades requires moving beyond garden design aesthetics and into the realm of structural civil engineering. Most homeowners and ‘mow-and-blow’ contractors treat a bench as a furniture piece, but a professional hardscape foreman treats it as a gravity-retaining structure subject to soil mechanics, frost heave, and hydrostatic pressure.
The Hardscape Autopsy: Why Most Stone Benches Fail
To build a stone bench that lasts decades, you must focus on the sub-grade preparation and compaction rather than the surface stones, using a 2A modified gravel base compacted to 98% density. I recently got called out to tear up a $30,000 patio that was sinking because the previous contractor ignored the soil’s load-bearing capacity and simply ‘scratched the dirt’ before laying stone. The bench on that project had tilted four inches to the left because the moisture in the heavy clay soil underwent a freeze-thaw cycle that the base couldn’t absorb. It was a mess. If you don’t fix the soil grading first, every stone you put in the ground is just expensive rubble waiting to move. We had to excavate three feet down just to find stable subsoil. Don’t be that guy. Spend your time in the dirt, not just on the masonry. It will rot if the water has nowhere to go. Stop looking at the top; look at the bottom.
“A retaining wall doesn’t fail because of the stone; it fails because of the water trapped behind it.” – Hardscape Engineering Axiom
The Science of Soil and Sub-Base Preparation
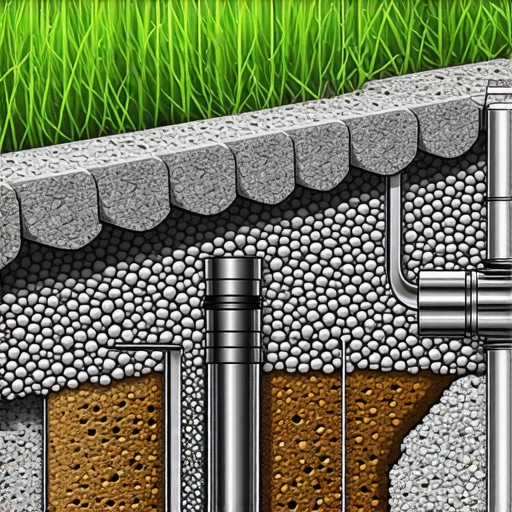
Sub-base preparation involves excavating below the frost line and replacing expansive native soils with non-frost-susceptible aggregates like crushed limestone or granite. In most temperate climates, this means digging deep enough to bypass the organic O-horizon and A-horizon topsoil layers. You are looking for the B-horizon, the mineral-heavy subsoil. If you build on topsoil, the decomposition of organic matter will cause micro-settling that cracks your mortar joints within three seasons. [IMAGE_PLACEHOLDER] Use a plate compactor. A hand tamper is for amateurs. You need 3,000 to 5,000 pounds of centrifugal force to lock those aggregate pieces together. If the tamper doesn’t literally bounce off the ground, you aren’t done yet. Do not skip this.
How much modified gravel do I need for a stone bench base?
Calculating the volume of your base is a matter of cubic footage: (Length x Width x Depth) / 27. For a standard six-foot bench, you should have a base that extends 6 inches beyond the footprint of the stone in every direction. This ‘over-build’ distributes the PSI (pounds per square inch) of the stone across a larger surface area of soil, preventing localized sinking. We typically aim for a minimum of 6 inches of compacted 2A modified gravel for a dry-set bench and up to 12 inches if we are pouring a concrete footer for a mortared bench.
| Material Type | Drainage Rating | Compaction Stability | Primary Use Case |
|---|---|---|---|
| 2A Modified (Crushed Limestone) | Moderate | High | Primary structural base layer |
| #57 Clean Stone | High | Moderate | Drainage layers and French drains |
| Stone Dust / Screening | Poor | Low | Final leveling (Use sparingly) |
| Polymeric Sand | N/A | High (Lateral) | Joint stabilization |
Material Selection: Moving Beyond Big-Box Quality
Selecting the right stone involves analyzing the mineralogy and absorption rates of the rock to ensure it can withstand thermal expansion without fracturing. Avoid the sedimentary ‘soft’ stones found at big-box retailers. They are often high-porosity limestones that soak up water like a sponge. When that water freezes, the stone spalls and flakes. Look for high-density igneous rocks like granite or basalt, or well-cemented metamorphic rocks like quartzite or certain high-grade flagstones. Check the absorption rate; it should be less than 1%. If the stone feels ‘light’ for its size, it’s full of air pockets. That’s a failure point.
What is the best stone for a permanent garden bench?
Granite is the gold standard for hardscaping because of its crystalline structure and resistance to acid rain and chemical weathering. While limestone is easier to cut and shape, it is susceptible to etching from acidic environmental factors. If you are in a region with heavy freeze-thaw cycles, a monolithic granite slab for the seat is the only way to guarantee a fifty-year lifespan. It won’t delaminate. It won’t crack. It just sits there, defying physics. For the legs or piers, use heavy block units rather than thin veneers which are prone to popping off when moisture gets behind them.
The Engineering Checklist for Stone Assembly
Before you set a single stone, you must have a plan for lateral stability and drainage. Here is the professional checklist for the build phase:
- Call 811 to mark underground utilities before excavation starts.
- Ensure the base is pitched at 1% to 2% to shed water away from the structure.
- Use a non-woven geotextile fabric to separate the subsoil from your gravel base.
- Check for ‘crowning’ in your stone slabs to prevent puddling on the seat.
- If using mortar, use Type S masonry cement for its higher compressive strength.
- Apply a high-quality silane-siloxane sealer to prevent salt and moisture penetration.
“Compaction is the single most critical factor in hardscape longevity, preventing the ingress of water and subsequent frost heave.” – ICPI Technical Manual
Managing Hydrostatic Pressure and Moisture
Managing moisture involves creating a dedicated path for water to exit the area surrounding the stone bench base using clean stone and perforated pipe if necessary. Water is the enemy of stone. It weighs 62.4 pounds per cubic foot. When it gets trapped behind a stone pier or under a footer, it exerts massive pressure. In a lawn care context, over-watering from irrigation systems often saturates the ground around hardscapes. This is why a ‘French drain’ or a simple layer of #57 stone is vital. It breaks the capillary action that pulls water upward. This isn’t just landscaping; it’s hydraulic management. If your bench is at the bottom of a slope, you aren’t just building a seat; you’re building a dam. Plan accordingly.
The Maintenance Horizon: Year One and Beyond
Once the bench is set, the work isn’t over. The first year is the ‘settling’ period. You should check the level of the bench after the first major ground thaw. If you did your compaction right, it won’t move more than a sixteenth of an inch. Keep the weeds away from the base. Roots from nearby trees or invasive turf grasses like Kentucky Bluegrass can exert surprisingly high pressure as they grow, potentially lifting even heavy stones. This is why we use pre-emergents in the surrounding garden design. Keep the organic debris cleared. Leaf litter turns into compost, and compost holds moisture against the stone, leading to biological staining and moss growth which, while some find it ‘picturesque’, actually speeds up the weathering process of the stone’s surface. Keep it clean. Keep it dry. Keep it stable.
![Building a 2026 Simple Stone Bench [DIY]](https://lawnmajesty.com/wp-content/uploads/2026/09/Building-a-2026-Simple-Stone-Bench-DIY.jpeg)
![Fix Your 2026 Sinking Deck Post for Under $100 [DIY]](https://lawnmajesty.com/wp-content/uploads/2026/05/Fix-Your-2026-Sinking-Deck-Post-for-Under-100-DIY.jpeg)