![Building a 2026 Simple Stone Bench [DIY]](https://lawnmajesty.com/wp-content/uploads/2026/09/Building-a-2026-Simple-Stone-Bench-DIY.jpeg)
Building a 2026 Simple Stone Bench [DIY]
The Anatomy of a Static Load: Why Your Stone Bench Project Starts in the Dirt
Building a stone bench requires excavating a minimum of 6 to 8 inches of subsoil and replacing it with compacted 21A or 57 stone to mitigate frost heave and ensure structural stability. A stone bench is not just a seat; it is a concentrated static load that exerts significant pounds per square inch (PSI) on the soil profile, necessitating a professional-grade foundation to prevent settling. Failing to address the soil density and drainage will lead to a lopsided, dangerous structure within two freeze-thaw cycles.
I recently got called out to tear up a $30,000 patio that was sinking because the previous contractor thought he could just throw down some sand over heavy clay and call it a day. The entire grade was holding water like a bathtub, and the hydrostatic pressure had turned his expensive pavers into a roller coaster. When we pulled the stones, the ‘base’ was nothing but mud. That is the reality of cutting corners in hardscaping. If you are building a bench, you are building a small-scale civil engineering project. You do not just set stones on grass. You fight gravity and the expansion-contraction cycle of the earth. I have spent twenty years fixing ‘simple’ DIY projects that became expensive demolition jobs because the homeowner did not respect the soil pH or the moisture content of the subgrade. Dirt is not just dirt; it is a matrix of minerals and air pockets that will betray you if you do not compact it to 95% of its maximum density.
“A retaining wall or stone structure doesn’t fail because of the stone; it fails because of the water trapped behind or beneath it.” – Hardscape Engineering Axiom
How much gravel do I need for a stone bench base?
To calculate your base material, multiply the length of your excavation by the width and the depth in feet, then divide by 27 to get cubic yards. For a standard 4-foot bench, you typically need 0.5 to 1 ton of crushed stone to create a stable 6-inch lift. Do not use pea gravel. Pea gravel is round and acts like ball bearings; you need angular crushed limestone or granite that locks together under compaction. This creates a bridge that distributes the weight of the bench across the subsoil. If you ignore this, the bench will sink. Period.
| Material Type | Compaction Rating | Drainage Capability | Best Use Case |
|---|---|---|---|
| 21A (Crusher Run) | High | Moderate | Primary load-bearing base |
| #57 Stone | Moderate | Excellent | Drainage layers/French drains |
| Masonry Sand | Low | High | Leveling layer only (1 inch max) |
| Pea Gravel | None | High | Decorative only; never for bases |
The Blueprint: Engineering a Bench That Outlasts the House
Most garden design tutorials focus on the aesthetics of the stone. I focus on the mineralogy. If you are using sandstone or limestone, you need to understand the porosity. High-porosity stones absorb water. When that water freezes, it expands by 9%, causing the stone to spall or crack. This is why I prefer basalt or high-density granite for the seat. The landscaping industry is full of cheap imported stone that looks good for six months and then starts shedding layers like an onion. You want stone that is ‘hard’ in the geological sense.
What is the best stone for an outdoor bench?
The best material for a DIY stone bench is natural cleft flagging or dimensional thermal-top granite because of its high compressive strength and resistance to acid rain erosion. Avoid soft shales or thin slate, which lack the structural integrity to bridge the gap between two pillars without a steel or concrete lintel. Always verify the stone’s absorption rate; anything over 3% will likely fail in northern climates with heavy freeze cycles.
- Excavation: Dig 8 inches deep, 6 inches wider than the bench on all sides.
- Geotextile: Lay down a non-woven filter fabric to keep the stone from mixing with the mud.
- Base Layer: Add 4 inches of modified gravel, wetting it slightly before tamping.
- Compaction: Use a plate compactor or a heavy hand tamper. The tamper should literally bounce off the ground when you’re done.
- Leveling: Use a 1-inch layer of coarse sand to fine-tune the seat height.
- Adhesive: Use a polyurethane hardscape adhesive between layers. Do not rely on gravity alone.
“Structural stability in hardscaping is 90% subterranean; what the eye sees is merely the veneer of the engineering below.” – ICPI Installation Standards
Soil Logic and the Physics of Settling
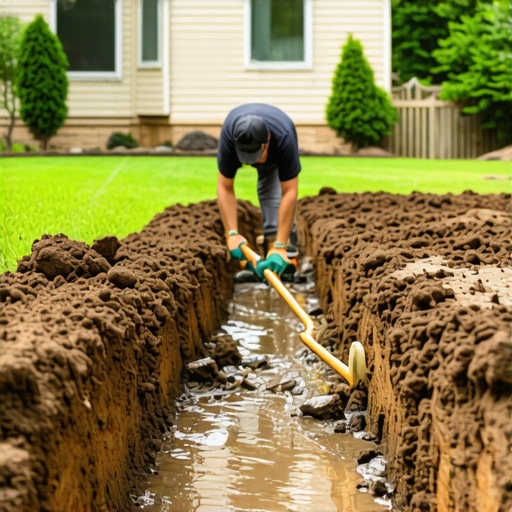
In lawn care and landscaping, we talk about soil structure for plants, but for hardscaping, we talk about shear strength. If your yard has high clay content, it will hold water and expand. This is why a French drain or a simple wicking layer of clear stone is often necessary even for a small bench. You must protect the base-layer compaction. If the soil beneath your base gets saturated, it loses its ability to hold the load. This is the Information Gain the big-box stores won’t tell you: the bench doesn’t move because the stones are heavy; it moves because the water under it is powerful. I have seen 500-pound slabs of granite shifted three inches in a single winter because of a clogged drainage plane. If you live in an area with heavy red clay, like Georgia, or expansive silt, you need to go deeper with your base. It is a scientific fact.
How do I stop a stone bench from wobbling?
Wobbling is a symptom of uneven screeding or improper compaction. To fix it, do not use wooden shims. Wood rots. Use stainless steel washers or thin granite chips embedded in hardscape adhesive. The goal is to achieve 100% surface contact between the pillar stones and the seat slab to distribute the static load evenly. If the load is concentrated on a single point, the stone will eventually fracture. It is basic physics.
The Long-Term Maintenance Cycle
Once the bench is built, your job isn’t done. The first year is the ‘settling in’ period. Check the level every spring. If you see more than a quarter-inch of shift, your drainage is failing. In 2026, we are seeing more extreme weather patterns, which means more hydrostatic pressure. Use a breathable silane-siloxane sealer on the stone. This doesn’t make it look ‘wet’ like those cheap hacks love; it penetrates the molecular structure to repel water while letting the stone ‘breathe.’ This prevents the efflorescence (that white salty crust) from forming. Don’t skip this. It will rot if you don’t protect it. Keep mulch volcanoes away from the base. Mulch holds moisture against the stone, leading to biological staining and algae growth that can eventually break down the mineral bonds of the stone. A clean, dry base is a permanent base.
![Build a $500 Natural Stone Retaining Wall [2026 DIY]](https://lawnmajesty.com/wp-content/uploads/2026/06/Build-a-500-Natural-Stone-Retaining-Wall-2026-DIY.jpeg)