Stop 2026 Weed Growth with This Heavy-Duty Cardboard Hack
The Engineering Logic of Soil Preparation
I always drill into my new crew members: if you don’t fix the soil grading and biology first, every plant you put in the ground is just expensive compost. I remember a job in ’14 where a client spent four grand on perennials but refused to properly prep the site. Six months later, the Canada Thistle and Bermuda grass had punched through three inches of premium cedar mulch like it was nothing. This is why we use cardboard. It is the poor man’s engineering fabric, but when applied with the precision of a hardscape base, it works better than any chemical cocktail on the market. We are not just covering weeds; we are performing a biological reset.
Why Sheet Mulching is the Superior Weed Suppression Method
To stop weed growth by 2026, you must implement a sheet mulching strategy that leverages cellulose decomposition to create a hypoxic environment for invasive weed seeds. This heavy-duty cardboard hack relies on the carbon-to-nitrogen ratio to build topsoil while physically blocking light from reaching the soil seed bank, effectively starving the photoblastic seeds of their primary energy source. It is about physics and biology, not just aesthetics.
When we talk about weed suppression, we are talking about Photosynthetically Active Radiation (PAR). If a seed can’t see the sun, it can’t trigger the hormonal response to germinate. But most people do it wrong. They throw a single thin layer of cardboard down and wonder why the Nutsedge is laughing at them. You need to think about the hydrostatic pressure of the soil and how moisture moves through the profile. Cardboard acts as a temporary moisture regulator, keeping the subsoil cool and inviting for earthworms (Lumbricus terrestris) which are your primary aeration tools. Don’t skip the science here. You are building a soil food web from the bottom up.
“Sheet mulching is a passive way to improve soil structure while managing competition by mimicking the natural leaf litter cycle of a forest floor.” – Cornell University Agricultural Extension
How much modified gravel do I need for a patio base?
While this article focuses on soil prep, many ask about hardscape foundations. For a standard patio, you need 4 to 6 inches of 21A or 3/4-inch modified gravel, compacted in 2-inch lifts. This ensures the PSI (pounds per square inch) of the load is distributed evenly, preventing the kind of settling that ruins a garden design. Always calculate volume by multiplying square footage by depth in feet, then dividing by 27 to get cubic yards. Do not guesstimate. Precision is the difference between a patio and a pile of rocks.
The Blueprint: Selecting and Prepping Your Materials
The success of this 2026 weed-stop strategy depends entirely on the integrity of the cardboard used in the process. You cannot use the glossy, plastic-coated shipping boxes from high-end electronics. Those coatings contain heavy metals and microplastics that disrupt mycorrhizal fungi colonization. You need raw, brown corrugated cardboard. The thicker, the better. Look for double-walled boxes. These provide the structural resistance needed to withstand freeze-thaw cycles without disintegrating before the weeds have been properly smothered.
| Material Type | Decomposition Rate | Weed Suppression Rating | Impact on Soil pH |
|---|---|---|---|
| Corrugated Cardboard | 6-9 Months | Excellent | Neutral |
| Landscape Fabric | 10+ Years | Poor (clogs pores) | None |
| Wood Chips (6 inches) | 1-2 Years | Moderate | Slightly Acidic |
| Black Plastic | Indefinite | Good (but kills biology) | None |
How thick should the cardboard layer be?
For aggressive weeds like Quackgrass or Field Bindweed, a single layer is a joke. You need a minimum of two layers with an 8-inch overlap at every seam. Think of it like shingling a roof. If there is a gap, the weeds will find it. They are opportunistic. They hunt for light. I have seen rhizomatous grasses travel three feet horizontally under a barrier just to find a pinhole of light. Don’t give them the chance. It will rot eventually, but it needs to stay solid for at least one full growing season.
Step-by-Step Installation: The Forensic Build
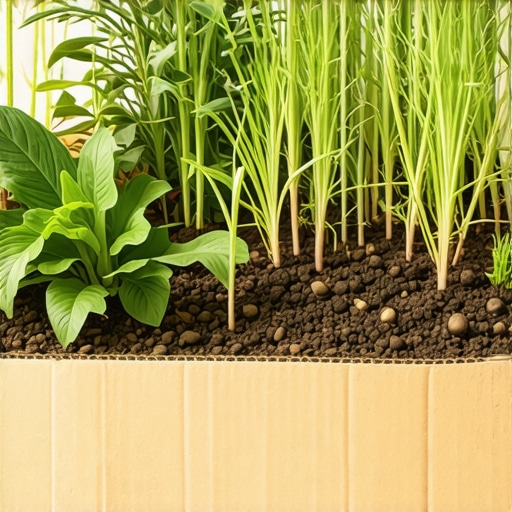
Start by scalping the area. Set your mower to the lowest setting. We want the existing vegetation to be as stressed as possible before we bury it. This reduces the carbohydrate reserves in the root systems. [image_placeholder] After scalping, apply a high-nitrogen amendment like blood meal or composted poultry manure. This prevents nitrogen immobilization. When the bacteria start eating the carbon-heavy cardboard, they will steal nitrogen from the soil. If you don’t provide an extra source, your future plants will turn yellow and stunted. This is a common rookie mistake.
- Scalp the area: Reduce green mass to minimum.
- Hydrate the soil: Wet soil conducts heat and encourages microbial activity.
- Layer the cardboard: 8-inch minimum overlap. No gaps.
- Wet the cardboard: It must be saturated to begin the breakdown process.
- Top-dress: Apply 3 inches of compost followed by 3 inches of wood chips.
Once the cardboard is down, you must wet it thoroughly. Dry cardboard is a hydrophobic barrier. It will shed water away from your soil. You want it to act like a sponge. Once saturated, top it with 3 inches of organic compost. This provides the inoculant of beneficial bacteria. Finally, cap it with 3 to 4 inches of aged hardwood mulch. This protects the compost from UV degradation and adds a second layer of physical weed suppression. This lasagna layering creates a thermal mass that speeds up the death of the weeds beneath.
“Organic matter is the engine of the soil, but carbon-to-nitrogen ratios dictate the speed of that engine and the health of the resulting tilth.” – USDA NRCS Soil Health Manual
The Reality of Maintenance and Year One Expectations
Don’t expect a miracle overnight. In the first year, you might see some perennial weeds try to poke through the edges. Kill them immediately. This is a war of attrition. By the time 2026 rolls around, the cardboard will have completely integrated into the soil profile, leaving behind a rich, loamy layer of humus. Your soil’s cation exchange capacity (CEC) will be higher, meaning it can hold onto nutrients better. You are literally building better dirt while you sleep.
If you are planting through this system, use a sharp spade or a bulb planter to cut a clean hole through the cardboard. Do not pull the cardboard up. Dig your hole, plant your nursery stock, and then tuck the mulch back around the root flare. Ensure the root flare is visible; never make mulch volcanoes. It will rot the bark. Keep it clean. Keep it scientific. This isn’t just gardening; it’s biological engineering for a maintenance-free future.

![Stop Killing 2026 Peonies: 3 Drainage Secrets [Zone 6]](https://lawnmajesty.com/wp-content/uploads/2026/05/Stop-Killing-2026-Peonies-3-Drainage-Secrets-Zone-6.jpeg)
![Stop 2026 Root Girdling in Potted Trees [Pruning Fix]](https://lawnmajesty.com/wp-content/uploads/2026/06/Stop-2026-Root-Girdling-in-Potted-Trees-Pruning-Fix.jpeg)