Why Your Outdoor Kitchen Needs a Better Lighting Plan
Why Your Outdoor Kitchen Needs a Better Lighting Plan
I recently got called out to tear up a $30,000 patio that was sinking because the previous contractor tried to bury indoor-rated Romex in a shallow trench without conduit. The moisture infiltration caused a short that fried the entire outdoor kitchen circuit and eventually undermined the base layer as they kept digging to find the fault. It was a disaster. This is the reality of cutting corners in hardscape engineering. When we talk about an outdoor kitchen, we are not just talking about a grill and some stone; we are talking about a complex intersection of civil engineering, electrical load management, and safety. A lighting plan is not an accessory; it is a fundamental structural requirement. If you cannot see the internal temperature of a ribeye at 9:00 PM, your $50,000 kitchen is a failure. But more importantly, if your lighting design does not account for the thermal expansion of stone or the corrosive nature of soil moisture, your investment is rotting from the inside out.
The Engineering Reality of Outdoor Kitchen Illumination
An effective outdoor kitchen lighting plan requires a strategic mix of task lighting, ambient lighting, and safety lighting to ensure visibility during food preparation and prevent accidents. By integrating high-quality LED fixtures into the hardscape design, you maintain a functional workspace while protecting your electrical infrastructure.
Most homeowners think about the pretty glow, but I think about the 12.5 volts hitting the furthest fixture on the run. We deal with something called voltage drop. In a low-voltage system, if you run 100 feet of 12/2 wire with a 100-watt load, the fixtures at the end will be dim and orange because the resistance in the copper wire eats the energy. We solve this by using multi-tap transformers that can output 13, 14, or 15 volts to compensate for the distance.
“Standard practice for outdoor electrical installations mandates that all circuits serving outdoor kitchens be GFCI protected and buried at a depth of at least 18 inches for standard cable or 6 inches for conduit.” – National Electrical Code (NEC) Standards
This is about physics, not aesthetics. If your contractor is using cheap plastic stakes from a big-box store, fire them. We use heavy-gauge brass or copper fixtures that can withstand the weight of a snow blower and the acidic nature of nitrogen-heavy fertilizers used in lawn care.
How many lumens do I need for an outdoor grill station?
For a standard 36-inch grill station, you need a minimum of 100 to 150 lumens of task lighting aimed directly at the cooking surface to ensure food safety. This light must have a high Color Rendering Index (CRI) to accurately show the color of the meat during the searing process.
| Feature | Budget Plastic Fixtures | Professional Brass/Copper | |
|---|---|---|---|
| Lifespan | 1-2 Years | 15+ Years | |
| Weather Resistance | Poor (Brittle) | High (Corrosion-proof) | |
| Serviceability | Disposable | Replaceable LEDs | |
| Heat Management | Low (Melts) | High (Heatsink properties) |
Task Lighting: The Difference Between Medium-Rare and Charcoal
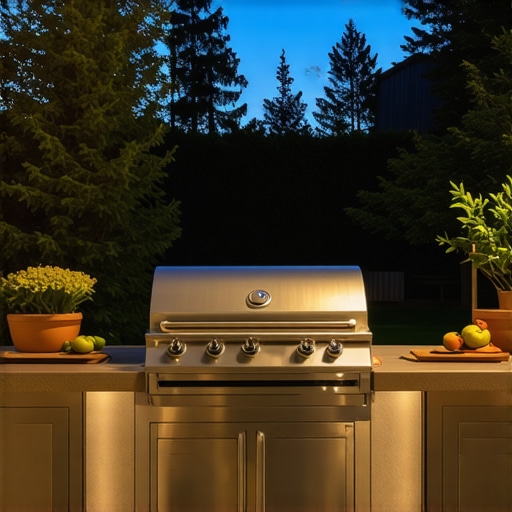
Task lighting in an outdoor kitchen provides focused illumination on prep areas, grill surfaces, and sinks to enable safe tool handling and food processing. By utilizing under-counter LED tapes or swivel-neck spotlights, you eliminate shadows that lead to knife slips or improperly cooked meals.
You have to consider the glare index. If you mount a bright light behind the chef, they will cast a shadow over the grill. If you mount it too low, you blind the person sitting at the bar. We use grazing techniques and shielded fixtures. Grazing involves placing a light source close to a masonry surface to highlight the texture of the stone. This is where hardscaping and lighting meet. If your stone veneer is uneven, grazing will show every flaw. This is why I demand a perfectly level screed layer and tight joints in my stonework. We also have to account for heat. A grill can reach 700 degrees Fahrenheit. If your fixture is mounted on the backsplash without a proper thermal break, the LED driver will fry in a week. Heat dissipation is an engineering hurdle that cheap fixtures cannot clear.
What is the best wire gauge for landscape lighting?
The best wire gauge for most residential landscape lighting projects is 12-gauge wire, which is thick enough to prevent significant voltage drop over 100-foot runs. For heavier loads or longer distances exceeding 150 feet, 10-gauge wire is recommended to maintain consistent brightness across all fixtures.
- Calculate total wattage of all fixtures before buying a transformer.
- Select a transformer with at least 20% overhead capacity for future expansion.
- Map out wire runs to minimize voltage drop and avoid ‘daisy-chaining’.
- Choose color temperatures between 2700K and 3000K for a natural look.
- Ensure all grill-side fixtures are heat-rated and made of non-corrosive metal.
The Science of Ambient and Safety Lighting
Ambient lighting creates the overall mood of the outdoor space while safety lighting focuses on tripping hazards like steps, elevation changes, and retaining wall edges. Proper path lighting must be spaced according to the fixture’s beam spread to avoid a ‘runway’ effect while ensuring clear footpaths.
We have to talk about the biology of the yard. Too much light at the wrong frequency disrupts the local ecosystem. I always recommend 2700K (Kelvin). It is a warm white that mimics the glow of an incandescent bulb. 5000K light looks like a hospital hallway and attracts every bug in the county. You do not want a cloud of moths over your steak. Furthermore, safety lighting is a liability issue. If you have a two-step transition in your patio and it is not illuminated by integrated step lights, you are one lawsuit away from losing that kitchen.
“A retaining wall doesn’t fail because of the stone; it fails because of the water trapped behind it, and a lighting plan fails when it ignores the moisture levels of the soil.” – Hardscape Engineering Axiom
We use pressure-treated connectors and heat-shrink tubing for every wire splice. If you use wire nuts and electrical tape, the moisture will seep in, the copper will oxidize, and your lights will flicker and die. In my firm, we do not allow tape. We use grease-filled connectors that create a waterproof seal. It takes longer. It costs more. It works forever.
The Installation Process: Precision Over Speed
The installation process for outdoor kitchen lighting involves trenching below the frost line, installing conduit for high-voltage lines, and mounting integrated fixtures during the masonry build. This phase requires coordination between hardscape contractors and electricians to ensure all wiring is hidden and protected from the elements.
Timing is everything. You cannot decide you want lighting after the concrete is poured. Well, you can, but it involves a diamond-blade saw and a lot of your money. We install the ‘sleeves’ (PVC pipes) through the base material before the gravel is compacted. We use a 3000-pound vibratory plate tamper to compact the modified gravel. If those sleeves are not scheduled-40 PVC, the tamper will crush them. This is the difference between a pro and a hack. We also consider the ‘settling in’ period. In the first year, soil will move. Frost will heave. If your wires are pulled tight, they will snap. We leave ‘service loops’—extra coils of wire at every fixture—so the earth can move without breaking the circuit. It is a game of inches and PSI. Do not let anyone tell you otherwise. This is the technical reality of building something that lasts. Every plant you put in the ground near these lights should be at the drip-line of your irrigation to avoid constant soaking of the fixtures. Good garden design is about harmony between the wet (plants) and the dry (electricity).
![Why Your 2026 Deck Stain is Peeling [Preparation]](https://lawnmajesty.com/wp-content/uploads/2026/06/Why-Your-2026-Deck-Stain-is-Peeling-Preparation.jpeg)
![Build a $300 Boulder Fire Pit Circle [2026]](https://lawnmajesty.com/wp-content/uploads/2026/06/Build-a-300-Boulder-Fire-Pit-Circle-2026.jpeg)