3 Mistakes to Avoid When Planting Your First Tree
3 Mistakes to Avoid When Planting Your First Tree: A Professional Forensic Guide
I always drill into my new crew members: if you don’t fix the soil grading first, every plant you put in the ground is just expensive compost. I have spent two decades remediating failed landscapes where homeowners—and frankly, many ‘mow-and-blow’ outfits—treated a living tree like a fence post. A tree is a complex biological engine, a hydraulic pump that moves hundreds of gallons of water through a vascular network of xylem and phloem. When you ignore the engineering requirements of the root system, you aren’t just planting a tree; you are scheduling a funeral. In my firm, we don’t ‘garden.’ We perform civil engineering with biological components. Success in hardscaping and landscaping requires understanding that 80% of the work happens below the soil grade before the first leaf even unfurls. If you skip the forensics of the site, the tree will fail. It is that simple.
Mistake 1: Burying the Root Flare and Suffocating the Vascular System
Planting a tree too deep suffocates the vascular system and leads to stem girdling roots that eventually choke the tree to death. You must locate the root flare—the point where the trunk widens at the base—and ensure it remains visible above the soil grade to allow for proper gas exchange and to prevent bark decay. In the industry, we call this the ‘Death Pipe’ effect. When soil or mulch is piled against the trunk bark, it traps moisture. This moisture leads to the development of adventitious roots that wrap around the trunk. As the trunk expands, these roots tighten like a noose.
“The most common cause of tree failure in the landscape is improper planting depth, specifically burying the root flare which leads to long-term decline and structural instability.” – International Society of Arboriculture (ISA) Best Management Practices
How deep should a tree be planted in heavy clay soil?
In heavy clay soil, you should plant the tree slightly high, with the root flare 1 to 2 inches above the surrounding grade to prevent hydrostatic pressure from waterlogging the root ball. Clay has high capillary action but low macro-pore space. If you drop a tree into a deep hole in clay, you have effectively created a bathtub. The water sits, the roots rot, and the tree dies from anaerobic conditions. Check the depth twice. Dig once. Don’t skip this.
Mistake 2: The “Teacup” Effect and Improper Excavation
Amending only the planting hole with rich potting soil creates a ‘teacup’ that traps water and discourages root penetration into the surrounding native soil. Dig a hole three times wider than the root ball but no deeper, maintaining a firm subgrade to prevent settling while allowing lateral root expansion into the rhizosphere. When a tree’s roots hit the interface between soft, amended soil and hard, compacted native soil, they often turn inward, circling the hole rather than pushing outward. This is a mechanical failure of garden design. We want the roots to chase nutrients and water into the local environment.
“The width of the planting hole is more important than the depth; roots must be able to expand horizontally into the surrounding soil profile to establish structural integrity.” – University of Florida IFAS Extension
How much modified gravel do I need for a patio base near trees?
You should never use modified gravel or compacted sub-base within the drip line of a tree, as it destroys the soil porosity required for root respiration. If you are integrating hardscaping near a specimen tree, use a suspended pavement system or permeable pavers to maintain oxygen diffusion. Compaction is the silent killer. A 95% Proctor density is great for a driveway, but it is a concrete wall to a root hair.
| Material Type | Drainage Rate | Root Penetration Potential | Best Use Case |
|---|---|---|---|
| Native Sandy Loam | High | High | Primary planting medium |
| Heavy Red Clay | Very Low | Low | Requires aggressive aeration |
| Amended Potting Mix | Variable | Moderate | Containers only, avoid in-ground holes |
| Compacted Backfill | None | None | Structural support only, never for roots |
Mistake 3: The Mulch Volcano and Irrigation Blindness
Piling mulch against the trunk bark creates a moisture trap that invites fungal pathogens and rodents while preventing root flare exposure. Apply a 2-3 inch layer of organic mulch in a wide ring, keeping it 3 inches away from the root flare, and provide deep, infrequent irrigation to force roots down. Lawn care hacks love the ‘mulch volcano’ because it looks tidy for a week. In reality, it causes phloem necrosis. Regarding water, most people douse the leaves or the trunk. The tree doesn’t drink through its bark. It drinks through feeder roots at the drip line. One inch of water per week, delivered slowly to saturate the top 12 inches of soil, is the rule. Deep, not frequent.
Tree Planting Pre-Flight Checklist
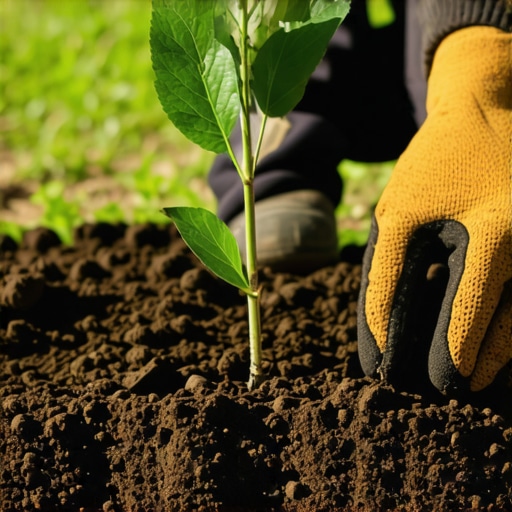
- Locate the root flare by removing excess soil from the top of the nursery ball.
- Dig a hole 3x the width of the root ball with sloped sides.
- Scarrify the edges of the hole to break up glazing caused by shovels.
- Check the pH levels to ensure compatibility with the tree species.
- Remove all twine, burlap, and wire baskets from the top third of the root ball.
- Backfill with native soil, tamping lightly to remove large air pockets.
- Apply a 3-foot radius of mulch, 3 inches deep, in a ‘donut’ shape.
The first year is the most critical. You are managing transpiration rates against root establishment. If the tree wilts, don’t just dump water; check the soil moisture 4 inches down. If it is wet, you are drowning it. If it is dry, you are starving it. Garden design is 10% aesthetics and 90% agronomy. Use your eyes, but use your hands more. Feel the soil. Smell the root ball for sulfur odors indicating rot. Do the work correctly the first time, or don’t do it at all.