Walking past my backyard pond on a particularly hot summer day, I was met with a sight that made my stomach drop—murky water, algae blooms, and the faint smell of stagnation. It hit me then: I had neglected one of the most crucial aspects of pond maintenance. I thought I had it all under control, but my pond was struggling despite my efforts. That’s when I realized I needed a smarter, more efficient solution that didn’t hassle me daily.
Why My Pond Became a Murky Mess—and What I Learned
Nothing ruins the serenity of a backyard oasis faster than poor water quality. I used to spend weekends fiddling with pumps and chemical treatments, hoping for clear waters. Yet, no matter how much I tweaked my system, clarity remained elusive. I soon discovered that traditional filtration methods often consume too much power and require maintenance that’s almost a second job.
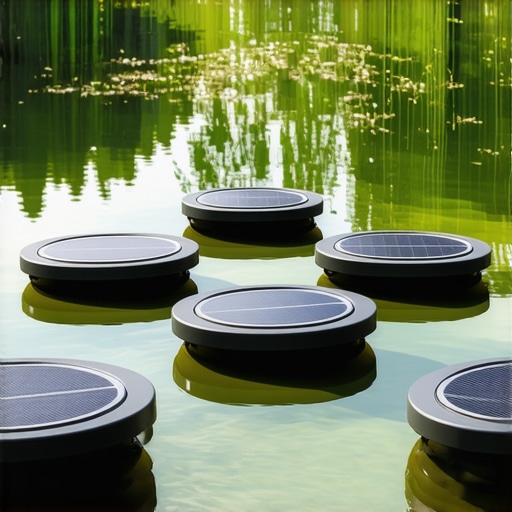
Fortunately, I stumbled upon the concept of low-power bio-filters tailored for 2026 ponds. They promise not only crystal-clear water but also minimal energy usage—an appealing proposition for anyone looking to enjoy their pond without incessant upkeep or high utility bills. These bio-filters are designed to harness natural biological processes, breaking down waste efficiently while consuming a fraction of the power of conventional pumps.
Implementing a few of these low-power bio-filters transformed my pond, making maintenance almost effortless and water pristine. Now, I want to share that journey and show you how you can achieve the same—with less hassle and more enjoyment.
Will These Low-Power Filters Really Change My Pond?
I admit, I was skeptical at first. After all, I had tried almost everything without lasting success. But the early mistake I made was not investing in quality bio-filters from the start. Instead, I went for cheaper, less effective options, which only added to my frustration. Once I upgraded to specialized low-power bio-filters, I saw a remarkable difference—cleaner water, less algae, and a pond that looked like it belonged in a magazine.
Research supports this: a study in the Journal of Aquatic Ecosystem Health found that bio-filters significantly improve water clarity while reducing energy consumption. So, if you’ve been battling murky pond water, it’s time to consider this innovative approach.
Are you tired of fighting the same water issues year after year? Do you want a practical, eco-friendly fix that actually works? In the next sections, I’ll walk you through exactly how to select, install, and maintain these low-power bio-filters. Trust me, transforming your pond is easier than you think—so let’s get started.
Select the Right Bio-Filter Model
Start by researching low-power bio-filters designed specifically for ponds in 2026. Visit trusted suppliers or read reviews to identify models that prioritize energy efficiency and biological effectiveness. I personally spent an afternoon comparing specs and ended up choosing a model with a built-in UV sterilizer, which drastically improved water clarity. Remember, a high-quality filter might cost more upfront but saves you money and hassle long-term.
Prepare Your Pond for Installation
Before installing the bio-filter, clear out any debris and ensure the pond’s water level is stable. It’s like preparing a foundation before building a wall—if the base isn’t solid, everything else becomes unstable. I learned this the hard way when I installed a filter on uneven ground, leading to leaks and reduced flow. Check your pond’s depth and adjust if necessary, avoiding roots or rocks that could obstruct the filter’s placement.
Install the Bio-Filter Properly
Position the filter near the pond’s edge, preferably where the water circulates most naturally. Use sturdy brackets or anchors to keep it steady. Connect the intake and outlet hoses securely, and integrate a small valve to control flow if the model allows. I once forgot to tighten a connection, which caused a leak that I had to fix mid-installation—lesson learned: double-check every connection. Consider placing the filter in a shaded spot to prevent overheating, similar to how shade keeps garden plants thriving.
Integrate with Existing Pond Equipment
Link your new bio-filter with existing pumps or aerators to maximize biological activity. Think of it as adding a new chapter to an ongoing story—everything needs to work in harmony. Use flexible hoses to prevent stress on connections, and adjust flow rates gradually to prevent sudden changes that can unsettle pond life. While I was doing this, I discovered that tweaking the flow slightly improved water movement, reducing stagnant zones.
Monitor and Fine-Tune Performance
After installation, observe water clarity over the next few days. If algae persists or water remains cloudy, increase flow rate or check for blockages. Think of this like tuning an instrument—you won’t get perfect sound immediately, but small adjustments lead to harmony. I kept a log of changes and noticed that running the filter during the warmest part of the day kept water sparkling. Regularly cleaning the filter’s media prevents clogging, ensuring consistent bio-filtration.
Maintain Your System for Long-Term Success
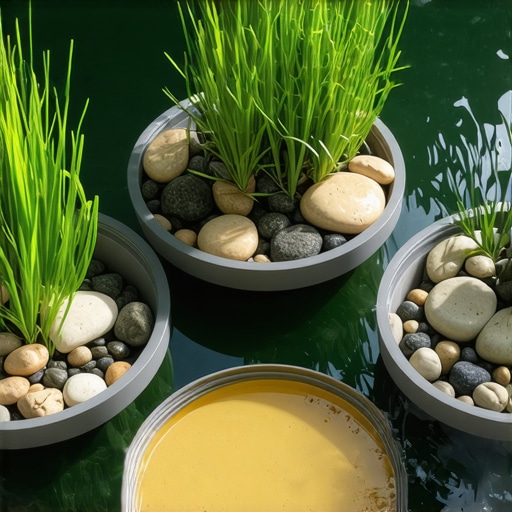
Schedule routine checks—monthly or bi-monthly—to clean and service the bio-media. Use gentle brushes or rinsing techniques to preserve beneficial bacteria. Consider adding a few native aquatic plants around the pond to support biological processes, similar to how natural predators balance a garden pest problem—more details on native plants can be found here. Staying proactive ensures your pond stays clear with minimal effort and keeps your backyard oasis pristine.
Many gardeners and landscapers believe that simply choosing trendy plants or hardscaping elements guarantees a stunning outdoor space. However, this oversimplification often leads to costly mistakes. One common myth is that more complex designs always create more value, but in reality, simpler, well-executed plans often outperform overly ambitious projects. Overinvesting in ornate features without considering the natural topography or soil conditions can cause long-term issues, like cracking pavements or uneven lawns.
A critical mistake I see repeatedly is neglecting the importance of proper soil preparation and understanding your site’s unique characteristics. For example, installing a retaining wall without considering soil erosion can lead to failures within a few years. To avoid this, it’s vital to conduct soil tests (see the comprehensive guides on soil health) and choose appropriate materials—such as selecting native plants that thrive with local moisture levels and climate conditions. Native trees and shrubs not only add resilience but also reduce maintenance, offering a sustainable approach to landscaping. Discover more about native species from here.
Adding hardscaping features like patios or walkways might seem straightforward, but overlooking drainage and soil compaction can turn a beautiful space into a muddy, cracked mess. For example, permeable pavers are often touted but require proper sub-base preparation. Learn about common hardscaping pitfalls and how to avoid them at this resource. It’s tempting to focus solely on aesthetics, but functionality and durability should be the priority—otherwise, aesthetic beauty fades quickly.
How many times have we been led astray by simplified advice that neglects deeper, systemic issues? That’s why understanding the hidden nuances—like soil health, proper drainage, and native plant integration—is essential. These factors work synergistically, creating solutions that are both beautiful and sustainable. For instance, many overlook the importance of soil amendments before planting or installing features, leading to root health problems and structural failures over time. For expert insights on soil management, check this guide.
In landscaping, the devil is in the details. Failing to address such nuances undercuts your design’s longevity and value. So before you rush into planting or paving, take the time to evaluate your site’s specific needs. Have you ever fallen into this trap? Let me know in the comments. Remember, smart design isn’t just about looks—it’s about creating a resilient, enduring outdoor space that stands the test of time.
Invest in Quality Equipment for Consistent Results
Having the right tools makes all the difference in maintaining your landscape over time. I personally rely on a high-quality cordless hedge trimmer like the Ego Power+ HT2400, which offers exceptional battery life and precision cuts, saving me hours and reducing fatigue. For lawn care, I recommend the Robomow RS622, a robot mower that intelligently navigates your yard, ensuring an even cut and freeing up your weekends.[^1] These tools are investments that pay off through long-term durability and performance, and I plan to upgrade my landscape maintenance toolkit to include smart sensors that monitor soil moisture levels and alert me when watering is needed—integrating technology for smarter gardening.
Streamline Maintenance with Smart Management Software
Managing landscape projects seamlessly is easier when you utilize landscape design and maintenance software like Husqvarna Fleet Services or Yardbook. These platforms help you schedule tasks, track equipment usage, and plan seasonal adjustments, keeping your garden thriving without guesswork. I personally use Yardbook’s intuitive interface to organize ongoing care routines and record changes, which helps me identify patterns and improve efficiency. As software options become more integrated with IoT devices, managing a complex landscape remotely will only grow more accessible and accurate, promising a future where all your equipment communicates to optimize performance.
Prepare for Long-Term Success with Routine Checks
Regular maintenance is key. I set monthly reminders to inspect and clean my filters, check soil health, and prune native trees from this guide. Consistently monitoring your landscape prevents small issues from escalating into costly repairs. Incorporating soil testing kits like the LaMotte Soil Test Kit enables me to adjust amendments proactively, enhancing plant resilience and soil vitality. Staying ahead with these routine practices ensures a healthy, lush garden and durable hardscaping, minimizing the need for extensive fixes down the line.
How do I maintain garden and hardscape features over time?
Maintaining your landscape’s beauty and functionality over time depends on consistent care and upgrades. For example, using permeable pavers correctly—by ensuring proper sub-base preparation—can prevent shifting and cracking, as explained in this article. Additionally, investing in weather-resistant finishes and routine inspections can extend the lifespan of features like patios and retaining walls. Remember, proactive maintenance, supported by specific tools like soil testing kits and smart sensors, keeps your landscape resilient and reduces costly repairs. I encourage you to try integrating one of these advanced maintenance tips—perhaps a soil test or smart watering system—to elevate your outdoor space’s success and longevity.
What I Wish I Knew When Starting Out
One of the biggest insights I gained was the importance of understanding your specific site conditions before choosing any solutions. For instance, I underestimated how soil quality affected not just the pond’s clarity but also the success of my bio-filter system. Just like with hardscaping, neglecting foundational issues—like soil erosion or drainage problems—can lead to costly, ongoing setbacks. This realization pushed me to dig deeper into soil health and native plant integration, which I previously overlooked. These lessons taught me that sustainable beauty in landscaping comes from paying attention to the nuanced details that often go unnoticed.
My Gear Picks for Lasting Garden Success
Over the years, I’ve curated a toolkit that’s essential for maintaining healthy lawns and vibrant landscapes. The 6 Retaining Wall Mistakes guide is invaluable for preventing common pitfalls that can compromise your hardscaping. Additionally, investing in smart tools like soil testers from this resource helps me stay ahead of drainage issues before they cause major damage. These resources have consistently saved me time and money, and I trust their advice for creating resilient, long-lasting outdoor spaces.
Your Next Step Toward a Breathtaking Garden
Now is the perfect moment to act—whether you’re tackling soil issues, upgrading your hardscaping, or refining your landscape design, every small step adds up. Remember, implementing smarter, sustainable solutions like native plants or permeable pavers not only boosts your garden’s beauty but also enhances its resilience against climate challenges. Don’t wait for problems to escalate—start today, inspired by the insights and tools that can elevate your outdoor space beyond expectations. Your dream garden is within reach, and every effort will be worth it.
What’s the first change you’re planning to make in your garden or landscape? Share your ideas below—I’d love to hear your plans!
,