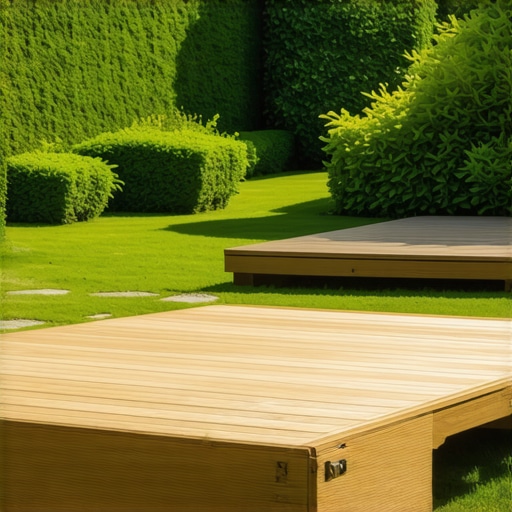
Build a $300 2026 Floating Deck for Sloped Yards
The Gravity Problem: Why Slopes Kill Cheap Decks
Building a $300 floating deck on a sloped yard in 2026 requires more than just a hammer and a prayer; it demands a fundamental understanding of hydrostatic pressure, lateral load distribution, and ground-contact lumber chemistry. For a sloped site, a floating deck must be engineered to resist ‘creep’—the slow downhill migration of structures caused by gravity and soil moisture cycles. Failure to account for the grade will result in a deck that buckles or slides within two seasons.
I always drill into my new crew members: if you don’t fix the soil grading first, every plant you put in the ground is just expensive compost. The same logic applies to hardscaping. I’ve seen guys throw down $5,000 worth of premium Ipe on a base that wasn’t compacted to 95% Proctor density. Within a year, the boards were screaming under the tension of a shifting foundation. If you are working with a $300 budget, you cannot afford to do the job twice. You have to get the physics of the slope right the first time, or you are just building a very expensive pile of scrap wood.
“A retaining wall or floating foundation doesn’t fail because of the stone or wood; it fails because of the water trapped behind or beneath it.” – Hardscape Engineering Axiom
How do you anchor a floating deck on a slope?
To anchor a floating deck on a sloped yard without permanent concrete footings, you must use deck blocks or TuffBlocks recessed into the uphill grade to create a level plane while ensuring the downhill blocks are stabilized by a compacted gravel sub-base. This prevents the frame from sliding down the incline during heavy saturation events.
The $300 Bill of Materials (2026 Reality)
In the 2026 market, lumber prices and fastener costs require a surgical approach to purchasing. You aren’t building a 20×20 dance floor; you are likely targeting an 8×8 or 4×8 observation platform. Every piece of wood must be UC4A Grade Ground Contact pressure-treated lumber. Anything less will rot in the dirt.
| Material Item | Quantity/Type | Estimated Cost (2026) | Purpose |
|---|---|---|---|
| Rim Joists & Beams | 2x6x8 PT (UC4A) | $85.00 | Structural Framing |
| Decking Boards | 5/4″ x 6″ x 8′ PT | $110.00 | Walking Surface |
| Foundation Blocks | TuffBlocks / Concrete Blocks | $45.00 | Load Distribution |
| Structural Screws | 3″ #10 Ceramic Coated | $25.00 | Frame Shear Strength |
| Base Material | #57 Crushed Limestone | $35.00 | Drainage & Stability |
Don’t buy the cheap bright-zinc screws. They will dissolve. The chemicals in modern ACQ (Alkaline Copper Quaternary) pressure-treated wood are highly corrosive to non-galvanized metals. Use ceramic-coated or stainless steel. It is non-negotiable.
What is the best wood for a cheap floating deck?
The best wood for a budget-conscious project remains Southern Yellow Pine (SYP) treated for ground contact (UC4A), as it offers the highest modulus of elasticity for the price point, ensuring the deck can handle the dynamic loads of a sloped environment without excessive deflection.
The Engineering of the Floating Frame
A floating deck on a slope is essentially a sled that shouldn’t move. You must excavate ‘shelves’ into the slope. These aren’t just holes; they are flat benches cut into the native soil. I demand my crews clear the organic duff layer—that soft, spongy topsoil—until they hit the B-horizon or compacted subsoil. If you build on top of grass, the deck will sink as the grass dies and decomposes. It’s basic biology.
“Organic matter in the subgrade is the primary cause of localized settlement in light-frame structures.” – USDA Soil Mechanics Manual
Once your benches are cut, fill them with three inches of compacted #57 stone. This breaks the capillary rise of water. Without this, your wood stays wet 24/7. Wet wood is food for fungi. Dry wood lasts decades. It is that simple.
Step-By-Step Installation Checklist
- Site Marking: Use batter boards and string lines to find the high point of the slope.
- Excavation: Remove 4 inches of soil at each block location to reach stable subgrade.
- Gravel Base: Pour and hand-tamp 3 inches of crushed stone for drainage.
- Block Leveling: Set your deck blocks. Use a 4-foot level to ensure the uphill and downhill blocks are on the same plane.
- Framing: Construct the outer box. Square it using the 3-4-5 triangle method. Check the diagonals.
- Joist Installation: Space joists at 12 inches on center (O.C.) if using 5/4″ decking to prevent ‘bounce’.
- Fastening: Drive two screws into every joist intersection. No ‘toenailing’ with cheap nails.
The Maintenance Protocol: Year One and Beyond
Your deck will move. In the first year, the wood will lose approximately 15% of its moisture content. This causes checking (small cracks) and shrinkage. Do not seal the wood immediately. Let it ‘weather’ for 60 days until water no longer beads on the surface. Then, apply a paraffinic oil-based stain. Avoid the ‘deck restores’ or thick acrylic paints sold at big-box stores. They trap moisture inside the wood. It will rot. Stick to oils that penetrate the grain.
Check the level every spring. If the slope has shifted, use a pry bar to lift the low corner and shim it with additional composite shims or gravel. A deck is a living structure. Treat it like one. Avoid mulch ‘volcanoes’ near the base. Keep the air flowing. Airflow is your best friend against rot.

![Build a $500 Outdoor Kitchen Base [2026 Budget]](https://lawnmajesty.com/wp-content/uploads/2026/06/Build-a-500-Outdoor-Kitchen-Base-2026-Budget.jpeg)