![Build a $1000 2026 Flagstone Patio [DIY Step-by-Step]](https://lawnmajesty.com/wp-content/uploads/2026/05/Build-a-1000-2026-Flagstone-Patio-DIY-Step-by-Step.jpeg)
Build a $1000 2026 Flagstone Patio [DIY Step-by-Step]
The Physics of a $1000 Flagstone Patio
Building a 2026 flagstone patio for $1000 requires a footprint of approximately 100-120 square feet, utilizing local natural cleft stone and a compacted crushed stone base. Success depends on soil excavation depth, 95% Proctor density compaction, and proper pitch for drainage away from foundations. This isn’t about aesthetics; it is about managing weight and water. If you fail to account for the 150 pounds per cubic foot that your base material weighs, your patio will fail before the first frost.
I recently got called out to tear up a $30,000 patio that was sinking because the previous contractor used pea gravel instead of a compacted base. Water sat in the voids. The freeze-thaw cycle turned it into a topographical map of a mountain range. It was a $30,000 lesson in why engineering matters more than the color of the stone. I had to tell the homeowner their expensive ‘custom’ build was actually an expensive pile of rubble. We excavated six inches of mud that used to be a ‘base.’ Don’t be that homeowner. If you want a patio that lasts until 2050 on a 2026 budget, you follow the physics, not the Pinterest board.
How much modified gravel do I need for a patio base?
To calculate gravel volume for a patio base, multiply the square footage by the decimal depth (e.g., 4 inches is 0.33 feet) and divide by 27 to find cubic yardage. For a 100-square-foot patio with a 6-inch base, you need roughly 2 tons of 2A modified crushed stone to ensure structural integrity and proper drainage.
The Ground-Up Build: Planning for 2026 Realities
Planning a hardscape project starts with the dirt. You are not just laying stones; you are building a gravity-retaining structure. Most DIYers underestimate the volume of spoils. Excavating 100 square feet to a depth of 8 inches generates nearly 3 cubic yards of loose soil. That is roughly 4 tons of dirt you have to move. If you don’t have a plan for where that dirt goes, your $1000 budget is already blown on dump fees. We focus on the subgrade first. The subgrade is the native soil at the bottom of your hole. If it is heavy clay, you need more stone. If it is sandy loam, you might get away with less, but the compaction requirements remain the same.
“A retaining wall doesn’t fail because of the stone; it fails because of the water trapped behind it.” – Hardscape Engineering Axiom
In 2026, material costs are the primary constraint. To stay under $1000, you must source stone from a local quarry, not a boutique landscape center. Natural cleft flagstone is cheaper than sawn-edge stone. It is also more durable in freeze-thaw climates because the natural layers allow for microscopic expansion. You are looking for ‘builders grade’ or ‘stand-up’ pallets. Avoid the thin stuff. Anything under 1.5 inches thick will crack under its own weight if the base shifts even a millimeter. Stick to 2-inch thick stone for a dry-set application.
Material Breakdown and Cost Projections
| Material Item | Quantity (100 sq ft) | Estimated 2026 Cost | Critical Function |
|---|---|---|---|
| 2A Modified Gravel | 2.5 Tons | $150 – $200 | Structural load-bearing layer |
| Sand / Stone Dust | 1 Ton | $80 – $120 | Leveling and stone bedding |
| Natural Cleft Flagstone | 1.2 Tons | $450 – $550 | Walking surface and wear layer |
| Polymeric Sand | 2 Bags | $80 – $100 | Joint stabilization and weed inhibition |
| Geotextile Fabric | 120 sq ft | $40 – $60 | Separation of subgrade and base |
Notice the proportions. Nearly 40% of your budget is buried underground. That is intentional. I have seen guys spend $900 on the stone and $100 on the base. Those are the patios I get paid to demo three years later. The geotextile fabric is non-negotiable. It prevents the expensive gravel from migrating into the soft subgrade. Without it, the stones will eventually find the mud. It will rot. Don’t skip this.
Phase 1: Excavation and the Science of Slope
Start by marking your perimeter. Use 811 to locate your utilities. I don’t care if you think you know where the lines are; call them. Once clear, excavate to a depth of 8 inches. This allows for 4 inches of compacted gravel, 1 inch of bedding sand, and 2 inches of stone. You must maintain a 2% slope away from any structure. That is a 1/4-inch drop for every foot of distance. Use a transit level or a string line. If you pool water against your foundation, you aren’t a landscaper; you are a basement-flooding liability.
What is the best base for flagstone?
The best base for flagstone is a 4-to-6-inch layer of dense-graded aggregate (DGA) or 2A modified stone, compacted in 2-inch lifts. This creates a non-yielding foundation that allows for hydrostatic pressure relief while preventing the individual stones from shifting or ‘rocking’ over time during seasonal temperature changes.
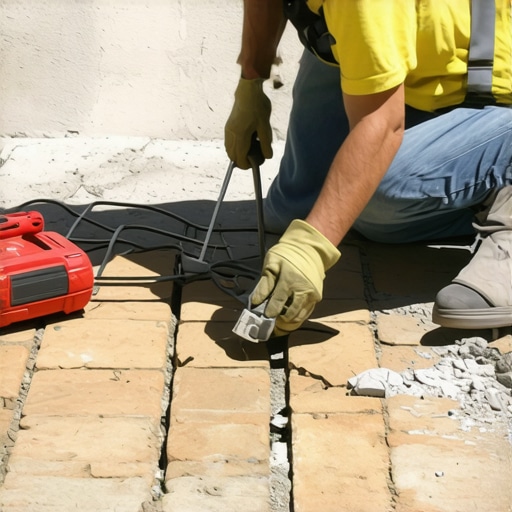
Phase 2: Compaction and Screeding
Rent a plate compactor. Do not use a hand tamper. A hand tamper is a tool for people who want to do the job twice. You need 3000-4000 pounds of centrifugal force to lock those aggregate pieces together. Run the compactor in overlapping passes. The surface should be so hard that a 200-pound man doesn’t leave a footprint. If the tamper literally bounces off the surface with a metallic ‘ping,’ you have reached maximum density. That is the sound of success.
“Standard Proctor Density tests ensure that the soil or aggregate has reached the optimal moisture content for maximum structural stability.” – Civil Engineering Materials Manual
Once the base is set, lay your 1-inch screed pipes. Use concrete sand for the bedding layer. This isn’t structural; it is for micro-adjustments. Pull your screed board across the pipes to create a perfectly flat, sloped plane. Do not walk on this sand once it is pulled. If you step on it, you create a soft spot. Every soft spot becomes a puddle in two years. Think like a surgeon. Precision is the only thing that saves you from rework.
Phase 3: Setting the Puzzle
Natural flagstone is irregular. This is where the biology of the project meets the engineering. Lay your largest stones first. These are your anchors. Keep your joints between 1/2 inch and 1.5 inches. Anything wider is a trip hazard and a weed nursery. Use a rubber mallet to set each stone into the sand. Check every single stone with a 4-foot level. You aren’t looking for ‘flat’; you are looking for ‘plane.’ The whole patio must follow the slope you established in the base layer.
- Excavate 8 inches deep and clear all organic matter (roots, sod).
- Install 3.1-ounce non-woven geotextile fabric.
- Layer 2A modified stone in 2-inch increments, wetting each layer.
- Compact base to 95% Proctor density using a vibratory plate compactor.
- Screed 1 inch of coarse washed sand.
- Set flagstone, ensuring 1-2 inch joint spacing.
- Sweep polymeric sand into joints and activate with a fine mist.
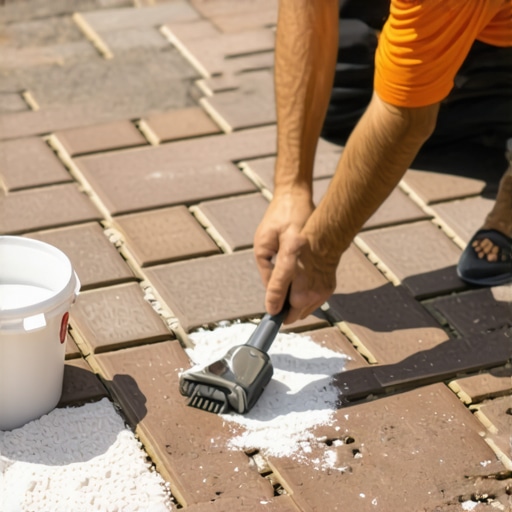
The Final Lock: Polymeric Sand Technology
In 2026, we don’t use plain stone dust in joints. We use polymeric sand. This is a high-tech blend of graded sand and binders that hardens when wet. It keeps out ants, it keeps out weeds, and it prevents the stones from shifting laterally. Sweep it into the joints until they are full. Run the plate compactor over the stones with a protective mat to settle the sand. Top it off. Blow off every single grain of dust from the surface of the stones. If you leave dust on top and then wet it, you will stain your stones forever. Once clean, mist it with water. Not a hose blast, a mist. The polymer needs to hydrate, not wash away.
Post-Build Maintenance and Year One Expectations
Your patio is a living system. In the first year, you may see minor ‘settling’ of the joint sand. This is normal. What you shouldn’t see is ‘heaving.’ If a stone pops up, your base was too thin or your drainage was poor. Keep the leaves off the stone; the tannins in oak and maple leaves will stain the rock if left to rot. Every 3-5 years, you might need to top off the polymeric sand. Other than that, leave it alone. No high-pressure power washing—you’ll just blow out the joints. A garden hose is enough. You built it right. It’s solid. Now go sit on it. It will outlast your mortgage if you followed these steps.
![Building a $100 2026 Natural Stone Path [DIY]](https://lawnmajesty.com/wp-content/uploads/2026/07/Building-a-100-2026-Natural-Stone-Path-DIY.jpeg)