5 2026 Small-Space Patios Using $2 Concrete Pavers
The Hardscape Autopsy: Why Cheap Pavers Fail (and How to Make Them Last)
I recently got called out to tear up a $30,000 patio that was sinking because the previous contractor ignored the basic laws of physics. They spent a fortune on high-end travertine but skimped on the base layer, resulting in a swampy, shifting mess within two seasons. When we talk about $2 concrete pavers, most people assume they are ‘cheap’ or ‘temporary,’ but that is a fundamental misunderstanding of hardscaping engineering. A paver is simply a wear surface; the actual patio is the 6 to 8 inches of engineered stone hidden beneath it. If you build the base correctly, a $2 concrete brick will outlast a $20 natural stone slab installed by a hack. We see this constantly in garden design: homeowners focus on the aesthetic ‘skin’ and ignore the ‘skeleton.’ It will fail. Don’t skip the prep work. In this guide, we are looking at 2026 trends for small spaces where efficiency and structural integrity meet.
“A retaining wall doesn’t fail because of the stone; it fails because of the water trapped behind it.” – Hardscape Engineering Axiom
The Science of the Small-Space Foundation
A small-space patio using $2 concrete pavers requires a minimum 4-inch compacted base of modified gravel and a 1-inch bedding sand layer. Structural integrity depends entirely on soil compaction and edge restraints, rather than the price point of the individual concrete units used. Before you buy a single brick, you must test your soil. If you are dealing with heavy clay, your excavation depth must increase to allow for better drainage. Hydrostatic pressure is the enemy of any landscaping project. Without proper lawn care and grading away from the patio, water will sit in the base, freeze, and heave your pavers into a jagged mess.
How much modified gravel do I need for a patio base?
To calculate your base material, multiply the square footage of your patio by the depth of the base (usually 0.33 feet for a 4-inch base), then divide by 27 to get cubic yards. Always add a 10% compaction factor to your order. For a 10×10 patio, you will need approximately 1.5 cubic yards of #2A modified stone. This stone must be compacted in 2-inch lifts. If you try to compact 4 inches at once, the bottom 2 inches will remain loose. The plate compactor should literally bounce off the surface when you hit 98% Proctor density. It is loud. It is tiring. It is mandatory.
Top 5 Small-Space Patio Designs for 2026
These designs leverage the 4×8-inch standard concrete paver, which typically retails around $2 per unit, to create high-end hardscaping results on a limited footprint.
| Design Style | Paver Pattern | Best For | Material Cost Est. |
|---|---|---|---|
| The Modernist Grid | Stack Bond | Minimalist yards | $250-$400 |
| The Heritage Courtyard | Herringbone 45-degree | High-traffic areas | $300-$500 |
| The Linear Extension | Running Bond | Narrow side yards | $200-$350 |
| The Woven Terrace | Basketweave | Traditional gardens | $280-$450 |
| The Mixed-Media Inlay | Framed Grid | Small urban patios | $350-$600 |
- The 45-Degree Herringbone: This is the gold standard for hardscaping. The interlock of the 4×8 pavers at a 45-degree angle provides the highest lateral strength. In 2026, we are seeing this paired with dark charcoal polymeric sand to give the $2 pavers a high-contrast, premium look.
- The Modernist Stack Bond: For a clean, architectural feel, align the pavers in perfect rows. This requires a laser-straight screed. Any variance in the bedding sand will show immediately. Use a 1-inch PVC pipe as a screed guide to ensure a perfectly flat plane.
- The Running Bond with Soldier Course: Lay the main field in a simple brick pattern but frame the entire patio with a ‘soldier course’ (pavers laid perpendicular to the edge). This provides a structural ‘bookend’ that prevents the field from shifting.
- The Basketweave Revival: This pattern uses pairs of pavers laid at 90-degree angles to each other. It is excellent for garden design because it requires very few cuts, saving you time and reducing waste. It creates a woven texture that looks intentional and historical.
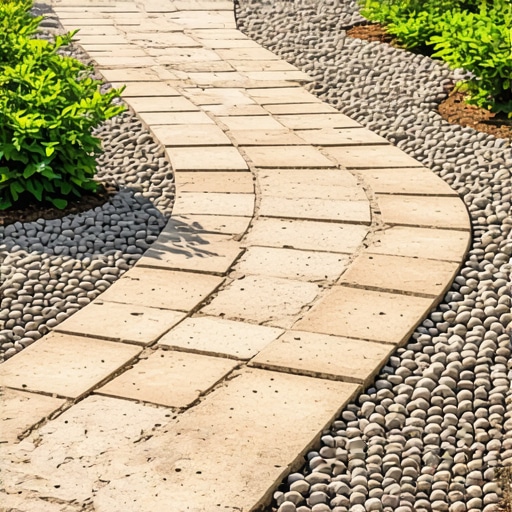
- The Permeable Inlay: Instead of tight joints, leave 1/2-inch gaps between $2 pavers and fill them with fine granite chips or decorative pea gravel. This allows for 100% water infiltration, reducing runoff and helping the local lawn care ecosystem by recharging the groundwater.
What is the best sand for paver joints?
You must use polymeric sand for any patio intended to last more than one season. Regular play sand or masonry sand will wash out, inviting weeds and ants to colonize your hardscaping. Polymeric sand contains chemical binders that activate when wet, creating a flexible, water-resistant seal between the pavers. This is the difference between a patio and a pile of bricks. Follow the manufacturer’s instructions to the letter: sweep the sand into the joints, vibrate it down with a plate compactor, sweep again, and then use a leaf blower to remove 100% of the dust from the surface before wetting. If you leave dust on the pavers, it will haze. You won’t get it off. It will look terrible.
The Critical Execution: Compaction and Drainage
You cannot eyeball a grade. For every foot of patio, you need a 1/4-inch drop away from any structures. This is non-negotiable. Use a transit level or a string line with a line level. If water pools on your landscaping, the soil underneath will saturate and lose its load-bearing capacity. This is basic soil mechanics.
“Standard interlock is achieved through the frictional forces generated by the jointing sand against the vertical faces of the pavers.” – ICPI Technical Manual
We use a non-woven geotextile fabric between the subgrade soil and the gravel base. This prevents the ‘migration of fines.’ Without it, your expensive gravel will eventually sink into the mud, and your patio will follow. Don’t listen to the guys at the big-box store who say you don’t need it. They don’t have to fix it when it fails in three years. I do.
Essential Hardscaping Checklist for 2026
- Utility Marking: Call 811 before you dig. Striking a gas line will ruin your weekend.
- Excavation Depth: Minimum 7 inches (4″ base + 1″ sand + 2″ paver).
- Base Material: #2A Modified or 21A crush-and-run stone. No ‘all-purpose’ sand.
- Compaction: Rental-grade plate compactor. Do not use a hand tamper.
- Edge Restraint: Professional-grade plastic or aluminum edging secured with 10-inch spikes.
- Polymeric Sand: High-performance jointing material to prevent weed growth.
Your lawn care routine should also adapt to your new patio. Do not use heavy salts or de-icers on concrete pavers in the winter; the chemical reaction can cause spalling and pitting of the surface. Use sand for traction instead. Also, ensure your mower discharge isn’t blowing grass clippings directly into the paver joints, as the organic matter will eventually break down and create a seedbed for weeds, despite the polymeric sand. A little maintenance goes a long way. Keep it clean. Keep it dry. Your $2 pavers will look like a million bucks for the next twenty years.