Fix Your 2026 Broken Paver Edging for Under $30
Why Your Paver Edging is Failing and How to Diagnose the Displacement
Paver edging fails primarily due to lateral movement caused by insufficient compaction of the sub-grade and hydrostatic pressure from poor drainage. When the edge restraint is not pinned into the base material, the pavers migrate, causing joint sand loss and structural instability in the patio. I recently got called out to tear up a $30,000 patio that was sinking because the previous contractor used cheap plastic spikes and failed to extend the gravel base 6 inches beyond the paver line. The physics of hardscaping are unforgiving. If the base isn’t 98% Proctor density, your edging is just a suggestion to the soil, not a barrier. You see the gap opening up? That is not just a cosmetic flaw. It is a structural breach where water infiltrates, saturates the bedding sand, and turns your patio into a floating mess. Don’t skip the diagnosis. Check the spikes. If they are plastic and 6 inches long, they are useless. You need 10-inch galvanized steel. Anything less is a hobby, not hardscaping. The failure usually starts at the lowest point of the grade where water collects. Hydrostatic pressure builds up, the soil softens, and the lateral force of a 4,000-pound patio pushes the edge into the lawn. It will fail. Every time.
“A retaining wall doesn’t fail because of the stone; it fails because of the water trapped behind it.” – Hardscape Engineering Axiom
The $30 Repair Kit: Professional Materials on a Budget
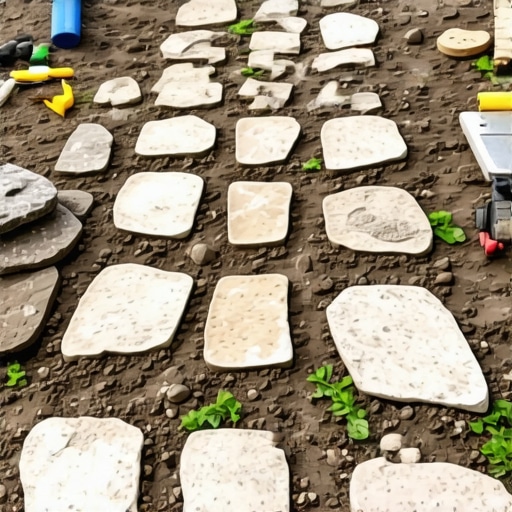
A professional paver edge repair under $30 requires a 50-pound bag of polymeric sand, three to five 10-inch galvanized spikes, and a small amount of C-33 concrete sand. By salvaging existing plastic edge restraints and cleaning the paver joints, you minimize costs while maximizing structural integrity for the long term. Forget the big-box store ‘all-in-one’ fixes. You need raw materials. Go to a local landscape supply yard. Ask for a bucket of modified 2B gravel if you have a void. They might give it to you for $5. The key is the sand. Polymeric sand is the glue of the hardscape world. It uses polymers that harden when misted with water, creating a semi-flexible joint that resists weed growth and washouts. However, it only works if the joint is clean. If you leave dirt in there, the polymer won’t bond. It will flake. Use a stiff wire brush. Scrub the paver edges until they look new. This is the difference between a hack job and a 20-year fix.
| Material | Purpose | Estimated Cost |
|---|---|---|
| Polymeric Sand (1 Bag) | Joint stabilization and weed prevention | $18.00 |
| 10-inch Steel Spikes (5pk) | Lateral restraint anchoring | $7.00 |
| C-33 Concrete Sand (1 Bag) | Leveling the bedding layer | $4.00 |
| Total Cost | Professional Grade Repair | $29.00 |
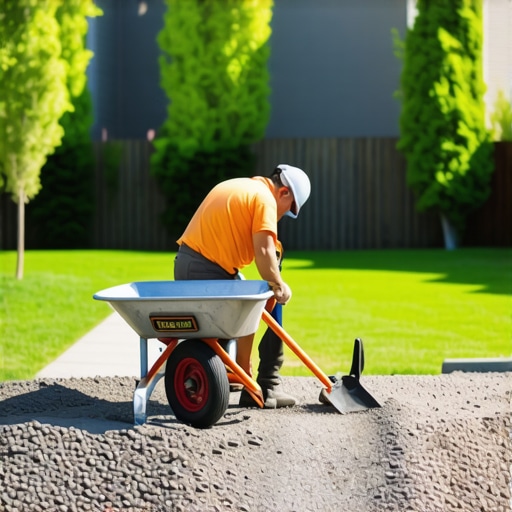
The Forensic Step-by-Step: Excavation and Base Prep
Fixing the edge requires excavating the soil back at least 4 inches from the paver line to expose the aggregate base. You must clear all organic matter and grass roots that have encroached into the hardscape profile to ensure the new edge restraint sits on a solid, non-compressible foundation. Organic matter holds water. Water causes frost heave. In a freeze-thaw cycle, that wet soil expands, lifting your edging and throwing the whole line out of plumb. You need to get down to the gravel. If the previous guy just threw the edging on top of the dirt, that is your problem. Scrap it. Clean the side of the paver. If there is old mortar or crusty sand, chip it off. You need a flush fit. Use a 3-pound sledgehammer to tap the pavers back into alignment. Don’t use a rubber mallet for the heavy lifting; you need the mass of steel to move a settled paver. If the paver is stuck, use a flat-head screwdriver to clear the joints first. Friction is your enemy during the reset phase. Once the paver is moved, the gap is gone.
How much modified gravel do I need for a patio base?
For a standard residential patio, you need a minimum of 4 to 6 inches of compacted modified gravel (typically 2A or 3/4-inch minus). The base should extend at least 6 inches beyond the paver edge to provide a structural shelf for the edge restraints and prevent perimeter washout. If you are fixing a broken edge, you likely only need about 0.5 cubic feet of gravel to fill localized voids. Compact it in 2-inch lifts. Use a hand tamper. The tamper should literally bounce off the compacted base when you are done. If it thuds, keep hitting it. You are aiming for a solid state. No air pockets. No movement.
What is the best way to prevent paver edging from moving?
The best way to prevent paver edging movement is to use heavy-duty rigid plastic or aluminum restraints secured with 10-inch galvanized steel spikes driven every 12 inches into a compacted aggregate base. Avoid using plastic spikes, as they shear under the freeze-thaw pressure of heavy clay soils. The spike must penetrate the gravel base, not just the dirt. The friction between the steel and the stone is what provides the lateral hold. In high-traffic areas, consider a ‘concrete soldier row’ or a ‘troweled concrete curb’ beneath the grade, though this exceeds our $30 budget. For most 2026 DIY repairs, the steel spike in gravel method is the gold standard.
The Final Seal: Polymeric Sand Application
Once the edge restraint is spiked down—hard—you must refill the paver joints with polymeric sand. This isn’t just for looks. The sand creates interlock. When the sand particles wedge between the pavers, they create a frictional bond that prevents individual units from shifting. Pour the sand when the pavers are bone dry. If there is a drop of moisture, the polymers will activate on the surface and leave a white haze. This is called ‘polymeric haze’ and it is a nightmare to remove. Sweep the sand into the joints, then vibrate the pavers. You can use a plate compactor with a protective mat, or for a small repair, just tap the pavers with the handle of your sledgehammer. This settles the sand. Refill. Sweep off every grain of excess. Every. Single. Grain. Then, mist it. Do not flood it. You want to hydrate the sand, not wash the polymers out of the mix. Let it cure for 24 hours. The result is a rock-hard edge that won’t budge when the mower hits it.
- Checklist for Edge Repair:
- Excavate 4 inches of soil to expose the gravel base.
- Scrub paver sides to remove organic biofilm and old sand.
- Reset pavers using a 3lb sledge and a block of wood.
- Anchor edging with 10-inch steel spikes at 12-inch intervals.
- Apply polymeric sand only to dry surfaces.
- Mist three times, waiting 10 minutes between applications.
“Soil pH and moisture content directly affect the corrosion rate of steel anchors; in acidic soils, galvanized coatings are mandatory for long-term structural retention.” – Agricultural Extension Agronomy Manual
Stop buying the $5 bags of ‘play sand’ for your patio. It’s a waste of money. It washes out in the first rain and leaves the door open for ants and weeds to undermine your hardscape. Spend the $18 on the high-quality polymer-modified stuff. It is cheap insurance. Landscaping is about managing the transition between the soft world (soil) and the hard world (stone). If you don’t respect the engineering, the soft world will win. Every time. Your 2026 yard deserves a fix that lasts until 2046. Now get out there and dig.