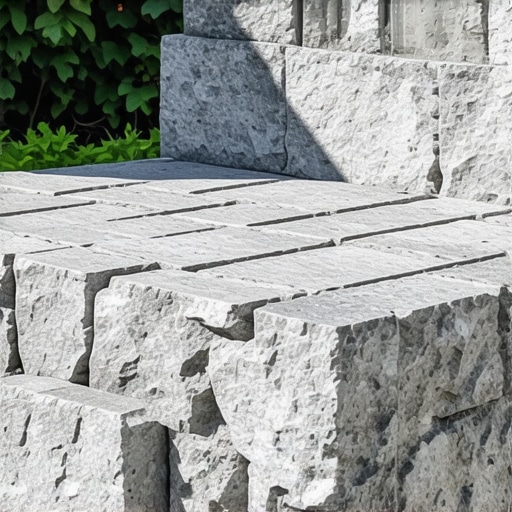
Build a $150 2026 Gravel Parking Pad [Weekend Fix]
The Hardscape Reality: Planning for Structural Integrity
Building a $150 gravel parking pad is not about dumping a few bags of stone from a big-box store and hoping for the best. To succeed at this price point, you must adopt the mindset of a civil engineer working with a limited budget. I recently got called out to tear up a $30,000 patio that was sinking because the previous contractor ignored the subgrade. This was a classic base-layer failure. They dumped four inches of expensive pavers onto loose topsoil without stripping the organic material. Within two seasons, the freeze-thaw cycles turned that expensive stone into a wavy mess of cracked mortar and trip hazards. This $150 project follows the same engineering principles as a $50k driveway. If you ignore soil mechanics, your parking pad will become a muddy pit by next spring. We focus on soil compaction, aggregate interlocking, and hydrostatic pressure to ensure your vehicle stays level and your gravel stays put. Every inch of excavation matters. Don’t skip the layout phase.
Site Selection and Subgrade Engineering
Site selection and subgrade engineering require identifying a high-ground location with a natural 1 to 2 percent slope to prevent water accumulation. You must excavate at least 4 to 6 inches of organic topsoil to reach the subgrade, which is the stable, mineral-based soil layer that provides the actual load-bearing capacity for your parking pad.
When you start digging, you are looking for a change in soil texture. Topsoil is full of roots, worms, and decaying matter. It is a sponge. If you leave it under your gravel, it will compress under the weight of your tires, and your pad will fail. You need to reach the B-horizon of the soil profile. This is where the mechanical strength lives.
“A retaining wall doesn’t fail because of the stone; it fails because of the water trapped behind it.” – Hardscape Engineering Axiom
This same logic applies to your parking pad. If water sits under your gravel, the subgrade will liquefy. You must ensure the bottom of your excavated pit is as smooth and sloped as the final surface will be. Use a 10-foot straight edge and a level to check your grade. Every inch of slope per 8 feet of run is the standard for moving water away from structures. If you have heavy clay, you may need to go deeper. Clay holds water and expands. This is called heave. You fight heave with drainage and compaction.
How much modified gravel do I need for a parking pad?
Calculating your material needs is a matter of volume. For a 10×12 foot pad at a 4-inch depth, you need approximately 1.5 to 2 tons of aggregate. Always multiply your square footage by your decimal depth (e.g., 0.33 feet for 4 inches) and then divide by 27 to get cubic yards. Multiply yards by 1.5 to get tons. For a $150 budget, you must source this directly from a local quarry. Avoid bags at all costs. A quarry will sell you 2 tons of crushed and run for roughly $70 to $90. The remaining $60 goes toward a truck rental or a delivery fee. This is the only way to make the 2026 budget work. Buying by the bag would cost you over $400 for the same volume of inferior material.
The Science of Aggregate Selection
Selecting the correct aggregate involves choosing a material that provides both vertical load distribution and frictional interlocking. For a parking pad, the industry standard is CR-6 or 3/4-minus crushed limestone, which contains a specific gradient of stone sizes and fine dust that compacts into a semi-impervious, concrete-like surface.
| Material Type | Best Use | Compaction Rating | Est. Cost (per ton) |
|---|---|---|---|
| #57 Crushed Stone | Drainage/French Drains | Low (Rolls) | $45-$55 |
| 3/4″ Minus (Crushed & Run) | Driveways/Parking Pads | Very High | $35-$45 |
| Pea Gravel | Walkways (Decorative) | None (Shifting) | $50-$65 |
| Recycled Concrete | Base Layer (Budget) | High | $25-$35 |
You need the “fines.” These are the dust-like particles in the crushed stone. When you wet them and compact them, they act like a mortar, locking the larger 3/4-inch jagged stones together. This prevents the gravel from spreading out when you turn your tires. Round stones, like river rock or pea gravel, will never compact. They are like walking on marbles. Do not use them for a vehicle surface.
“Soil compaction of at least 95 percent Standard Proctor Density is required for all load-bearing surfaces to prevent structural settling.” – Civil Engineering Handbook
While you likely won’t hire a lab to run a Proctor test, you can feel it. When you use a hand tamper, the tool should eventually start to bounce off the surface rather than thudding into it. That is the sound of density.
What is the best base for a gravel driveway?
The best base is a well-compacted subgrade covered by a geotextile fabric. Even on a $150 budget, if you can find a scrap of woven stabilization fabric, use it. It prevents the “disappearing gravel” phenomenon. Without a barrier, the heavy stones will eventually be pushed down into the soft soil by the weight of the car, while the mud is squeezed upward. This is called soil migration. A fabric barrier keeps the layers separate, doubling the life of your parking pad. If the budget doesn’t allow for professional fabric, ensure your compaction of the raw soil is perfect before the first stone drops.
The Installation Process: A Weekend Fix
The installation process consists of a mechanical sequence: clearing the footprint, excavating to the required depth, compacting the raw earth, and then adding aggregate in 2-inch lifts. Each lift must be hydrated and tamped individually to ensure the interlocking fines settle into the voids between the larger aggregate pieces, creating a stable matrix.
- Mark the perimeter: Use stakes and high-visibility string to define a 10×12 area. Check for square by measuring diagonals.
- Excavation: Remove 4 inches of soil. Slice the edges vertically with a flat spade for a clean look.
- Subgrade Prep: Remove any large rocks or roots. These create soft spots. Tamp the bare dirt until hard.
- First Lift: Add 2 inches of crushed stone. Level it with a garden rake.
- Moisture Control: Lightly mist the gravel. It should be damp, not muddy. Water acts as a lubricant for compaction.
- Compaction: Use a heavy hand tamper. Work from the outside in.
- Final Lift: Add the remaining 2 inches. Crown the center slightly (1 inch higher) to shed water to the sides.
- Final Tamp: Hammer it home. It should feel like a road.
Precision in the first lift is vital. If the bottom 2 inches are loose, the top 2 inches will never stabilize. You are building a structural sandwich. Don’t rush the tamping. It is the most physically demanding part, but it is the difference between a parking pad and a mud hole. If your tamper doesn’t leave a mark, you’re done. Check your edges. If they are loose, they will crumble. Pack them tight. This is where a few pressure-treated 2x4s could help if you had an extra $40, but for $150, we rely on the density of the earth and the gravel itself to hold the line.
Long-Term Maintenance and Settling
Expect some settling. In the first year, the weight of your vehicle will find the weak spots you missed with the tamper. This is normal. You may need to rake the gravel back toward the center if you see “ruts” forming. This usually happens because of tire shear. Avoid turning your steering wheel while the vehicle is stationary; this grinds the stone and breaks the mechanical bond. Every two years, you might need a “top-dress” of half a ton of stone to freshen the surface. Keep the edges clear of weeds. Grass roots will break up your compaction and hold moisture in the base, leading to soft spots. If you see a low spot where water sits, add more stone immediately. Water is the enemy of all hardscapes. Keep it moving. Don’t let it soak in. [IMAGE_PLACEHOLDER]
![Building a 2026 Simple Stone Bench [DIY]](https://lawnmajesty.com/wp-content/uploads/2026/09/Building-a-2026-Simple-Stone-Bench-DIY.jpeg)