
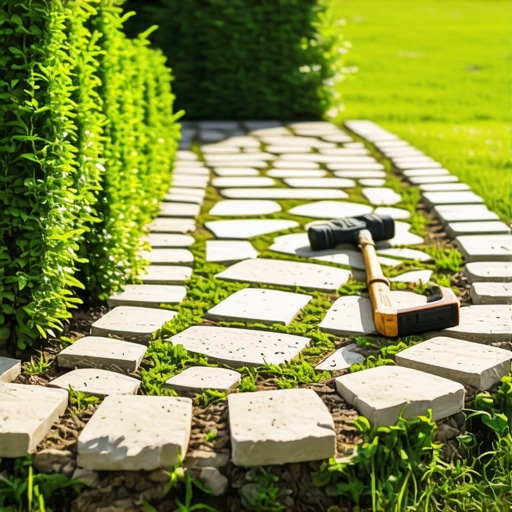
Build a $200 2026 Flagstone Edge for Gardens
Why Most Garden Edges Fail Within Two Seasons
A garden edge fails primarily due to frost heave and inadequate base preparation, where improper compaction allows water to settle and expand beneath the stones. To build a $200 flagstone edge that lasts until 2026 and beyond, you must prioritize the sub-base excavation and aggregate drainage over the aesthetic finish of the stone itself.
I recently got called out to tear up a $30,000 patio that was sinking because the previous contractor thought he could just skim the topsoil and throw down some bedding sand. It was a disaster. The same logic applies to a simple garden edge. If you don’t address the hydrostatic pressure and soil movement, your $200 investment will be a jagged mess of tripped-over limestone in eighteen months. Most homeowners see a pretty edge; I see the failure points where water will infiltrate the subgrade. We are not just laying rocks; we are performing a minor civil engineering project. You have to think about the Standard Proctor Density of your soil. If that ground isn’t compacted to 95%, the first heavy rain will turn your garden border into a mud-slicked liability. Don’t be the guy who has to do this twice. Do it right once.
“A retaining wall doesn’t fail because of the stone; it fails because of the water trapped behind it.” – Hardscape Engineering Axiom
How deep should a flagstone garden edge be?
A professional flagstone edge requires an excavation depth of 6 to 8 inches to account for a 4-inch compacted aggregate base and the thickness of the stone. This depth ensures that the frost line fluctuations do not easily displace the stones during seasonal freeze-thaw cycles.
The Blueprint for a Permanent Garden Border
Success in hardscaping is 80% preparation and 20% installation. When you are working with a $200 budget, you cannot afford to waste materials on a poorly planned trench. You need to map out your utility lines by calling 811 before you even touch a spade. Then, you evaluate your soil. Is it heavy red clay or sandy loam? Clay holds water, which means you need more angular aggregate for drainage. Sand shifts, which means you need better lateral restraint.
| Material Item | Estimated Cost | Quantity (Approx 20 LF) | Purpose |
|---|---|---|---|
| Pennsylvania Bluestone/Flagstone | $120.00 | 150 lbs | Primary Structure |
| 2A Modified Crushed Stone | $40.00 | 4-5 Bags/Bulk | Structural Base |
| Polymeric Sand (ASTM C144) | $25.00 | 1 Bag | Joint Stabilization |
| Landscape Fabric (Non-Woven) | $15.00 | 1 Roll | Separation Layer |
Skip the big-box store ‘garden stones’ that look like molded concrete. Go to a local stone yard. You want natural cleft flagstone. It has better slip resistance and a higher compressive strength. You are looking for pieces that are 1.5 to 2 inches thick. Anything thinner will crack under a lawnmower wheel. Anything thicker will be impossible to level on a budget.
What is the best base material for flagstone edging?
The best base material for a flagstone garden edge is crushed 2A modified stone or 3/4-inch minus gravel because the varied particle sizes lock together under compaction. Avoid using play sand or pea gravel, as these materials act like ball bearings and will cause the flagstone to shift laterally over time.
The Step-by-Step Installation Protocol
First, mark your line with a garden hose or marking paint. Dig a trench 8 inches wide and 6 inches deep. Throw away the organic topsoil; it is too spongy. You want the mineral subsoil. Line the trench with non-woven geotextile fabric. This prevents your expensive gravel from migrating into the dirt. Fill with 2 inches of modified stone, wet it down, and use a hand tamper. The tamper should literally bounce off the surface when it is ready. If it feels soft, keep tamping. It is physics. You are removing air pockets.
“Soil compaction is the most critical factor in hardscape longevity, requiring a minimum of 95% Standard Proctor Density for load-bearing surfaces.” – ICPI Tech Manual
- Step 1: Excavate to 6-8 inches deep and remove all roots.
- Step 2: Install geotextile fabric to separate soil from aggregate.
- Step 3: Add 4 inches of 2A modified stone in 2-inch lifts, tamping each lift.
- Step 4: Lay stones, ensuring they are level from front-to-back and side-to-side.
- Step 5: Fill gaps with polymeric sand and sweep clean before activating with a fine mist.
When you lay the stone, use a rubber mallet. Do not use a hammer. You will shatter the stone. Check each piece with a 2-foot level. If a stone is wobbly, don’t just shove dirt under it. Add more crushed fines. The stone must have 100% contact with the base. If there is a void, the stone will snap. Once the stones are set, sweep in polymeric sand. This isn’t regular sand; it has polymers that harden when wet, preventing weeds and ants from destroying your work. It creates a monolithic structure that resists the 2026 weather patterns of heavy rain and flash droughts. Maintenance is simple: blow out the leaves. Don’t let organic matter rot on the stone. It will stain. Check the joints every spring. If the sand has eroded, top it off. It is easier to maintain than to rebuild. Don’t be lazy. Your yard is a reflection of your discipline. Tight joints mean a tight ship. Loose joints mean you’ll be back at the stone yard in two years spending another $200.
![Stop Hillside Soil Washout for $200 [2026 DIY Fix]](https://lawnmajesty.com/wp-content/uploads/2026/05/Stop-Hillside-Soil-Washout-for-200-2026-DIY-Fix.jpeg)