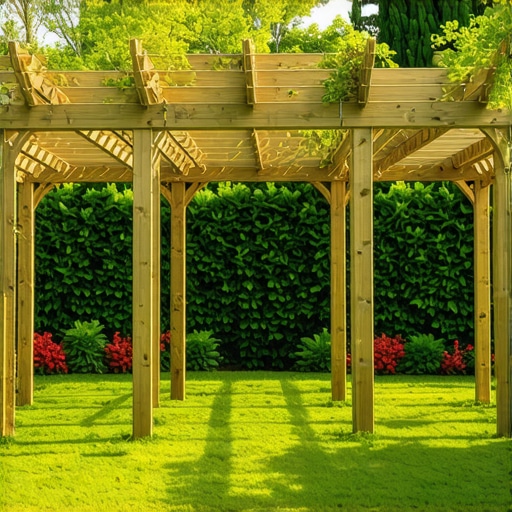
Build a $150 2026 Cedar Privacy Screen [Fast]
The $150 Budget Reality: Engineering a Privacy Screen Without Cutting Corners
A $150 cedar privacy screen is achievable by using utility-grade 1×4 cedar slats and pressure-treated 4×4 posts for below-grade stability. By spacing slats 1/2-inch apart, you minimize wind load while maintaining visual occlusion, ensuring the structure survives high-velocity gusts without snapping at the base. Most contractors will quote you $1,200 for this. They are charging for the convenience of high-grade clear cedar and labor. To hit the $150 mark in 2026, you must become your own logistics manager, sourcing rough-cut STK (Select Tight Knot) cedar and doing the heavy lifting yourself. This isn’t just about aesthetics; it is about building a structural baffle that manages wind pressure and light filtration.
I always drill into my new crew members: if you don’t fix the soil grading first, every plant you put in the ground is just expensive compost.
I remember a job in the fall of ’14 where we were installing a series of cedar panels. My apprentice, a kid who thought he knew it all, wanted to skip the gravel base in the post holes because the ground felt ‘hard enough.’ I stopped him right there. I told him, ‘In two years, the frost heave in this clay will spit these posts out like a bad habit.’ We spent the extra three hours digging those holes to 36 inches and tamping 4 inches of modified crushed stone at the bottom. You don’t build for the day of the install; you build for the record-breaking freeze five years from now. If the foundation isn’t dead-on, the expensive cedar on top is a waste of money. Grade the soil so water moves away from the post, or you are just building a rot-accelerator.
Sourcing Cedar: Why Sapwood is Your Project’s Silent Killer
To keep the project under $150, you must understand the difference between heartwood and sapwood in Western Red Cedar (Thuja plicata). Heartwood contains natural thujaplicins—organic compounds that act as fungicides. Sapwood is just sugar and fiber, basically candy for termites and wood-rot fungi. When you are at the lumber yard, look for the darker, reddish-brown boards. Avoid the creamy white edges. Those white edges will fail within 36 months of ground exposure.
“The longevity of cedar in outdoor applications is directly proportional to the concentration of extractive chemicals in the heartwood, which inhibit the growth of decay-producing fungi.” – Forest Products Laboratory Tech Report
| Material | Quantity | Unit Cost (Est.) | Total |
|---|---|---|---|
| 4×4 Pressure Treated Post (8′) | 2 | $14.00 | $28.00 |
| 1x4x8 Rough-Cut Cedar Slat | 12 | $7.50 | $90.00 |
| 80lb Bag Fast-Setting Concrete | 2 | $7.00 | $14.00 |
| 304 Stainless Steel Screws (5lb) | 1 | $18.00 | $18.00 |
| TOTAL | – | – | $150.00 |
Setting the Posts: The 30-60-90 Rule for Lateral Stability
The structural integrity of a privacy screen depends on its ability to resist lateral force, commonly known as wind load. For a 6-foot tall screen, your post depth must be at least 30 inches, preferably 36 if you are north of the frost line. If you dig a shallow hole, the screen becomes a sail. The moment a 40mph gust hits it, the leverage will crack the concrete collar or tilt the post. Don’t use a standard post-hole digger in heavy clay; use a clamshell digger or a power auger to ensure the walls of the hole are vertical. If the hole is bell-shaped at the top, frost will grab that concrete and pull it upward. This is called frost jacking. It is a project-killer.
How deep should a privacy screen post be?
For a standard 6-foot cedar privacy screen, the 4×4 post must be buried at least 1/3 of its total height. In most jurisdictions, this means a minimum 24-inch depth, though 36 inches is the professional standard to reach below the frost line and provide adequate lateral resistance against wind loads. Use a 4-inch layer of 3/4-inch minus gravel at the base of the hole to allow for drainage and prevent the bottom of the post from sitting in standing water.
The Assembly Process: Managing Wood Movement
Cedar expands and contracts with humidity. If you butt the boards tight against each other, they will buckle when the first rain hits. Use a 1/2-inch spacer between slats. This allows the wood to breathe and reduces the PSI of wind pressure against the structure. Always use 304 Stainless Steel or high-quality ceramic-coated screws. Never use standard zinc-plated screws. Cedar contains tannic acid. When that acid hits zinc, it creates a chemical reaction that leaves permanent black streaks down your beautiful wood. It looks like the screen is crying. It’s ugly. Don’t do it.
- Call 811 to mark underground utilities before digging.
- Dig holes 12 inches wide and 36 inches deep.
- Add 4 inches of compacted gravel for drainage.
- Level and plumb the posts using a 4-foot level.
- Pour concrete 2 inches below the soil line and slope the top to shed water.
- Pre-drill all holes in the cedar slats to prevent splitting.
- Maintain a 2-inch gap between the bottom slat and the ground to prevent moisture wicking.
Maintenance: Preventing Ultraviolet Degradation and Rot
Cedar will turn a silvery-gray due to UV degradation of the lignin in the wood fibers. This isn’t necessarily structural failure, but it changes the look. If you want to keep the red hue, you need a penetrating oil stain with UV inhibitors. Avoid film-forming finishes like polyurethane. They will peel. Once they peel, you have to sand the whole thing back to bare wood. An oil-based stain just fades, meaning you can simply wash it and re-apply a fresh coat every two years.
“Water-saturated wood is the primary precursor to fungal colonization; maintaining a moisture content below 20% is critical for structural longevity.” – USDA Wood Handbook
How much modified gravel do I need for a patio base?
While this project focuses on a screen, if you are integrating it into a hardscape design, you need 4 to 6 inches of compacted 21A or 3/4-inch modified gravel. For a standard 10×10 area, this equates to approximately 2 cubic yards of material. Proper compaction with a plate compactor is non-negotiable to prevent settling and heaving. Without a solid base, any pavers or structures built on top will fail as the soil shifts under hydrostatic pressure.