Build a $200 2026 Gravel Path with Brick Edging [Fast DIY]
The Hard Truth About Gravel Paths
To build a $200 gravel path with brick edging, you must prioritize subgrade compaction and hydrostatic drainage. By excavating 4 inches, laying non-woven geotextile fabric, and securing reclaimed bricks with a 1/4-inch minus screenings base, you create a stable, permeably-drained walkway that resists shifting. I always drill into my new crew members: if you don’t fix the soil grading first, every plant or paver you put in the ground is just expensive compost. I’ve seen guys spend thousands on high-end slate, only to watch it disappear into the clay because they didn’t understand the load-bearing capacity of the A-horizon soil. We are not just making a walk; we are engineering a drainage solution that happens to look good. If your base is soft, your path is trash. It is that simple. Don’t be the homeowner who dumps $200 of stone into a muddy trench and wonders why it’s a swamp by next April. You have to understand the soil mechanics first.
The Engineering of a Sustainable Path Base
The foundation of any hardscape project is the management of water and soil density. When you excavate for a path, you are disturbing the natural compaction of the earth. You must restore that density. In most residential yards, you are dealing with either heavy clay or sandy loam. Clay has high water retention but terrible drainage; sandy loam drains fast but shifts under load. You need to hit a 95% Proctor density on your subgrade before a single pebble hits the ground.
“A retaining wall doesn’t fail because of the stone; it fails because of the water trapped behind it.” – Hardscape Engineering Axiom
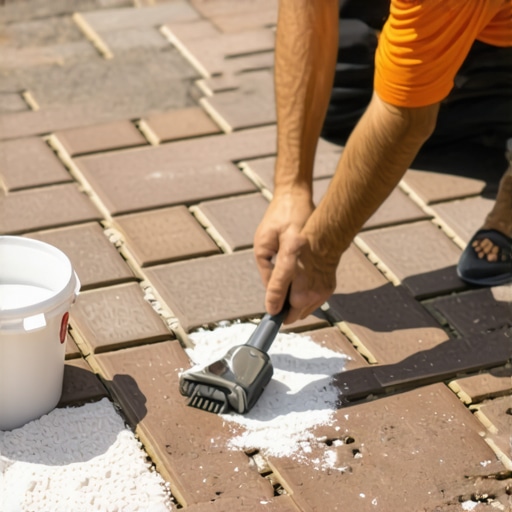
This principle applies to paths too. If water pools under your gravel, it will liquefy the sub-base and your bricks will heave during the first freeze-thaw cycle. You need a slight 2% cross-slope to ensure water moves away from structures. [image_placeholder_1]
Material Comparison for Budget Hardscaping
| Material | Cost (Per Ton) | Drainage Rating | Stability Level |
|---|---|---|---|
| Pea Gravel (3/8″) | $35 – $55 | Very High | Low (Rolls underfoot) |
| Crushed Limestone (3/4″) | $28 – $45 | High | High (Angular lock) |
| Decomposed Granite | $45 – $70 | Moderate | Very High (Compacts hard) |
| Recycled Concrete (RCA) | $20 – $30 | Low | High |
Phase 1: Excavation and Soil Grading
Do not just dig a shallow trench. You need to excavate at least 4 inches deep. This allows for 2 inches of base material and 2 inches of surface aggregate. If you go shallower, weeds will migrate up from the dormant seed bank in the soil. Once you’ve cleared the grass, you need to look at the soil structure. If you see grey or mottled clay, you have a drainage issue. You might need to go deeper and add a layer of #57 stone for a capillary break. Don’t skip the geotextile. Use a non-woven fabric. Do not use that cheap plastic ‘weed barrier’ from the big box store. It’s useless. You need a fabric that allows water molecules to pass through while keeping the fines in the soil from mixing with your clean gravel. If the soil and gravel mix, the path will soften and fail. It’s physics, not a suggestion.
How much gravel do I need for a patio base or path?
To calculate your aggregate needs, multiply the length by the width by the depth (in feet) and divide by 27 to get cubic yards. Most gravel weighs approximately 1.4 tons per cubic yard. For a 50-foot path that is 3 feet wide and 4 inches deep, you will need roughly 1.8 to 2 tons of material. Always over-order by 10% to account for compaction. When you hit that gravel with a tamper, it’s going to shrink in volume by about 15-20%. That is the air being pushed out. If it doesn’t shrink, you aren’t compacting it hard enough. You want it to sound like a concrete floor when you walk on it.
Phase 2: Setting the Brick Edging
Bricks provide the lateral restraint. Without a solid edge, your gravel will migrate into the lawn within three months. This is where the budget often breaks, but we can fix that by sourcing reclaimed bricks or using standard 4×8 clay pavers. These are not ‘landscaping bricks’ which are often just painted concrete. You want fired clay. Set them on a 1-inch bed of coarse sand or stone screenings.
“Soil pH and moisture content are the primary drivers of masonry degradation in sub-grade applications.” – Agronomy Manual Section 4
Use a string line. If you eye-ball it, the path will look like a snake. Use 10-inch galvanized spikes if you are using plastic edging, but for bricks, the weight and a tight soil pack on the outside are usually enough. Trench the edge slightly deeper than the path center to create a ‘shoulder’ for the bricks to sit in. This prevents them from kicking out when someone steps on the edge. It’s about structural integrity, not just aesthetics.
Do I need a weed barrier under gravel?
You need a professional-grade geotextile fabric, not for weeds, but for soil separation. Weeds usually come from the top down—seeds blowing into the gravel—not from the bottom up. A heavy-duty fabric prevents the gravel from sinking into the mud. If you skip this, your $200 investment will be gone in two seasons. Use 4-ounce non-woven needle-punched fabric. It lasts 20 years and maintains permeability. Avoid the woven ‘tarp-like’ fabrics; they can slick over with silt and create a slip hazard by trapping water on the surface.
Phase 3: The Aggregate Fill
Now we talk about the ‘crunch.’ Do not use pea gravel if you want a stable path. Pea gravel is rounded. It’s like walking on a ball pit. Use an angular stone like 3/4-inch crushed limestone or ‘crusher run.’ The jagged edges lock together under pressure. This is called the ‘angle of repose.’ Spread the stone in 2-inch ‘lifts.’ Don’t dump it all at once. Spread 2 inches, rake it level, and tamp it. Then add the final 2 inches. This ensures uniform density throughout the profile. If you have extra budget, use a plate compactor. If not, a 10-inch hand tamper and some sweat will work. The stone should literally bounce the tamper back at you when it’s finished.
- Tools Needed: Square-head shovel, steel rake, masonry string, line level, hand tamper.
- Materials: 2 tons of crushed stone, 1 roll of non-woven geotextile, 100 reclaimed bricks.
- Timeframe: One weekend for a 50-foot path.
- Maintenance: Leaf blow monthly to prevent organic matter buildup.
Long-term Maintenance and Biology
Your path is a living system. Over time, dust and organic debris will settle between the stones. If you let it sit, it will turn into soil, and weeds will germinate. This isn’t a failure of the path; it’s just nature doing its job. Every two years, you might need to ‘top-dress’ the path with a half-inch of fresh stone. Also, keep an eye on your brick edges. If the ground settles, you might need to lift a few bricks and add a bit more sand. This is why we don’t use mortar. Mortar cracks. Dry-set bricks can be adjusted forever. It’s a flexible pavement system. It moves with the earth. Don’t fight the freeze-thaw; build for it. That is the secret to a path that lasts a decade for under two hundred bucks. Don’t be lazy on the prep. Dig deep. Tamp hard. Use real fabric. Done.

![Build a $350 Flagstone Path in One Weekend [DIY 2026]](https://lawnmajesty.com/wp-content/uploads/2026/05/Build-a-350-Flagstone-Path-in-One-Weekend-DIY-2026.jpeg)