How to Repair a 2026 Cracked Fire Pit for Under $50
Understanding Why Your Fire Pit Cracked: The Forensic Autopsy
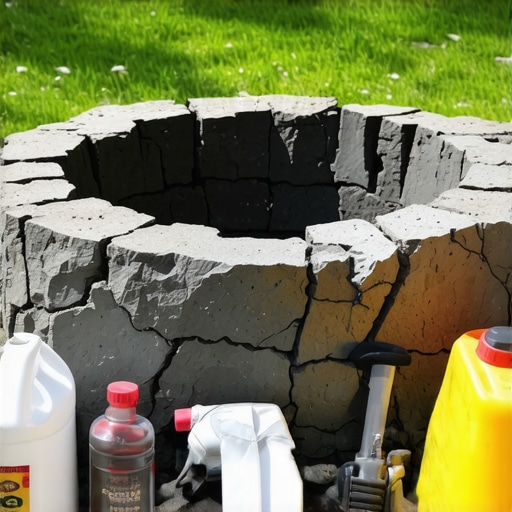
A cracked fire pit usually results from thermal shock or hydrostatic pressure caused by trapped moisture within the masonry units. When the internal temperature of a stone or concrete block rises too quickly, the moisture expands into steam, creating internal PSI that the material cannot withstand, leading to structural failure. You don’t need a new pit; you need better chemistry. I recently got called out to tear up a $30,000 patio that was sinking because the previous contractor ignored the basic laws of drainage. The fire pit on that project had literally split in half because they used standard mortar instead of refractory grade material. It was a mess. Every time they lit a fire, the moisture trapped in the base layer turned into a jackhammer. This is the same reason your DIY pit is failing.
“A retaining wall doesn’t fail because of the stone; it fails because of the water trapped behind it.” – Hardscape Engineering Axiom
The Physics of Thermal Expansion
Concrete and natural stone are porous. They breathe. When you build a fire, the side of the stone facing the flame hits 800 degrees while the outside stays at 50 degrees. This temperature gradient causes the inside to expand while the outside remains static. If the material isn’t rated for this, it snaps. Most homeowners buy cheap pavers from big-box stores that are meant for walkways, not fire. These pavers have a high moisture content. When heated, they spall. Spalling is the technical term for the surface popping off. It is dangerous and ugly. Fixing it for under $50 requires focusing on the bond, not just the gap.
The $50 Repair Kit: What You Actually Need
To fix a fire pit for under $50, you must prioritize high-heat refractory mortar and masonry adhesive over standard hardware store cement. Professional grade materials like Rutland or Quikrete Fire Pit Mortar are essential because they contain calcium aluminate, which handles temperatures up to 2,000 degrees Fahrenheit. Don’t buy a 50-pound bag of standard Portland cement. It will fail within two burns. You need a tube of high-temp masonry caulk for the fine cracks and a small tub of refractory mortar for the structural gaps. Check the table below for a cost-benefit breakdown of repair materials.
| Material Type | Heat Rating | Cost (Approx) | Recommended Use |
|---|---|---|---|
| Refractory Mortar | 2,000°F+ | $18 – $25 | Structural gaps and firebrick |
| Masonry Adhesive | 400°F | $10 – $15 | Exterior decorative stones |
| High-Temp Silicone | 500°F | $8 – $12 | Expansion joints and hair-lines |
| Standard Mortar | 200°F | $7 – $10 | NOT RECOMMENDED (Will crack) |
You also need a stiff wire brush and a spray bottle filled with water. Cleaning the joint is 90% of the job. If there is soot or ash in the crack, the new mortar will not bond. It will just sit there until the next thermal cycle kicks it out. I see this all the time with rookies. They slap mud over dirt and wonder why the repair lasted a week.
Step-by-Step Masonry Remediation
The remediation process involves excavating the crack, cleaning the substrate of carbon deposits, and applying a pre-hydrated refractory compound. Failure to properly hydrate the existing stone will result in the stone sucking the moisture out of the new mortar too quickly, preventing a chemical cure and leaving you with a brittle, sandy mess. Use a cold chisel to widen the crack slightly. This sounds counterintuitive, but you need enough volume for the repair material to hold. A hair-thin crack is harder to fix than a quarter-inch gap.
“Refractory mortar must meet ASTM C199 standards to withstand repeated thermal cycling without losing structural integrity.” – Masonry Engineering Manual
- Remove all loose debris and ash using a wire brush.
- Vacuum the cracks to remove microscopic dust particles.
- Mist the area with water (SSD condition: Saturated Surface Dry).
- Apply the refractory mortar using a tuck-point trowel.
- Pack the material tightly to eliminate air pockets.
- Smooth the joint and let it cure for at least 48 to 72 hours.
How much modified gravel do I need for a patio base?
While the fire pit repair is the focus, the base is often the culprit. For a standard small fire pit area, you need 4 to 6 inches of compacted 21A or 3/4-inch modified gravel. This ensures water drains away from the masonry. If your pit is sitting on bare dirt, the soil’s moisture is migrating up into the stones via capillary action. This makes the stones more likely to crack when heated. Always dig out the footprint and replace the soil with crushed stone. Tamp it until the tamper literally bounces off the surface. If it doesn’t bounce, it isn’t compacted.
What is the best mortar for fire pit repair?
The only mortar you should use is a pre-mixed or dry-pack refractory mortar. These products are specifically engineered to withstand the expansion and contraction cycles of high-heat environments. Standard Type S or Type N mortar is fine for a garden wall, but it is too rigid and lacks the thermal resistance needed for fire. Using the wrong mortar is the fastest way to turn a $50 fix into a $500 replacement job. Don’t be cheap on the chemical specs.
Preventing Future Fractures
Prevention requires managing the moisture levels and the rate of heating within the fire pit structure. Start with small fires to gradually drive out any absorbed humidity before ramping up to a large blaze. If you have a stone pit without a steel liner, you are asking for trouble. A steel fire ring acts as a heat shield, preventing the direct flame from licking the stone. This reduces the temperature gradient and extends the life of your masonry by years. You can often find these rings for under $40, and they are the best investment you can make for fire pit longevity. Stop over-watering your lawn near the pit too. If your lawn care routine involves soaking the area around the hardscape, that water is wicking into the stones. Keep the sprinklers aimed away. It is simple engineering. Dry stone stays whole; wet stone explodes. Avoid using the pit as a trash incinerator. High-energy plastics and treated woods burn at inconsistent temperatures that can cause localized hotspots and rapid cracking. Stick to seasoned hardwoods. They burn predictable and clean. Your fire pit is a tool, not a dumpster. Treat it with the respect that thermodynamics demands.
“, “image”: {“imagePrompt”: “Close-up photo of a professional landscaper’s hands using a small tuck-point trowel to apply grey refractory mortar into a crack in a circular stone fire pit. The focus is on the texture of the stone and the mortar. Sunlight hits the masonry, showing detail of the grit and repair work.”, “imageTitle”: “Professional Fire Pit Crack Repair”, “imageAlt”: “Applying refractory mortar to a cracked stone fire pit for a budget-friendly repair.”}, “categoryId”: 0, “postTime”: “”}
![Build a $250 Stone Retaining Wall [DIY 2026]](https://lawnmajesty.com/wp-content/uploads/2026/06/Build-a-250-Stone-Retaining-Wall-DIY-2026.jpeg)