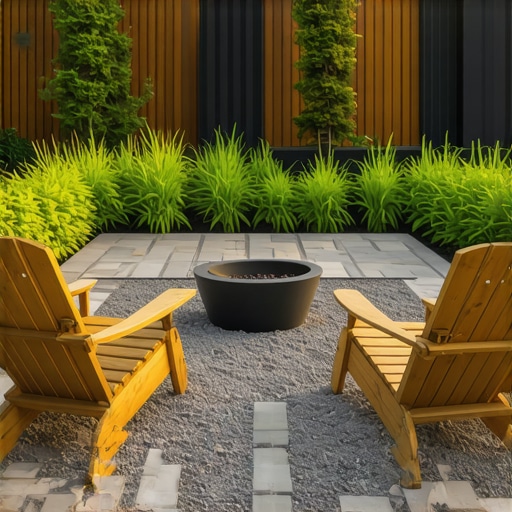
Building a 2026 Gravel Patio for Under $400
The Engineering Reality of a $400 Gravel Patio
Building a gravel patio under $400 requires a shift from aesthetic gardening to civil engineering, focusing on soil compaction, hydrostatic pressure management, and base-layer integrity to ensure the structure lasts 20 years rather than one season. Success depends on sourcing bulk aggregates and executing a 4-inch deep excavation that accounts for subgrade stability.
I recently got called out to tear up a $30,000 patio that was sinking because the previous contractor thought he could skip the compaction phase on a clay-heavy subgrade. He used clean stone without a dense-graded base, and within two years, the entire structure had shifted three inches toward the foundation. It was a mess. If a $30k project can fail from poor physics, your $400 DIY project will disappear into the dirt in six months if you don’t respect the Proctor density of your soil. Stop looking at Pinterest for ‘vibes’ and start looking at your site drainage. Most homeowners fail because they treat gravel like mulch. It is not mulch; it is a structural element.
The Physics of Subgrade and Base Layers
Before you move a single shovelful of dirt, you must understand what you are standing on. If you have high plastic clay, your patio will heave. If you have sandy loam, it might migrate. You need to excavate at least 4 to 6 inches. This isn’t optional. You are replacing unstable organic matter with a compacted mineral base. We use a non-woven geotextile fabric between the subgrade and the base. This isn’t the cheap ‘weed fabric’ from a big-box store; you need a 4oz or 6oz punched needle fabric that allows water through but prevents the stone from sinking into the mud. It will rot if you use organic materials nearby. Don’t skip this.
“A retaining wall doesn’t fail because of the stone; it fails because of the water trapped behind it.” – Hardscape Engineering Axiom
How much modified gravel do I need for a patio base?
To calculate the material for a 10×10 patio, you need 1.25 cubic yards of 21AA crushed limestone or Class II modified stone to create a 4-inch compacted base. Always multiply your square footage by the desired depth in feet, then divide by 27 to get cubic yardage, adding a 10% compaction factor to your final order. If you buy bags, you will go broke. Call a local quarry. A yard of crushed concrete or dense-graded aggregate usually costs $30-$50 plus delivery. This is how you stay under the $400 limit.
| Material Type | Function | Approx. Cost (Bulk) | Stability Rating |
|---|---|---|---|
| 21AA / Road Base | Foundation Layer | $35/yard | High |
| Pea Gravel | Decorative Top (Not Recommended) | $45/yard | Low (Rolls) |
| Angular Crushed Granite | Finished Surface | $60/yard | High (Locks) |
| Non-Woven Geotextile | Separation Layer | $0.50/sq ft | Essential |
The Installation Process: The Ground-Up Build
First, mark your utility lines. Call 811. If you hit a gas line, your $400 project becomes a $10,000 liability. Once clear, excavate to your depth. Use a transit level or a simple string level to ensure a 2% slope away from any structures. This means the patio should drop 1/4 inch for every foot of length. This manages surface runoff. If water pools, the subgrade softens, and the patio fails. It’s that simple.
Next, lay your geotextile. Overlap seams by 12 inches. Now, bring in your base material. Do not dump it all at once. Spread it in 2-inch ‘lifts.’ Each lift needs to be compacted. Rent a vibratory plate compactor for $80. This is where your budget goes, and it is the most important $80 you will spend. The tamper should literally bounce off the compacted base once you’ve hit maximum density. If it still feels soft, keep going. You are aiming for a surface you could drive a truck over without leaving ruts.
“Soil moisture at the time of compaction is the most critical factor in achieving the desired dry density of the subgrade.” – USDA Agricultural Manual 101
How to prevent weeds from growing through a gravel patio?
Weed prevention in gravel patios is achieved through depth and compaction, not chemicals or thin plastic liners. A 4-inch compacted base of fines and stone creates a barrier that most seeds cannot penetrate from below; any weeds that appear are usually ‘surface’ weeds from wind-blown seeds, which can be easily removed because they cannot establish deep roots in the angular stone. Do not use pea gravel. It’s round. It’s like walking on marbles. It never locks. Use decomposed granite or 3/8″ minus crushed stone. These angular pieces wedge together under foot traffic, creating a stable surface.
The Professional Checklist for Success
- Verify property lines and HOA setbacks before digging.
- Confirm 811 utility markings are active.
- Excavate to a minimum depth of 5 inches (4″ base, 1″ finish).
- Set a 2% slope for positive drainage.
- Install 4oz non-woven geotextile fabric.
- Apply base material in two separate 2-inch lifts.
- Mechanical compaction of every layer.
- Edge restraint installation (heavy-duty plastic or pressure-treated timber).
Forget the ‘mow-and-blow’ hacks who tell you to just throw stone over the grass. That grass will rot, create an anaerobic environment, and your patio will become a mud pit within one season. Hardscaping is about managing water and gravity. If you don’t control the water, the water will control your patio. For a $400 budget, your sweat equity is the currency. You are trading your labor for the structural integrity that usually costs thousands. Keep your edges tight. Use polymeric sand if you are using pavers, but for a pure gravel build, ensure your edging restraints are spiked every 12 inches to prevent lateral migration of the stone. This is how you build a professional-grade space without the professional price tag.