Stop Backyard Flooding with This $100 Dry Well Strategy
The Foundation of Proper Drainage: More Than Just Moving Water
To stop backyard flooding with a dry well, you must understand that water management is a matter of civil engineering and soil physics rather than simple gardening. A dry well acts as an underground reservoir that collects runoff and allows it to percolate into the subsoil, preventing surface saturation and foundation damage.
I recently got called out to tear up a $30,000 patio that was sinking because the previous contractor ignored the hydrostatic pressure building up in the clay subsoil. They laid beautiful pavers, but they didn’t account for the fact that the yard was essentially a bowl. Every time it rained, the water sat under that patio, liquefying the bedding sand and turning the structural base into mush. We had to rip it all out, regrade the entire area, and install a series of dry wells to give that water somewhere to go. It was a $30,000 mistake that a $100 dry well strategy could have prevented if implemented during the initial phase. If you don’t respect the volume of water your roof and landscape generate, the water will eventually win. It is a relentless force.
The $100 Dry Well Strategy: Material Breakdown and Engineering
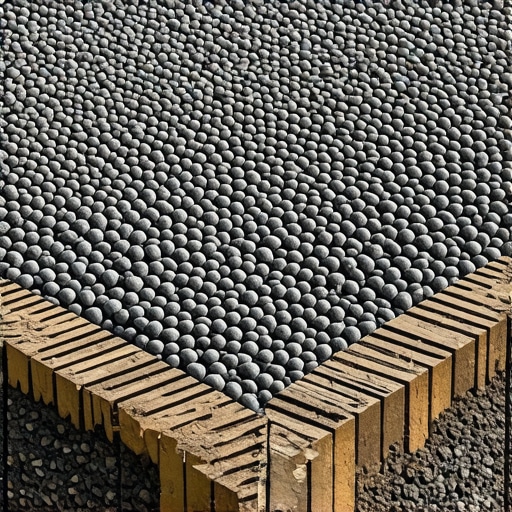
A cost-effective dry well consists of a subterranean basin, non-woven geotextile fabric, and clean 1.5-inch crushed stone to create a void space for water storage. By utilizing a high-density polyethylene (HDPE) basin or even a modified heavy-duty 50-gallon drum with perforated walls, you can manage hundreds of gallons of stormwater for under $100 in raw materials.
“A dry well’s effectiveness is entirely dependent on the infiltration rate of the surrounding soil; in heavy clay, a dry well without an overflow exit is simply a buried bucket.” – Agricultural Extension Drainage Manual
When you are working with a tight budget, you have to be smart about your components. You aren’t buying the fancy, pre-packaged kits from the big-box stores that charge you for the plastic molding. You are buying the raw utility. You need a 50-gallon heavy-duty basin, a roll of 4-ounce non-woven geotextile fabric, and roughly a half-yard of #57 stone. The fabric is the most critical part. Do not use cheap landscape fabric. You need the industrial stuff that allows water through but keeps silt out. If silt enters your stone reservoir, the system fails. It is that simple.
How much water can a small dry well actually handle?
A standard 50-gallon dry well can handle the runoff from a 500-square-foot roof section during a 1-inch rainfall event, provided the soil has moderate permeability. For larger areas or heavy clay, you must daisy-chain multiple units together to increase total storage capacity and surface area for infiltration.
| Material | Estimated Cost | Function |
|---|---|---|
| HDPE Perforated Basin | $35 – $45 | Main reservoir for water collection |
| #57 Crushed Stone (1/2 yard) | $25 – $30 | Structural support and void space |
| Non-Woven Geotextile Fabric | $15 – $20 | Filtration to prevent siltation |
| 4-inch PVC or Corrugated Pipe | $10 – $15 | Inlet from downspout or catch basin |
Soil Physics: Why Your Dry Well Might Fail
The success of any drainage installation depends on the hydraulic conductivity of your soil, which is the ease with which water can move through pore spaces. If you have heavy red clay, the microscopic particles are so packed that water cannot escape the well, leading to a permanent underground puddle that breeds anaerobic bacteria.
Before you dig, you must perform a percolation test. Dig a hole 12 inches deep, fill it with water, and see how long it takes to drain. If it takes more than 24 hours, a dry well alone won’t save you. You’ll need to dig deeper to find a sandier stratum or install an overflow pipe that leads to a lower point in the property. I see amateurs skip this step every week. They bury a tank in solid clay and then wonder why their yard is still a swamp. It’s because they built a subterranean bathtub, not a drainage system. You have to understand the geology beneath your boots.
“Subsurface drainage systems must be designed to accommodate the peak flow rate of a 10-year storm event to prevent surface erosion and structural bypass.” – ICPI Hardscape Engineering Standards
How deep should a dry well be buried?
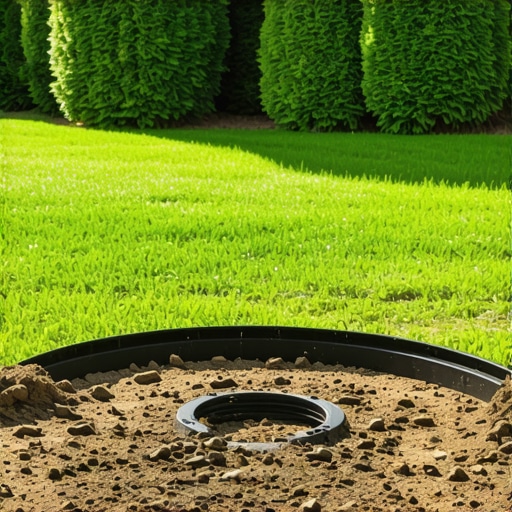
A dry well should be buried so the top of the basin sits at least 12 to 18 inches below the surface to prevent frost heave and allow for turf growth. The total depth of the excavation usually reaches 4 to 5 feet once you account for the stone base and the height of the basin itself.
The Step-by-Step Installation Protocol
Following a strict hardscaping installation sequence ensures that the dry well remains functional for decades without collapsing or clogging. Precision during the excavation and lining phases is what separates a professional build from a weekend disaster that will need to be dug up in two years.
- Locate Utilities: Call 811 before you strike the ground. Hitting a gas line or a fiber-optic cable will turn your $100 project into a $5,000 nightmare.
- Excavation: Dig a hole 12 inches wider than your basin on all sides. Depth should include 6 inches of stone at the bottom.
- Lining the Pit: Line the entire hole with non-woven geotextile fabric. Leave enough excess at the top to wrap over the stone later.
- The Stone Base: Pour 6 inches of #57 stone into the bottom. Level it. This provides a stable floor for the basin and extra storage.
- Setting the Basin: Place the perforated basin in the center. Connect your 4-inch inlet pipe from the source (downspout or catch basin).
- Backfilling: Fill the space between the basin and the fabric-lined walls with more #57 stone. This stone acts as a secondary reservoir.
- Sealing the System: Wrap the fabric over the top of the stone and basin. This “burrito wrap” is what keeps the dirt out.
- Final Cover: Add 6 inches of native soil on top and replant with turf or deep-rooted native grasses.
What type of pipe is best for dry well inlets?
Rigid PVC (SDR-35) is superior to thin, black corrugated piping because it is easier to clean with a snake and won’t collapse under the weight of the soil. While corrugated pipe is cheaper, its ridges trap sediment and organic debris, leading to clogs that are nearly impossible to clear without excavating.
Vegetation and Soil Microbiology Around Dry Wells
In garden design and lawn care, the area around a dry well requires specific attention because the soil moisture levels will fluctuate more than in the rest of the yard. Selecting plants that can tolerate “wet feet” for 24 hours but also handle dry spells is crucial for long-term stabilization of the site.
Don’t plant trees with aggressive, water-seeking roots (like Willows or Silver Maples) near your dry well. Those roots will find the perforations in the basin, enter the system, and eventually fill the entire stone reservoir with a root mat. Instead, opt for sedges, rushes, or native shrubs like Red Osier Dogwood. These plants help with evapotranspiration, pulling water out of the ground and releasing it into the atmosphere, which actually assists your dry well in recovering capacity faster between rain events. Also, avoid heavy applications of synthetic fertilizers near the well; the concentrated runoff can lead to nutrient leaching directly into the local groundwater table.
The Maintenance Schedule: Keeping the System Clean
A dry well maintenance routine is the only way to prevent the inevitable accumulation of fine silt and organic leaf litter from sealing the system. You must treat the inlet point—whether it is a catch basin or a downspout leaf diverter—as the primary filter for the entire underground structure.
Every autumn, clear the debris from your gutters and the grates of your catch basins. If you see standing water in the dry well basin three days after a rain, your soil interface is likely blinded by silt. This usually happens because someone used cheap fabric or no fabric at all. If the system is properly wrapped, it should last 20 to 25 years. But the second you let sediment in, the clock starts ticking. Don’t be the homeowner who ignores the signs of a slow drain until the basement is wet. Check the basin once a year. It takes five minutes and a flashlight. Do it.
![Stop Your 2026 Retaining Wall from Leaning [Drainage Fix]](https://lawnmajesty.com/wp-content/uploads/2026/07/Stop-Your-2026-Retaining-Wall-from-Leaning-Drainage-Fix.jpeg)
![Fix a 2026 Yard Slope with This $300 Fieldstone Wall [DIY]](https://lawnmajesty.com/wp-content/uploads/2026/05/Fix-a-2026-Yard-Slope-with-This-300-Fieldstone-Wall-DIY.jpeg)
![Build a $500 Natural Stone Retaining Wall [2026 DIY]](https://lawnmajesty.com/wp-content/uploads/2026/06/Build-a-500-Natural-Stone-Retaining-Wall-2026-DIY.jpeg)