Build a $150 2026 Pea Gravel Seating Area
The $150 Seating Area: Engineering over Aesthetics
Building a pea gravel seating area for under $150 requires a shift from cosmetic gardening to structural engineering. By focusing on soil compaction, sub-grade preparation, and bulk material sourcing, you can create a stable, drainage-efficient space that rivals professional hardscape installs costing thousands. Most DIY projects fail not because of the stone, but because of the dirt beneath it.
I recently got called out to tear up a $30,000 patio that was sinking because the previous contractor thought they could skip the sub-base compaction on a clay-heavy site. Water sat behind the retaining wall, built up hydrostatic pressure, and blew the entire structure out by four inches. It was a forensic disaster. If a $30k project can fail from poor physics, your $150 seating area definitely will if you don’t respect the site’s soil mechanics. Landscaping isn’t about buying pretty rocks; it is about managing water and gravity.
“Pea gravel, by its nature as a rounded stone, lacks the mechanical interlock of crushed stone, requiring a confined edge and a stable sub-base to prevent lateral migration.” – Hardscape Engineering Axiom
The Anatomy of a Stable Gravel Base
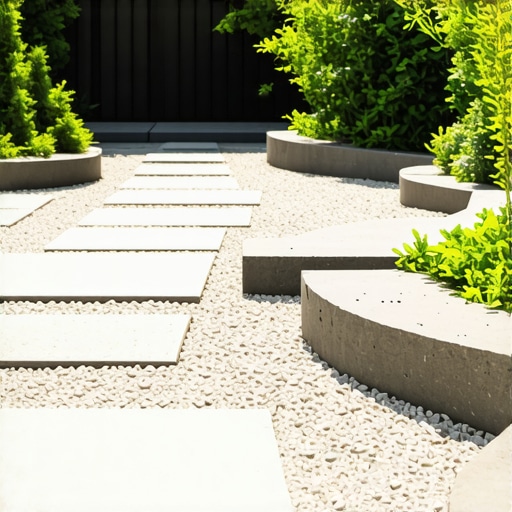
A professional-grade pea gravel patio consists of a compacted sub-grade, a high-tensile geotextile fabric, and exactly two inches of 3/8-inch pea stone. This layered approach ensures maximum drainage while preventing the stone from disappearing into the mud during the first heavy rain cycle of the season.
| Material Item | Estimated Bulk Cost | Functional Purpose |
|---|---|---|
| 3/8″ Pea Gravel (1 cu yard) | $45.00 | Surface aesthetic and drainage |
| Heavy-duty 4oz Non-woven Fabric | $35.00 | Soil separation and weed suppression |
| Timber Edging (Pressure Treated) | $50.00 | Lateral stone containment |
| Leveling Sand or Fines | $20.00 | Minor grade adjustments |
Materials Selection: Avoiding Big-Box Blunders
To stay under $150, you must bypass the bagged goods at big-box retailers. A single bag of pea gravel covers a pathetic 0.5 cubic feet and costs nearly $6.00. You need a bulk landscape yard. Buying by the ‘scoop’ or cubic yard typically drops your price per ton by 700%. Ask for washed 3/8-inch pea stone. Avoid ‘river pebbles’ for seating areas; they are too large and create an unstable walking surface. You want the stone small enough to settle but large enough to allow capillary water movement through the gaps.
The fabric is where most hacks fail. Do not buy the thin, perforated plastic ‘weed barrier.’ It will shred within six months. You need a non-woven geotextile. This material acts as a structural filter. It allows water to pass through into the water table while preventing the fine soil particles from migrating upward and mixing with your clean gravel. Once soil mixes with gravel, you no longer have a patio; you have a muddy mess that grows weeds.
How much gravel do I need for a 10×10 seating area?
For a 100-square-foot area at a 2-inch depth, you require approximately 0.62 cubic yards of gravel. Always round up to 1 yard to account for settling and edge loss. Buying in bulk is essential to keep the total material cost for this hardscaping project under the $150 threshold.
Should I put landscape fabric under pea gravel?
Yes, but it must be a permeable geotextile. Without this barrier, the weight of your furniture and foot traffic will pump the underlying soil up through the stones. This process, known as sub-grade contamination, ruins the drainage capacity of the gravel and creates a permanent weeding nightmare.
Step-by-Step Installation: The Forensic Approach
Success is found in the excavation. You must remove the organic layer—the grass and the first few inches of topsoil containing seeds and roots. If you leave organic matter under your gravel, it will decompose, create air pockets, and cause the seating area to become uneven. It will rot. Don’t skip this. Use a square-point shovel to keep your edges crisp and your depth uniform across the entire 100-square-foot footprint.
- Mark the Site: Use marking paint and string lines to ensure the area is square. Check for utility lines (Call 811).
- Excavate 4 Inches: Remove all turf and 2 inches of sub-soil. Ensure a 1% slope away from any building foundations to prevent basement seepage.
- Compact the Native Soil: Use a manual tamper. The ground should be hard enough that your heel doesn’t leave an indent.
- Install the Perimeter: Use 4×4 pressure-treated timbers or metal edging. Without a hard edge, the pea gravel will migrate into your lawn.
- Lay Geotextile: Overlap seams by at least 6 inches. Staple the fabric into the soil using 6-inch landscape staples.
- Spread the Stone: Dump the gravel in the center and rake it outward. Do not exceed a 2-inch depth. Any deeper and the chairs will sink into the stone like quicksand.
“Soil compaction is the most critical and often neglected phase of any structural landscape installation, as uncompacted soil can settle for years following a project.” – Penn State Agricultural Extension
The Maintenance Reality
Pea gravel is not ‘zero maintenance.’ It is low maintenance. Over time, aeolian dust (wind-blown dirt) will settle between the stones. This creates a microscopic bed for weed seeds to germinate. Once a year, you should vigorously rake the gravel to disturb any emerging root systems. If the stone looks dull, spray it down with a high-pressure nozzle to push the fines back down through the fabric. Your garden design is a living system; treat it with the technical respect it deserves. Do not let the edges get overgrown with turf grass, or the invasive rhizomes will find their way under your edging and compromise the entire project. Control the perimeter. Keep it clean. Enjoy the drainage.
![Build a $300 2026 Stone Fire Pit Area [Fast]](https://lawnmajesty.com/wp-content/uploads/2026/07/Build-a-300-2026-Stone-Fire-Pit-Area-Fast.jpeg)