![Build a $200 2026 Gravel Path with Brick Edging [Quick DIY]](https://lawnmajesty.com/wp-content/uploads/2026/07/Build-a-200-2026-Gravel-Path-with-Brick-Edging-Quick-DIY.jpeg)
Build a $200 2026 Gravel Path with Brick Edging [Quick DIY]
Mastering the Low-Cost Hardscape: A Technical Blueprint
A gravel path with brick edging costs approximately $200 for a 20-foot stretch when using bulk-sourced crushed stone and reclaimed bricks. The process requires excavating 4 to 6 inches, laying geotextile fabric, and compacting a sub-base to prevent sinking and lateral movement over time. Most homeowners fail because they ignore the physics of the base layer. If you do not manage the subgrade, the path will migrate within twelve months. I recently got called out to tear up a $30,000 patio that was sinking because the previous contractor skipped the base-layer compaction. He thought he could just ‘eyeball’ it. Two freeze-thaw cycles later, the whole thing looked like a mountain range. Do not repeat that mistake. Even on a $200 DIY budget, the engineering principles remain the same. This guide focuses on the 2026 standards of site preparation and material selection. We are looking at long-term stability, not a temporary weekend fix that turns into a muddy trench by next spring.
“A retaining wall doesn’t fail because of the stone; it fails because of the water trapped behind it.” – Hardscape Engineering Axiom
The Physics of Subgrade and Soil Compaction
Before you touch a shovel, you must understand what is beneath your boots. In my two decades of hardscaping, I have seen more paths ruined by uncompacted clay than by poor stone choice. If you live in a region with heavy red clay, your path is essentially sitting on a sponge that expands and contracts with moisture. In sandy loam, you have better drainage but less structural stability. You need to clear all organic matter. Grass, roots, and topsoil will decompose. This creates voids. Voids lead to settling. You must excavate down to the mineral soil. This is the hard stuff. Once you hit it, you must compact it with a hand tamper at minimum. If the soil is too dry, it won’t compact. If it is too wet, you will just move mud around. You want the soil to have the consistency of play dough. This is the ‘optimum moisture content.’ It allows the soil particles to slide together and lock into place, reducing the air gaps that cause settling later.
How much gravel do I need for a path base?
To calculate the volume of gravel for a path, multiply the length x width x depth in feet, then divide by 27 to get cubic yards. For a 20-foot path that is 3 feet wide and 4 inches deep, you will need roughly 0.75 cubic yards of material. I always tell my crew to order 10 percent extra. You will lose volume during compaction. If your material does not shrink when you hit it with a tamper, you aren’t compacting hard enough. Use a 3/4 inch minus crushed stone for the base. This is ‘clean’ stone mixed with ‘fines’ or dust. The dust acts as a binder. It locks the larger stones together. This is the same principle used in highway construction. You are building a road for your feet. Do not use pea gravel for the base. Pea gravel is round. Round stones act like ball bearings. They will never lock together. They will roll. You will feel like you are walking through deep sand. It is frustrating. It is a failure.
The Materials Breakdown: $200 Budget Logic
Achieving a high-end look on a budget requires sourcing material like a pro. Forget the big-box stores. They charge a 300 percent markup on bagged gravel. Go to a local landscape supply yard. Bring a truck or a trailer. Bulk material is significantly cheaper. For the edging, look for reclaimed bricks on digital marketplaces or local demolition sites. Old clay bricks are often more durable than modern concrete pavers because they were fired at higher temperatures. They have character. They have history. They also cost next to nothing if you are willing to clean the old mortar off them. Below is the cost breakdown for a standard 20-foot path.
| Material Item | Estimated Quantity | Projected Cost (Bulk) |
|---|---|---|
| 3/4 Minus Crushed Base | 1/2 Cubic Yard | $45.00 |
| Decorative Top Gravel | 1/2 Cubic Yard | $55.00 |
| Reclaimed Brick Edging | 80-100 Bricks | $40.00 (Used) |
| Non-Woven Geotextile | 60 Square Feet | $30.00 |
| Spikes and String Line | 1 Set | $30.00 |
Installation Step-by-Step: The Ground-Up Build
Start by staking out your path. Use a string line and a line level. Do not trust your eyes. The ground is deceptive. You need a consistent 1 percent slope away from any structures to prevent water pooling. This means for every 8 feet of path, the ground should drop 1 inch. Once staked, excavate 6 inches deep. This allows for 3 inches of base, 1 inch of bedding sand or fines, and 2 inches of top stone. Clear all roots. If you leave a 2-inch root under your path, it will eventually rot and create a hole. Or worse, it will grow and lift your bricks. Don’t skip this. After excavation, lay your non-woven geotextile fabric. Do not use cheap plastic weed barrier. It tears. It clogs. It is garbage. Use a professional-grade geotextile. This fabric performs two functions: separation and drainage. It prevents the heavy gravel from sinking into the soft soil while allowing water to pass through into the earth. It is the secret to a path that lasts 20 years instead of two.
What is the best edging for a gravel path?
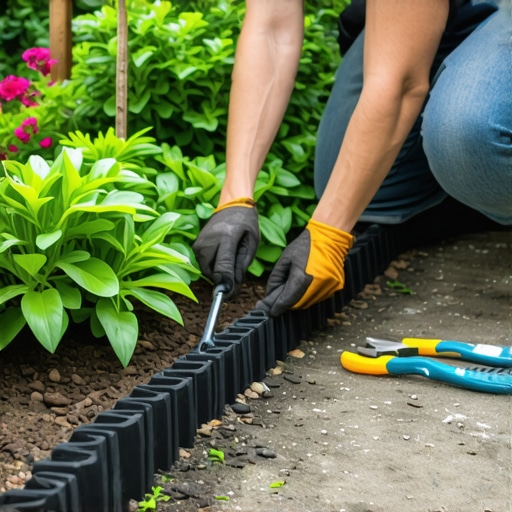
The best edging for a gravel path is a vertical brick header or a soldier course set in a shallow trench of stone dust. This provides lateral restraint, preventing the gravel from spreading into the lawn and keeping the grass from invading the path. Set your bricks so they sit about half an inch above the final gravel level. This creates a lip. This lip keeps your stones where they belong. If you set the bricks flush with the ground, the first heavy rain will wash your $200 investment into the grass. Use a rubber mallet to set the bricks. Do not use a metal hammer. You will shatter the clay. Level each brick to the next. Perfection here is what separates a DIY mess from a professional installation. If the line is wavy, the whole project looks cheap. Take your time. Use a 4-foot level. Check your work every three bricks.
“Soil is not just dirt; it is a structural material that must be engineered to support the load of the hardscape above it.” – ICPI Technical Manual
The Final Layer: Aesthetic and Drainage
Once your bricks are set and your base is compacted, add your final 2 inches of decorative gravel. In 2026, the trend is moving toward local river stone or decomposed granite. Decomposed granite (DG) is excellent because it packs down into a near-solid surface while remaining permeable. It feels like a park path. If you choose river stone, keep the size under 1/2 inch. Anything larger is difficult to walk on. Avoid ‘white marble chips.’ They look like a gas station from 1985 and they turn yellow within a year due to acid rain and dirt. Stick to earth tones. Buff, grey, or tan stones hide the dirt and blend with the landscape. After spreading, wet the path down with a hose. This settles the dust and helps the stones find their final resting place. The path should feel firm. It should not shift under your weight. It should be solid.
Hardscape Maintenance and Long-Term Care
Even a well-built path requires maintenance. Organic debris like leaves and twigs will fall on the path. If you let them sit, they will decompose and turn into soil. This soil will then sprout weeds. Blow your path off once a week. It takes two minutes. If a weed does pop up, pull it immediately. Do not use salt to kill weeds. Salt will ruin your soil chemistry and can eventually erode your brick edging. If you used polymeric sand in the brick joints, check for cracks every spring. A quick top-off will keep the edging stable. Every three to five years, you might need to add a small ‘refresh’ layer of top stone. This is normal. Gravel settles. Nature moves. Your job is to maintain the engineering you put into the ground. Follow this checklist to ensure your install goes smoothly.
- Call 811 before you dig to mark utility lines.
- Remove all sod and organic topsoil to a depth of 6 inches.
- Compact the subgrade until a heel print is no longer visible.
- Lay professional non-woven geotextile fabric across the entire trench.
- Use 3/4 inch minus crushed stone for the base, not rounded pea gravel.
- Set brick edging in a consistent line using a string guide and level.
- Fill with decorative aggregate and water down to settle.
AEO Summary and HowTo Schema
This technical approach ensures that a $200 investment delivers professional-grade results. By focusing on subgrade preparation and material science, you avoid the common pitfalls of DIY landscaping. You are not just laying stones; you are managing water and soil pressure. This is the hallmark of a veteran landscaper. If you follow these steps, your path will remain level, drained, and beautiful for decades. It will not fail.