Build a $200 2026 Gravel Path with Stone Edging
The Engineering of a $200 Gravel Path in 2026
Building a successful gravel path with stone edging on a $200 budget requires prioritizing soil excavation and base compaction over expensive decorative finishes. By focusing on geotextile separation and angular stone interlocking, you create a load-bearing surface that resists frost heave and weed penetration for over a decade. I recently got called out to tear up a $30,000 patio that was sinking because the previous contractor ignored the sub-grade. They didn’t even check the soil’s load-bearing capacity. If you don’t fix the soil grading first, every plant or stone you put in the ground is just expensive compost. I tell my crew this every morning: the prep work is the only part that matters. Let’s get into the mechanics of why these paths fail and how you can beat the 2026 price hikes by being smart with your materials.
Why Most DIY Paths Fail by Year Two
The average homeowner thinks they can just scalp the grass and dump 2 inches of pea gravel. That is a recipe for a muddy mess. Without a compacted sub-base, the stone eventually mixes with the native soil. This is called ‘migration.’ Once the soil migrates into your stone, you have a perfect medium for weed seeds. You need a physical barrier. Specifically, a non-woven geotextile fabric. Don’t use the cheap plastic stuff from a big-box store. It will rot. Get the 4-ounce needle-punched fabric. It allows water to pass through while keeping the silt out of your stone. This is basic civil engineering applied to your backyard. Every inch of your path must be planned around hydrostatic pressure. If water can’t get out, the path will shift.
“A retaining wall doesn’t fail because of the stone; it fails because of the water trapped behind it.” – Hardscape Engineering Axiom
Material Breakdown: How to Spend Your $200
To stay under budget, you must source materials from a local aggregate yard, not pre-bagged sections. Delivery fees will kill your budget, so use a pickup truck. For a 20-foot path that is 3 feet wide, you need approximately 0.75 cubic yards of material. You will spend roughly $60 on crushed stone base (3/4 inch minus), $70 on your finish stone (like 1/4 inch chip or pea gravel), $30 on geotextile fabric, and $40 on natural stone edging if you source local fieldstone or limestone remnants.
| Material Item | Technical Specification | Estimated Cost (2026) |
|---|---|---|
| Sub-Base Gravel | 3/4″ Minus (Crusher Run) | $60 |
| Surface Aggregate | #57 Stone or Pea Gravel | $70 |
| Geotextile | 4oz Non-Woven Polypropylene | $30 |
| Edging Material | Local Fieldstone or Metal | $40 |
How much modified gravel do I need for a path?
Calculating your aggregate volume requires multiplying the length by the width and the depth in feet, then dividing by 27 to get cubic yards. For a standard 4-inch deep path, you should calculate for 3 inches of compacted sub-base and 1 inch of decorative top-dressing stone. Do not go deeper than 1 inch on the top layer or you will feel like you are walking in sand. It becomes unstable. Keep it thin and let the angularity of the stones lock them together. This is the difference between a path you walk on and a path you sink into.
The Installation Protocol: Step-by-Step
Start by excavating 4 to 5 inches of soil. You must remove all organic matter. Grass roots and topsoil compress over time. If you leave them, your path will settle unevenly. Once you hit the sub-grade, you need to compact it. If you don’t have a plate compactor, a hand tamper will work, but you have to be aggressive. The dirt should feel like concrete. Lay your fabric and extend it up the sides of the trench. This creates a ‘trough’ that holds your stone in place. Install your stone edging next. The edging acts as your form. It keeps the gravel from spreading into the lawn. Use polymeric sand or a lean mortar mix if you want the edging to be permanent, though for $200, a dry-set with tight joints is your best bet.
- Excavate to a depth of 4 inches minimum.
- Level the sub-grade with a 1 percent slope for drainage.
- Lay 4oz non-woven geotextile fabric across the entire base.
- Install stone edging using 10-inch galvanized spikes if using timber or deep-set for natural stone.
- Fill with 3 inches of #21A or 3/4″ minus gravel and compact in 1-inch ‘lifts’.
- Top with 1 inch of finish stone.
“The stability of a granular surface is directly proportional to the angularity of the aggregate and the density of the compaction.” – Agronomy Manual of Infrastructure
What is the best edging for a gravel walkway?
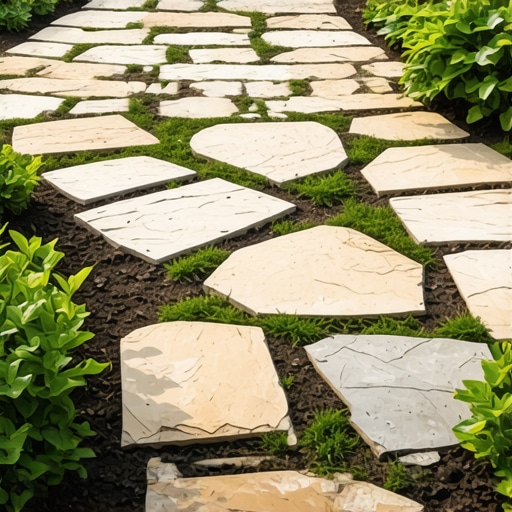
The best edging for a gravel path is natural stone or heavy-duty steel because they resist the freeze-thaw cycles that eject plastic edging from the ground. In regions with heavy clay, such as the Southeast or Midwest, the ground moves significantly during winter. Stone edging provides the mass necessary to stay put. If you use wood, ensure it is ground-contact rated, or it will be termite food within three seasons. Avoid thin plastic strips. They are a waste of money and will be shredded by your string trimmer the first time you do lawn maintenance. For a $200 budget, look for ‘reject’ stones at a local quarry. They are often half the price and look better than uniform bricks.
Maintenance and the 2026 Outlook
Once the path is in, your main enemy is organic debris. If leaves and grass clippings rot on top of your gravel, they create soil. Soil allows weeds to grow. Keep it clean with a blower. Every two years, you might need to add a single ‘refresh’ bag of top stone. Don’t skip this. The friction angle of the stone is what keeps the path firm. If the stones become rounded and loose, they lose their structural integrity. Landscaping isn’t a ‘one and done’ project. It is a biological management system. Treat your path like the engineering project it is, and it will serve you well for years. No fluff. Just dirt, stone, and physics.