
Build a $400 2026 Paver Walkway for Urban Backyard Entries
The Engineering of an Urban Footpath
Building a durable paver walkway for under $400 requires precise material sourcing and a focus on sub-grade preparation. In urban environments, managing compaction and drainage is more critical than the aesthetic of the stone itself to prevent shifting over time. I recently got called out to tear up a $30,000 patio that was sinking because the previous contractor skipped the geotextile layer and used stone dust instead of clean gravel. It was a $30,000 autopsy of incompetence. People think a walkway is just flat rocks. It is not. It is a civil engineering project on a micro-scale. If you ignore the hydrostatic pressure and the soil load-bearing capacity, your $400 project will be a pile of loose rubble by the following spring.
Material Procurement on a Budget
For a $400 budget, prioritize structural integrity by investing in modified stone and coarse bedding sand rather than high-end pavers. Using standard concrete pavers or reclaimed brick allows you to allocate funds to the geotextile fabric and edge restraints necessary for longevity. You do not need the fancy $12-per-square-foot multi-piece systems. Go to a local masonry supply yard, not the big box orange or blue stores. Ask for 2 1/4 inch thick concrete pavers. They are rugged. They are functional. They are affordable. You are building a path, not a palace. The real work is under the ground. I have seen homeowners spend their whole budget on fancy travertine and then lay it on dirt. It will crack. Every time.
| Material | Quantity (approx. 30 sq ft) | Estimated Cost |
|---|---|---|
| 21A Modified Stone | 0.5 Cubic Yard | $45.00 |
| ASTM C33 Concrete Sand | 0.25 Cubic Yard | $25.00 |
| Standard Concrete Pavers | 120 Units | $180.00 |
| Non-woven Geotextile Fabric | 40 Sq Ft | $35.00 |
| Plastic Edge Restraints | 20 Linear Ft | $50.00 |
| Polymeric Sand | 1 Bag | $40.00 |
The Excavation and Sub-Grade Foundation
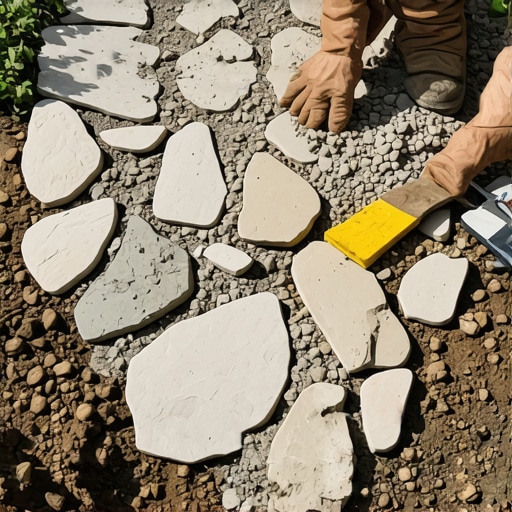
Proper excavation involves digging to a depth of 7 to 9 inches to accommodate a 4-inch compacted stone base, 1 inch of bedding sand, and the paver thickness. Failure to remove organic material leads to settling and eventual walkway failure within two seasons. Organic soil, or topsoil, is spongy. It holds water. When that water freezes, it expands. This is frost heave. It will ruin your work. Dig until you hit subsoil, which is usually lighter in color and harder. This is your load-bearing surface. Don’t skip the utility call. Hit a gas line and your $400 project becomes a $10,000 emergency. [image_placeholder_1]
“A retaining wall or walkway doesn’t fail because of the stone; it fails because of the water trapped behind or beneath it.” – Hardscape Engineering Axiom
How much modified gravel do I need for a patio base?
To calculate gravel, multiply length times width times depth in feet, then divide by 27 to get cubic yards. For a 4-inch base on a 10-foot walkway that is 3 feet wide, you need 0.37 cubic yards. Always order 10% more for compaction loss. Gravel does not stay the same volume once you hit it with a plate compactor. It shrinks as the fines fill the voids between the larger stones.
Compaction and Screeding: The Invisible Success
Mechanical compaction of the sub-grade and base material is the most overlooked step in DIY hardscaping. Using a plate compactor ensures the 21A modified stone reaches maximum density, preventing the hydrostatic pressure of ground moisture from lifting individual pavers during freeze cycles. If the tamper doesn’t bounce off the stone, you aren’t done. Run the machine in overlapping passes. You want a 95% Proctor density. This is what prevents the walkway from developing ruts where people walk. After compaction, lay your 1-inch screed pipes. Use concrete sand, not play sand. Play sand is round; concrete sand is angular. Angular sand locks together. Round sand acts like ball bearings. Your pavers will slide if you use the wrong sand.
What is the best sand for paver joints?
The best sand for modern paver joints is high-quality polymeric sand that meets ASTM C-144 standards. This material contains polymers that harden when wetted, creating a flexible but firm bond that prevents weed growth and ant hills while allowing for thermal expansion. Cheap sand is a waste of time. Spend the $40 on the good stuff. It keeps the structural integrity of the system intact.
The Installation Checklist
- Call 811 before digging to mark underground lines.
- Excavate 8 inches deep and 6 inches wider than the path on both sides.
- Lay non-woven geotextile fabric to separate soil from stone.
- Install 4 inches of 21A modified stone in 2-inch lifts, compacting each.
- Screed 1 inch of concrete sand perfectly flat.
- Set pavers in the desired pattern, keeping joints tight.
- Install edge restraints with 10-inch steel spikes every 12 inches.
- Sweep in polymeric sand, vibrate, and mist with water.
Final Finishing and Maintenance
Applying polymeric sand to the joints creates a semi-rigid bond that resists weed growth and insect infestation while remaining flexible. Regular lawn care maintenance around the walkway edges prevents root encroachment from disrupting the structural integrity of the pavers over time. Do not use a pressure washer on high settings near the joints. You will blast out the sand. Keep your garden design away from the very edge of the path; large tree roots will lift these pavers in five years. You want a 6-inch buffer of turf or small perennials. Check the edges every spring. If a spike has heaved, hammer it back down. Hardscaping is a battle against gravity and water. You never truly win; you just maintain a superior position.
“Effective drainage is the primary requirement for any pavement system to achieve its design life.” – Penn State Agricultural Extension
![Repair 2026 Cracked Concrete Walkways for $40 [Fast]](https://lawnmajesty.com/wp-content/uploads/2026/05/Repair-2026-Cracked-Concrete-Walkways-for-40-Fast.jpeg)