3 Stone Walkway Layouts That Reduce Foot Traffic Noise
Engineering Silence: 3 Stone Walkway Layouts to Minimize Foot Traffic Noise
The sound of heavy boots clicking against stone can ruin the quiet of a garden. Most homeowners do not realize that walkway noise is a failure of engineering, not just the material choice. As a contractor with over two decades in the dirt, I have seen every mistake in the book. I recently got called out to tear up a $30,000 patio and walkway system that was sinking and clacking because the previous contractor used a base of stone dust instead of modified gravel. Every time the homeowner walked to their mailbox, it sounded like they were stepping on hollow drums. We had to excavate 12 inches of muck and start from the sub-grade. This is why you do not hire a mow-and-blow crew to do a hardscape foremans job. If the base is not right, the noise will never go away.
The Physics of Acoustic Hardscaping and Material Selection
Acoustic hardscaping reduces foot traffic noise by manipulating the surface density and porosity of materials. By choosing stones with high surface irregularity and using diffusive joint fillers, you break up sound waves before they bounce back into the surrounding environment. Noise is essentially reflected energy. Hard, smooth surfaces like polished granite or dense concrete pavers are the worst offenders. They act like mirrors for sound. To kill the noise, you need materials that either absorb energy or break the wave. We look at the Youngs modulus of the stone: sandstones and limestones generally have more internal porosity than metamorphic rocks like quartzite. This microscopic air space acts as a natural dampener. Do not ignore the jointing. The gap between your stones is your best friend for noise reduction. If you fill that gap with a rigid mortar, you create a monolithic resonator. If you fill it with an open-cell aggregate or living mulch, you create an acoustic trap.
“A walkway base that lacks proper compaction will eventually create a resonant chamber between the stone and the soil.” – ICPI Installation Manual
Layout One: Irregular Flagstone with Deep-Set Joints
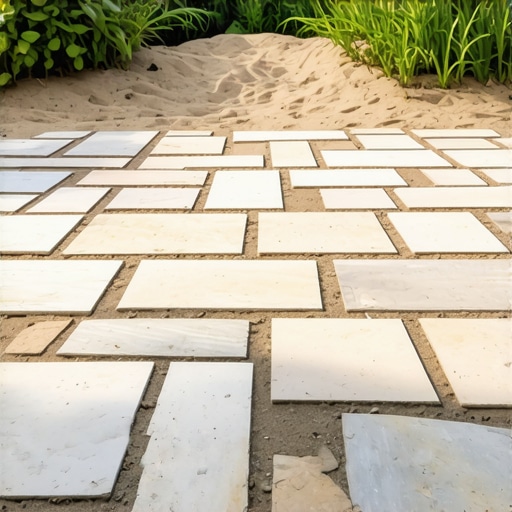
The Irregular Flagstone layout utilizes varied stone shapes to disrupt linear sound reflection. By installing stones with wide joints filled with creeping perennials or loose aggregates, you create a decoupled surface that prevents the drumming effect common in monolithic concrete slabs. When you use irregular shapes, the sound waves are scattered in multiple directions rather than bouncing back up in a clean line. This is the same principle used in recording studios with jagged foam on the walls. For this to work, the flagstone needs to be at least 1.5 to 2 inches thick. Thin stone vibrates. Thick stone has mass. We bed these in a 1 inch layer of coarse sand over a 4 to 6 inch base of 21A modified gravel. The gravel must be compacted in 2 inch lifts using a plate compactor. If you do not hit 95% Proctor density, the stones will shift. Shifting stones rub against each other. That rubbing creates a high-frequency grating sound that drives people crazy. Use a wide joint: 2 to 4 inches: and fill it with a mix of compost and native soil if you are planting, or #8 stone if you want drainage. The gaps act as sound breaks.
What is the best stone for reducing noise on a path?
For the quietest results, look for sawn-bed sandstone or cleft-finish limestone. These stones have a rougher texture which prevents the ‘slapping’ sound of rubber soles hitting a flat surface. Avoid thermal-finish bluestone if noise is your primary concern, as the heating process makes the surface glass-smooth and highly reflective to sound waves.
Layout Two: Permeable Paver Systems with Open Cells
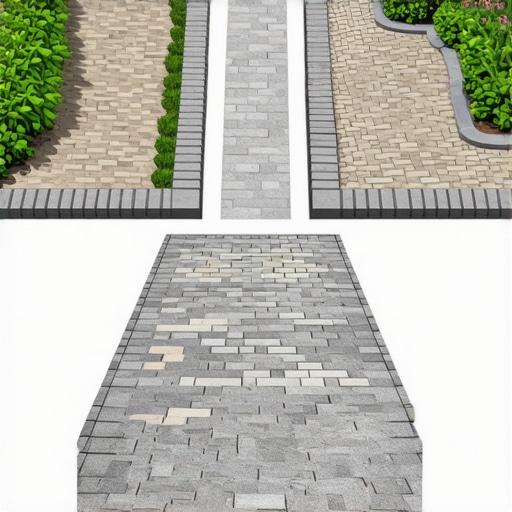
Permeable paver systems utilize engineered voids and angular stone chips to trap sound energy within the base layers. This design relies on a sub-surface reservoir of #57 stone which acts as a sound muffler while managing stormwater runoff and preventing hydrostatic lift. These are not your standard pavers. They are designed with larger spacer bars that create wide gaps. Instead of polymeric sand: which hardens like concrete: we use small, angular clean stone. When you walk on this, the energy travels through the paver and is dissipated into the air pockets between the stones in the joints. It is a massive mechanical dampener. From an engineering perspective, this layout is superior for drainage too. It prevents the pooling of water which can lead to ‘squishing’ sounds in the lawn. You must ensure your sub-grade is sloped at 2% away from any structures. Even a quiet walkway is a failure if it floods your basement. We use a geotextile fabric to keep the #57 stone from migrating into the clay sub-soil. This maintains the structural integrity and the acoustic properties for the long haul.
“Soil compaction levels exceeding 95% are necessary to maintain structural integrity and minimize vibrational transfer in pedestrian hardscapes.” – Penn State Agricultural Extension
| Material Type | Density (lb/ft3) | Noise Absorption | Primary Benefit |
|---|---|---|---|
| Sandstone Flagstone | 150 | High | Acoustic Softness |
| Permeable Pavers | 135 | Medium-High | Drainage & Dampening |
| Granite Setts | 175 | Low | Durability |
| River Pebbles | 105 | Very High | Sound Diffusion |
Layout Three: Stepping Stones with Bio-Buffer Zones
Stepping stone layouts involve individual stone placement surrounded by vegetative buffers like moss or thyme. This configuration creates acoustic breaks between every step, using the soil’s natural dampening properties to absorb vibrational energy from footfall impact before it travels horizontally. This is the ultimate ‘anti-noise’ layout. By isolating each stone, you prevent the walkway from acting as a single, loud structure. The ‘bio-buffer’ or the green space between stones acts like a carpet. Creeping Thyme (Thymus serpyllum) is a favorite because it handles foot traffic and releases a scent when stepped on, but more importantly, its dense mat of foliage absorbs high-frequency noise. You must excavate individual ‘pockets’ for these stones or build a continuous base and then ‘island’ the stones within it. If you just toss stones on top of the grass, they will tilt and wobble. A wobbling stone is a noisy stone. We set each stone in a dedicated 4 inch deep pad of screenings to ensure they never move. This is meticulous work. Hacks won’t do it. But it is the difference between a path that feels solid and one that feels like a trip hazard.
How thick should a stone walkway base be?
A standard pedestrian walkway requires a minimum of 4 inches of compacted modified gravel. If you are in a region with heavy freeze-thaw cycles, like the Northeast or Midwest, you should increase this to 6 inches. This prevents frost heave from tilting the stones, which creates uneven gaps and mechanical noise when walked upon.
The Engineering Behind the Base: Why Compaction Matters
A quiet walkway requires a 95% Standard Proctor density in the modified gravel base to prevent void-related echoes. Using DGA (Dense Graded Aggregate) or CR6 gravel ensures the stones sit on a solid foundation, eliminating the clicking or shifting sounds caused by unstable bedding layers. You cannot skip the plate compactor. I see guys trying to hand-tamp a 50-foot walkway. It does not work. The tamper should literally bounce off the compacted base when it is finished. That is how you know the air is out. If there is air in the base, there is room for moisture. Moisture leads to movement. Movement leads to noise. We also check for hydrostatic pressure. If the yard drains toward the path, we install a French drain alongside it using a 4 inch perforated pipe and clean gravel. Keep the water out of the base and the path stays quiet. This is applied civil engineering. Don’t let anyone tell you it is just ‘landscaping.’
- Mark all underground utilities by calling 811 before any excavation begins.
- Excavate the path to a depth of 8 inches to allow for base, bedding, and stone thickness.
- Install a heavy-duty non-woven geotextile fabric to separate soil from the aggregate.
- Add 21A modified gravel in 2-inch layers, wetting slightly and compacting each layer.
- Set stones using a dead-blow hammer to ensure full contact with the bedding sand.
- Fill joints with the appropriate acoustic dampening material (stone chips or living mulch).
Long-Term Maintenance and Year One Settling
The first year is the most critical for any stone installation. The earth is a living thing and it will settle. You might hear a slight ‘crunch’ in the first few months as the jointing material seats itself. This is normal. What is not normal is a stone that rocks. If a stone rocks, lift it immediately. Add bedding sand to the low spot and reset it. If you let it rock, it will eventually crack the stone or the surrounding joints. For permeable systems, you must vacuum or blow out the joints once a year to prevent organic debris from clogging the gaps. If they clog, they lose their acoustic dampening properties and their drainage capacity. Do not use salt on natural stone in the winter. It eats the surface and increases the porosity to a point of structural failure. Use sand for traction. It is better for the stone, better for the noise profile, and better for the soil biology. Real landscaping is about stewardship of the system you built. It will rot if you ignore it. Stay on top of the weeds in the joints of Layout Three. If the thyme dies, the soil erodes, and the noise returns. Keep the system tight.



![Fix Sinking Garden Steps with Poly-Sand [2026 DIY]](https://lawnmajesty.com/wp-content/uploads/2026/06/Fix-Sinking-Garden-Steps-with-Poly-Sand-2026-DIY.jpeg)