![Fix 2026 Yard Puddles with a $150 Dry Well [DIY]](https://lawnmajesty.com/wp-content/uploads/2026/06/Fix-2026-Yard-Puddles-with-a-150-Dry-Well-DIY.jpeg)
Fix 2026 Yard Puddles with a $150 Dry Well [DIY]
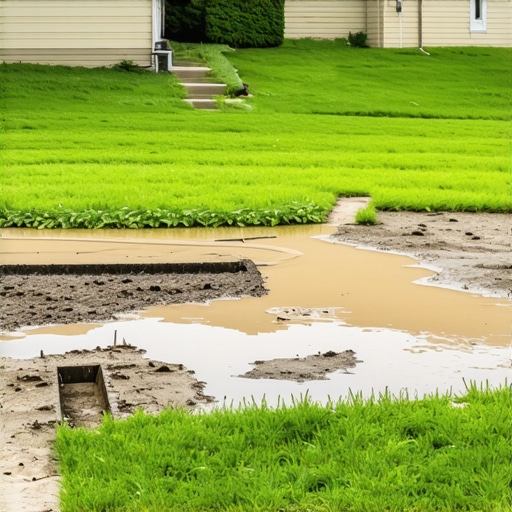
The Anatomy of a Sinking Yard
You know the sound. It is that sickening squish when you step on your turf three days after the rain has stopped. Your lawn is not just wet; it is drowning. I recently got called out to tear up a $30,000 patio that was sinking because the previous contractor ignored basic hydrostatic pressure. They laid expensive pavers over a site with a 1% grade and zero drainage infrastructure. Within two seasons, the sub-grade saturated, the fines migrated, and the entire structure buckled. It was a forensic autopsy of a failed landscape. Most homeowners see a puddle and think they need more dirt. They are wrong. You do not need more dirt; you need a way to manage the water volume that your soil’s bulk density can no longer process. Yard puddles in 2026 are often the result of legacy compaction from construction equipment or poor local grading that directs runoff into localized depressions.
“A retaining wall doesn’t fail because of the stone; it fails because of the water trapped behind it.” – Hardscape Engineering Axiom
Why Your Yard Puddles Persist
Standing water is caused by soil compaction, hydrostatic pressure, and improper grading that prevents gravity from moving surface runoff toward a viable exit point. When your soil reaches its saturation point, the pore spaces between soil particles fill completely with water, leaving no room for oxygen. This leads to anaerobic conditions that kill turf roots. If your yard has heavy clay, the percolation rate might be as low as 0.05 inches per hour. This is where the dry well comes in. It acts as an underground surge tank. It buys you time by holding the water in a high-void-space environment until the surrounding subsoil can slowly absorb it through capillary action.
| Material | Quantity | Estimated Cost |
|---|---|---|
| NDS 10-Gallon Basin | 1 Unit | $55.00 |
| #57 Clean Crushed Stone | 0.5 Cubic Yard | $65.00 |
| Non-Woven Geotextile Fabric | 1 Roll (Small) | $20.00 |
| 4-inch Perforated PVC Pipe | 10 Feet | $10.00 |
How much water can a small dry well hold?
A standard 10 to 20 gallon DIY dry well, when surrounded by a 12 inch jacket of #57 stone, can effectively manage the runoff from a 500 square foot roof section during a standard one inch rain event. The stone provides a 40% void space, significantly increasing total capacity beyond the basin volume itself.
The $150 Dry Well Blueprint
A dry well is an underground basin that collects runoff and allows it to percolate into the subsoil without creating surface mud or erosion. To build this for $150, you have to skip the fancy contractor crews and do the digging yourself. Start by identifying the lowest point of the puddle. You must call 811 before you break ground. Striking a gas line will cost you a lot more than $150. You are looking to dig a hole roughly 4 feet deep and 3 feet wide. This is not a suggestion. If you go shallow, the frost heave will eject your basin by spring. Once the hole is dug, line the entire perimeter with non-woven geotextile fabric. Do not use the cheap plastic weed barrier from a big-box store. You need a fabric that allows water molecules through while stopping silt from clogging your stone. Silt is the enemy of drainage. Once the fabric is in, add 6 inches of #57 clean stone. Set your basin, connect your 4 inch perforated pipe to the source of the water (like a downspout or a French drain inlet), and backfill the sides with more stone. Wrap the fabric over the top like a burrito. Top it with 4 inches of topsoil and seed. It will work. Do not skip the fabric. If you do, your dry well will be a bucket of mud within two years.
Will a dry well work in heavy clay soil?
Yes, but you must increase the surface area of the stone jacket. In heavy clay, the percolation rate is the bottleneck. By doubling the width of your gravel pit, you provide more “face time” between the stored water and the clay walls, forcing the water to dissipate across a larger subterranean footprint.
Technical Maintenance and Longevity
Do not assume that once the well is buried, the job is over. Every autumn, you need to clear the debris from the intake grates. If organic matter enters the well, it will rot. That rot turns into a biological film that seals the pores of your geotextile fabric. This is called “bioclogging.” A well-maintained dry well can last 20 years. A neglected one will fail in five. If you see water backing up out of the grate, it means your basin is full or the surrounding soil is fully saturated. This is why site selection is critical. Never install a dry well within 10 feet of a foundation. You do not want to invite that hydrostatic pressure to push against your basement walls. Use a laser level to ensure your feeder pipe has at least a 1% slope (1/8 inch of drop per foot). Gravity is the only employee that never calls out sick. Trust it. Check your basin after the first three major storms. Look for sediment buildup. Scoop it out. Keeping the system clean is the difference between a permanent fix and a temporary hole in the ground.
- Step 1: Locate the utility lines and mark the lowest puddle point.
- Step 2: Dig a 4×3 foot pit and trench the feeder line at a 1% grade.
- Step 3: Line the pit with non-woven geotextile fabric, ensuring 12 inches of overlap.
- Step 4: Install the basin and backfill with #57 clean crushed stone.
- Step 5: Seal the fabric burrito and top with native soil.
“Surface drainage is a matter of geometry; subsurface drainage is a matter of physics.” – Agronomy Manual 101

![Stop 2026 Tree Bark Damage from Weed Whackers [Fix]](https://lawnmajesty.com/wp-content/uploads/2026/05/Stop-2026-Tree-Bark-Damage-from-Weed-Whackers-Fix.jpeg)
![Fixing 2026 Broken Drip Irrigation Lines [Easy]](https://lawnmajesty.com/wp-content/uploads/2026/06/Fixing-2026-Broken-Drip-Irrigation-Lines-Easy.jpeg)