How to Build a Durable Gravel Path That Stays Put
The Engineering Reality of the Gravel Path
To build a durable gravel path, you must excavate 6 inches of soil, install a 4-inch compacted sub-base of crushed stone, and use non-woven geotextile fabric. This prevents the gravel from migrating into the soil while ensuring water drainage and structural stability under foot traffic. Most failures occur because of poor sub-grade preparation or the use of rounded stones that never lock together.
I recently got called out to tear up a $30,000 patio and walkway system that was sinking because the previous contractor thought they could skip the sub-base compaction. The path was essentially a 20-foot-long mud trench dressed up with expensive river rock. Within six months, the stones had disappeared into the clay sub-soil, creating a sludge that was impossible to walk on. That is $30,000 in the trash because of a refusal to understand soil mechanics. If you don’t respect the dirt, it will swallow your investment. This isn’t just about aesthetics; it is about managing the hydrostatic pressure and soil bearing capacity of your property.
The Science of Soil Stabilization and Sub-Grades
Before you even think about buying stone, you need to understand what you are digging into. In my 20 years of hardscaping, I have seen too many people start throwing gravel on top of organic material. Organic matter, like grass and topsoil, decomposes. When it decomposes, it leaves air pockets. When those pockets collapse, your path sinks. You must excavate down to the mineral soil. This is the sub-grade. Once you hit that stiff clay or packed sand, you have a foundation. If you are dealing with heavy clay, you are dealing with a material that expands when wet and shrinks when dry. This cycle will destroy a path that isn’t properly engineered. You need a non-woven geotextile. This fabric acts as a separator. It allows water to pass through but prevents the fine clay particles from pumping up into your clean gravel. It is the single most important 15 cents per square foot you will ever spend.
“A retaining wall doesn’t fail because of the stone; it fails because of the water trapped behind it.” – Hardscape Engineering Axiom
How deep should a gravel path be for a garden?
A professional-grade garden path requires a total depth of 6 inches, consisting of 4 inches of compacted 21AA crushed stone followed by 2 inches of angular decorative aggregate. This depth ensures that the path can distribute weight effectively without deforming the underlying soil. Without this depth, the path will likely shift during freeze-thaw cycles or heavy rain events.
Selecting the Right Aggregate: Angular vs. Rounded
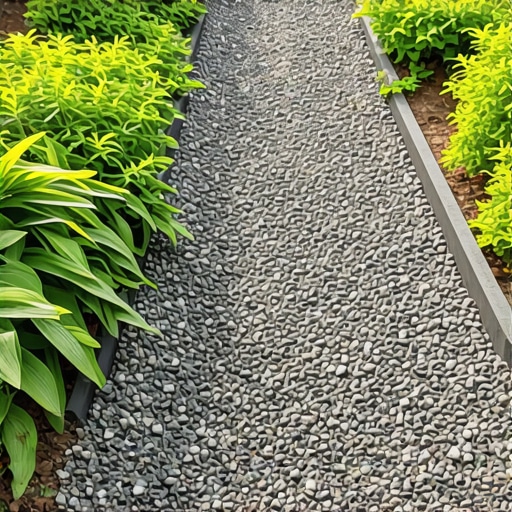
For a path that stays put, you must select angular crushed stone rather than rounded pea gravel. Angular stones possess interlocking properties that create a stable, monolithic surface when compacted, whereas rounded stones act like ball bearings and will shift under every footstep. This is the difference between a path you can walk on in heels and one that feels like walking through deep sand.
| Material Type | Shape | Compaction Rating | Best Use |
|---|---|---|---|
| Pea Gravel | Rounded | Very Low | Drainage/Decorative Only |
| 3/4″ Minus (Crushed) | Angular | Very High | Structural Sub-Base |
| Decomposed Granite | Fine/Angular | High | High-Traffic Surface |
| River Rock | Smooth/Round | None | Dry Creek Beds |
Why does shape matter? It comes down to the angle of repose and friction. When you pack angular stones together, the jagged edges bite into one another. This creates a friction lock. Rounded stones, like the ones found in big-box store bags, have no way to grip. They roll. If you try to push a wheelbarrow over pea gravel, you will learn this lesson the hard way. I tell my crew: if it is round, it is for drainage; if it is sharp, it is for walking. Don’t mix the two up unless you want to spend your weekends raking stones back into place.
What is the best base for a gravel walkway?
The best base for a gravel walkway is a 4-inch layer of 3/4-inch minus crushed limestone or recycled concrete. This material contains a mix of stone sizes and fines (dust) that, when moisture-conditioned and compacted, forms a base nearly as hard as concrete. This base provides the structural integrity needed to prevent the finish gravel from sinking into the sub-soil.
The Compaction Protocol: Do Not Skip the Tamper
Compaction is the process of removing air from the soil and aggregate to increase its bulk density. For a path to be durable, you must use a vibratory plate compactor or a heavy hand tamper to achieve at least 95% Standard Proctor Density. If you skip this, the first heavy rain will do the compacting for you, and it will not be level. This is where the amateurs fail. They dump the stone and walk away. You need to compact in “lifts.” A lift is a 2-inch layer of stone. You spread 2 inches, you run the compactor. You spread another 2 inches, you run the compactor again. It should be so hard that the machine literally bounces off the surface. If it still feels soft, keep going. It is the only way to ensure the path won’t rut when someone walks on it after a storm.
“Proper compaction of the sub-grade is essential to prevent differential settlement in residential walkways.” – ICPI Tech Spec No. 2
- Step 1: Excavate to 6 inches depth and remove all roots.
- Step 2: Grade the sub-soil to a 1% slope to move water away from structures.
- Step 3: Lay down 4oz non-woven geotextile fabric.
- Step 4: Install edge restraints (steel, aluminum, or pressure-treated timber).
- Step 5: Add 4 inches of base stone in 2-inch lifts, compacting each time.
- Step 6: Top with 2 inches of finish gravel and a final light compaction.
Edge Restraints and Hydrostatic Management
A gravel path without edging is just a long, narrow pile of rocks waiting to be scattered across your lawn. You need a rigid edge restraint to keep the stone confined and to prevent lateral migration. Steel edging is my preference because it is nearly invisible and won’t rot like wood or crack like cheap plastic. You also have to consider where the water goes. Water is the enemy of any hardscape. If your path is in a low spot, it will become a stream. I always look at the soil grading first. You want the path to be slightly elevated or to have a subtle crown in the center so water sheds to the sides. If you trap water under the path, the soil will turn into a liquid state, and your path will vanish. It is simple physics. We often install a 4-inch perforated French drain alongside paths in heavy clay areas to ensure the sub-base stays dry. It’s a bit more work now, but it saves a total rebuild in five years.
Maintenance and the Longevity Cycle
Once the path is built, maintenance shouldn’t involve a shovel. If you engineered it correctly, you are just looking at occasional weeding and a light topping of stone every 3-5 years. Don’t use chemical weed killers if you can help it; they can mess with the soil chemistry of the surrounding garden. Instead, ensure your edging is tight. Most weeds in gravel paths don’t come from the bottom—they come from seeds blowing into the top. A quick blow with a leaf blower once a week keeps organic debris out of the stone, which prevents a compost layer from forming. If you let leaves rot in your gravel, you are literally making soil for weeds to grow in. Keep it clean. Keep it dry. The path will last longer than your house. Don’t skip the details. Details are the difference between a landscape and a chore.
![Build a $400 Flagstone Walkway in One Weekend [DIY]](https://lawnmajesty.com/wp-content/uploads/2026/06/Build-a-400-Flagstone-Walkway-in-One-Weekend-DIY.jpeg)
![Fix Sinking Pavers with This $40 Poly-Sand Trick [2026 DIY]](https://lawnmajesty.com/wp-content/uploads/2026/05/Fix-Sinking-Pavers-with-This-40-Poly-Sand-Trick-2026-DIY.jpeg)