How to Build a Low-Cost Shade Structure Using Sail Cloth
Structural Integrity and the DIY Shade Sail Trap
Building a low-cost shade structure using sail cloth requires a deep understanding of tensile loads, structural anchoring, and wind resistance to prevent catastrophic failure of your hardscaping elements. Most homeowners underestimate the massive lateral force a simple 20-foot sail exerts on a 4×4 post during a 40 mph gust. I recently performed a hardscape autopsy on a $30,000 patio where the owner had attached a shade sail directly to a chimney. The wind didn’t just rip the sail; it pulled three courses of brick loose because they didn’t account for the leverage and hydrostatic pressure redirects. If you think you can just screw an eye-bolt into your siding and call it a day, you are essentially building a giant, house-wrecking kite. Real landscaping professionals know that the fabric is the cheapest part of the project; the real work lies in the engineering of the anchor points and the soil compaction around your support posts.
“A retaining wall doesn’t fail because of the stone; it fails because of the water trapped behind it, much like a shade structure fails not from the fabric, but from the physics of the load transfer.” – Hardscape Engineering Axiom
Site Analysis and Solar Geometry
Successful garden design utilizing shade sails depends on azimuth calculations and solar pathing to ensure the shadow actually falls where you intend to sit during peak UV exposure hours. You must track the sun at 2:00 PM in July, not just look at where the sun is when you are digging the holes. Many amateurs install a beautiful sail only to realize the shade is ten feet over the neighbor’s fence when they actually need it. Beyond the light, you must look at the soil profile. Are you working with expansive clay or sandy loam? In heavy clay, your post footings need to be wider to resist lateral movement, whereas in sandy soil, they need to be significantly deeper to prevent pull-out failure. Never skip calling 811 before you dig; hitting a lateral sewer line will turn your lawn care project into a five-figure plumbing disaster instantly. It is expensive. It is avoidable.
How much tension does a shade sail need?
A professional grade shade sail requires approximately 100 to 150 pounds of tension per corner to prevent fabric flapping and water pooling during rain events. We measure this tension by the “tight as a drum” sound when you strike the center of the HDPE material. Use 316-grade stainless steel turnbuckles to achieve this; cheap zinc-plated hardware will seize within six months due to oxidation. You aren’t just hanging a sheet; you are pre-stressing a structural membrane.
Material Specifications and Chemical Resistance
Selecting the right HDPE (High-Density Polyethylene) fabric is critical for landscaping longevity because UV degradation will shred lower-quality polyester in a single season. Look for a material weight of at least 280 GSM (Grams per Square Meter). This fabric is designed to breathe, allowing hot air to rise through the weave while blocking 95% of UV radiation. If you buy a solid waterproof tarp, you are building a wing. In a high wind event, a solid tarp will exert thousands of pounds of force, likely snapping your posts or pulling out your house’s fascia board. We use HDPE because it is hydrophobic and resistant to mildew and mold, which are the primary enemies of garden design in humid climates.
| Hardware Component | Material Requirement | Purpose |
|---|---|---|
| Turnbuckle | 316 Stainless Steel | Adjusting tension and removing slack |
| D-Shackles | Forged Stainless | Connecting sail corners to anchors |
| Post Footing | 4000 PSI Concrete | Resisting lateral wind loads |
| Support Post | Schedule 40 Steel or 6×6 PT Wood | Main structural vertical support |
The Engineering of the Hyperbolic Paraboloid
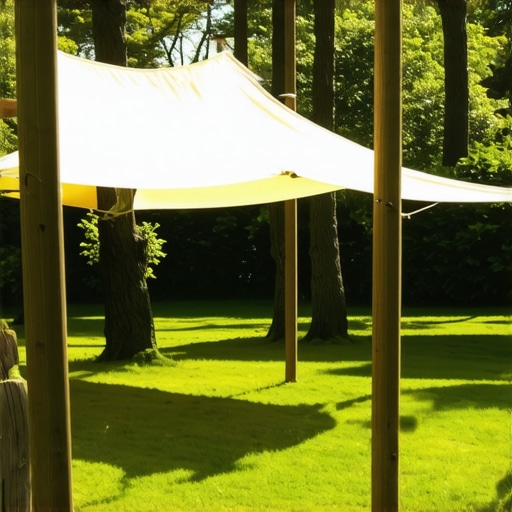
To prevent water ponding and fabric stretching, you must install your sail cloth in a hyperbolic paraboloid configuration, meaning at least two corners are significantly higher or lower than the others. This creates a 3D twist in the fabric that sheds water and breaks up wind laminar flow. If you hang a sail perfectly flat, it will collect rainwater, weigh several hundred pounds, and eventually collapse. I tell my crew: if it looks like a flat ceiling, it is a failure waiting to happen. The slope should be at least 20 degrees. This is non-negotiable for hardscaping stability. You want the wind to move around the sail, not against it.
What is the best post for a shade sail?
The best post for a low-cost shade structure is a Schedule 40 galvanized steel pipe or a pressure-treated 6×6 timber buried at a depth equal to one-third the height of the post. For a 10-foot tall sail, that means 3.5 feet of post is in the ground, encased in a concrete pier. Anything smaller, like a 4×4, will flex under tension, causing the sail to sag and eventually leading to wood fatigue or snapping at the grade line.
Step-by-Step Installation Protocol
First, excavate your post holes to the required depth, ensuring you are below the frost line to prevent heave. Don’t just pour concrete into a dry hole; use a sonotube to ensure a clean, cylindrical pier that won’t be pushed by soil expansion. Second, lean your posts 5 to 10 degrees away from the center of the sail area. When you apply the 150 pounds of tension, the posts will pull toward the center and become perfectly vertical. If you start vertical, they will lean inward over time, and your sail will never be tight. Third, attach your mounting hardware using heavy-duty lag bolts into structural framing only; never attach to 1x trim or siding. Fourth, hook up your turnbuckles in the fully extended position, then tighten them sequentially. Go around the sail in a circle, tightening each corner a few turns at a time to maintain even tensile distribution. It should be taut. No sagging. No wrinkles.
- Verify underground utilities with a Dig Safe request before excavation.
- Use a transit level to ensure consistent heights across anchor points.
- Apply anti-seize lubricant to all stainless steel threads to prevent galling.
- Check tension after the first 48 hours as the HDPE fabric undergoes initial mechanical stretch.
“The primary cause of failure in tensile structures is not the fabric itself, but the failure of the attachment hardware under cyclic loading conditions.” – Structural Engineering Institute Standards
Long-Term Structural Integrity
Maintenance is the part of landscaping that most people ignore until something breaks. You must inspect your D-shackles and eye-bolts annually for signs of stress fractures or metal fatigue. In regions with heavy snow, you must take the sail down before the first freeze. HDPE is strong, but it is not rated for snow loads. A single inch of wet snow on a 200-square-foot sail adds over 1,000 pounds of weight. Your hardscaping isn’t designed for that. Clean the fabric with a low-pressure garden hose and a mild pH-neutral soap; high-pressure washers will blow out the weave fibers and ruin the UV coating. If you treat it like a piece of civil engineering rather than a decoration, it will last ten years. Skip the details, and it won’t last ten weeks. Don’t be the guy whose patio becomes a debris field after the first summer thunderstorm.