How to Create a Layered Flower Bed with Constant Blooms
Establishing the Foundation: Why 80% of Landscaping Happens Before the First Plant
To create a layered flower bed with constant blooms, you must first master the soil profile and site drainage to ensure root systems have the oxygen and nutrient access required for multi-season performance. Most amateurs start by picking out pretty colors at a big-box store, but a veteran foreman knows that if you do not fix the soil grading first, every plant you put in the ground is just expensive compost. I always drill this into my new crew members: we are engineers first and gardeners second. If the compaction levels are too high or the pH balance is skewed, those perennials will fail within eighteen months. Period.
“A successful planting bed is dependent on the physical and chemical properties of the soil, specifically the pore space for oxygen and the Cation Exchange Capacity for nutrient retention.” – Agronomy Manual for Professional Landscapers
The Forensic Analysis of Your Site
Before you touch a spade, you need to understand the micro-climate of the specific bed location. This includes calculating the sun-hour duration, assessing the USDA Hardiness Zone, and performing a percolation test. If your soil has high clay content, it will hold water like a bathtub, rotting the root flares of your structural shrubs. If it is too sandy, your nitrogen-phosphorus-potassium (NPK) ratios will flush out before the plants can uptake them. We aim for 5% organic matter in the top 8 inches of the soil profile. Don’t guess. Test.
The Blueprint for Structural Layering
A layered flower bed uses height-staggered plant material, starting with tall structural evergreens in the back, transitioning to mid-sized perennial shrubs, and finishing with low-growing groundcovers to create depth and visual density. This is not just about aesthetics; it is about biomass management and air circulation. We use the stair-step method to ensure that every leaf has access to the light it requires for photosynthesis without being shaded out by aggressive neighbors.
How deep should a flower bed be for perennials?
For a professional-grade layered flower bed, the depth should be at least 5 to 7 feet to allow for a three-tier hierarchy of plants without overcrowding the root zones. If the bed is too narrow, you cannot achieve the staggered bloom cycles necessary for year-round interest. Crowded plants compete for soil moisture and are far more susceptible to powdery mildew and root rot due to poor airflow. Give them space. They will fill in.
| Layer Type | Height Range | Function | Plant Examples |
|---|---|---|---|
| Back (Structural) | 4′ – 8′ | Backdrop / Privacy | Boxwood, Juniper, Dwarf Conifers |
| Middle (Seasonal) | 2′ – 4′ | Bloom Volume | Coneflowers, Salvia, Peonies |
| Front (Border) | 6″ – 18″ | Ground Cover | Creeping Phlox, Heuchera, Sedum |
The Constant Bloom Strategy: Successional Planting Science
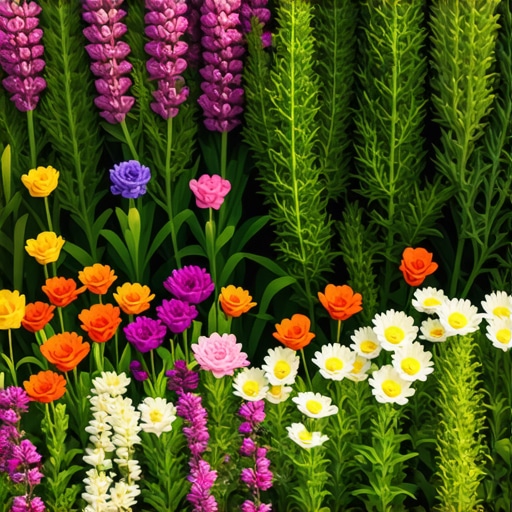
The secret to constant blooms is successional phenology, which involves selecting species that trigger their reproductive cycles at different photoperiods and temperature thresholds throughout the growing season. Most DIYers buy everything that is blooming in May. By July, their yard is a wall of green with no color. To fix this, you must map out your early-spring ephemerals, mid-summer heavy hitters, and late-fall performers. You want a 1:1:1 ratio of bloom timing across your layers.
What is the best mulch for perennial flower beds?
The best mulch for perennial flower beds is triple-shredded hardwood bark or high-quality leaf mold, which provides weed suppression while breaking down to improve soil tilth. Avoid dyed mulches or large wood chips; the dyes can contain heavy metals, and large chips take too long to decompose, often robbing nitrogen from the soil as fungi work to break them down. Apply exactly 2 to 3 inches. Any more and you will suffocate the root flares. Any less and the evaporation rates will spike.
“Mulch should never touch the base of the plant; the ‘mulch volcano’ effect traps moisture against the bark, leading to cambium rot and pest infestation.” – Penn State Extension Horticultural Guidelines
- Step 1: Edge the bed with a clean 90-degree vertical cut to prevent turf grass encroachment.
- Step 2: Incorporate 2 inches of composted organic matter into the top 6 inches of native soil.
- Step 3: Install the back layer (Structural) first, ensuring the root ball is 1 inch above the soil grade.
- Step 4: Stagger the middle layer in a triangular pattern for maximum coverage.
- Step 5: Install the front layer, leaving room for horizontal spread.
- Step 6: Apply a pre-emergent weed preventer and 3 inches of hardwood mulch.
- Step 7: Perform a deep soak to settle air pockets around the roots.
Maintenance: The Long Game for High-Performance Beds
Installation is only the first 20% of the job. To keep a layered bed from becoming a chaotic mess, you must master deadheading and corrective pruning. Removing spent blooms forces the plant to redirect energy from seed production back into vegetative growth or secondary flower sets. Also, watch your irrigation levels. Most people over-water. Turf grass and flower beds have different needs. Turf needs frequent shallow water; perennials need deep, infrequent drenching—exactly 1 inch per week—to force roots to chase the moisture down into the subsoil layers. This makes them drought-tolerant. Shallow roots are weak roots. Don’t raise weak plants. Keep your soil microbiology active by avoiding heavy synthetic fertilizers that kill off beneficial mycorrhizae. Use organic-based slow-release feeds that work with the soil, not against it. It takes time. Be patient.
![2026 Pollinator Garden Setup [Bee-Friendly]](https://lawnmajesty.com/wp-content/uploads/2026/09/2026-Pollinator-Garden-Setup-Bee-Friendly.jpeg)