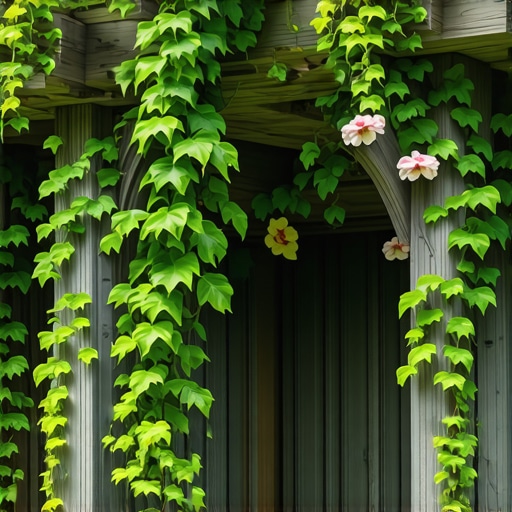
How to Build a Custom Arbor for Climbing Garden Vines
The Hard Truth About Vertical Structures in the Landscape
To build a custom arbor for climbing garden vines, you must prioritize structural load-bearing capacity and foundation depth to counter wind shear and plant weight. A professional install requires 6×6 rot-resistant posts, galvanized hardware, and footings that extend below the local frost line to prevent heaving. I always drill into my new crew members: if you don’t fix the soil grading and foundation first, every plant you put in the ground is just expensive compost. I have seen too many three-hundred-pound Wisteria vines collapse cheap, store-bought kits because the homeowner didn’t understand the physics of lateral tension. When you are building for a living organism that grows heavier every year, you are not just a carpenter; you are a structural engineer for a slow-motion weight machine. These vines exert massive pressure as they thicken. A flimsy 4×4 post will eventually bow under the weight of a mature Trumpet Vine or Grapevine. We build for the next twenty years, not the next twenty days. Quality matters. Precision matters. Soil chemistry matters. If you skip the compaction of the base or ignore the drainage at the post site, the wood will rot from the bottom up before the vine even reaches the rafters. This guide details the exact mechanical and horticultural steps required to build a structure that survives the elements and the biology of the garden.
Phase 1: Engineering the Foundation and Site Preparation
The foundation of your arbor determines the lifespan of the entire hardscaping project by managing hydrostatic pressure and soil stability. You must excavate a hole that is at least 12 inches in diameter and 36 to 42 inches deep, depending on your local building code and frost line requirements. Drainage is the enemy of wood longevity. I always add 4 inches of crushed 57-stone to the bottom of the hole before pouring concrete. This creates a sump area for water to exit the base of the post. Without this, the post sits in a bucket of water every time it rains. Use 3000 PSI concrete and slope the top of the pour away from the wood to shed water. Don’t let the concrete sit flush with the grass. It will trap moisture against the grain. We are looking for a structural bond that resists the frost heave cycles common in northern climates. If you are in a high-wind zone, you might even consider steel post-bases set into the concrete to keep the wood entirely out of the soil. This is the difference between a 10-year arbor and a 40-year arbor. The soil type also dictates your approach. Heavy clay holds water like a sponge, requiring more aggregate for drainage. Sandy soil shifts easily, requiring wider footings for lateral support.
“Wood in contact with the ground or concrete should be rated for Ground Contact (UC4A) to prevent premature fungal decay and structural failure over time.” – American Wood Protection Association (AWPA) Standards
Material Selection: Why Quality Timber Beats Big-Box Lumber
Selecting the right lumber for an arbor involves understanding tannin content, fiber density, and rot resistance of various wood species. For high-end garden design, I exclusively use Western Red Cedar (Heartwood) or Black Locust. Pressure-treated lumber is fine for the structural skeleton, but it lacks the aesthetic and dimensional stability of cedar. Big-box store lumber is often kiln-dried too fast, leading to warping and checking. I buy from local lumber yards where the moisture content is controlled. Cedar contains natural oils that repel boring insects and fungal pathogens. If you use pressure-treated wood, ensure it is rated for ground contact and let it weather for six months before applying any stain or sealant. Otherwise, the chemicals will prevent the finish from adhering correctly. Below is a comparison of materials common in professional hardscaping.
| Material | Expected Lifespan | Maintenance Level | Structural Strength |
|---|---|---|---|
| Western Red Cedar | 20-25 Years | Moderate (Sealing) | High |
| Pressure Treated (ACQ) | 15-20 Years | Low | Very High |
| Vinyl/PVC Kits | 10-15 Years | Very Low | Low (Brittle) |
| Ipe (Brazilian Walnut) | 50+ Years | High (Hardness) | Extreme |
How deep should arbor posts be buried?
Arbor posts must be buried at least one-third of their total height above ground, with a minimum depth of 36 inches in frost-prone regions. This depth ensures that the lateral leverage exerted by wind catching the vine canopy does not pull the structure out of the ground. In areas with high clay content, the expansion and contraction of the soil can push shallow posts upward, a process known as frost heaving. We always use a power auger to ensure the sidewalls of the hole are clean and vertical. If the hole is bell-shaped, the frost will grab the wider top and lift the post easily. If you are building a larger pergola-style arbor, you should increase the footing diameter to 16 inches. Do not skip the gravel base. It is the only thing preventing the post from rotting in the standing water at the bottom of the concrete sleeve. It is a simple step. It saves the project. Don’t be a hack. Do it right the first time.
Phase 2: Framing for Maximum Load and Aesthetics
The rafters and stringers of your arbor must be designed to handle dead loads (the weight of the wood and vines) and live loads (snow and wind). For a standard 4-foot wide path, I use 2×8 headers and 2×6 rafters spaced 12 inches on center. This creates a dense grid that gives the vine plenty of attachment points. I never use nails for structural connections. Everything is joined with 3-inch or 5-inch 316-grade stainless steel structural screws. Zinc-plated fasteners will react with the tannins in cedar, causing ugly black streaks. We also use a process called “double-headering” where we sandwich the 6×6 posts between two 2×8 beams. This prevents the beams from twisting over time. For the top lattice, don’t buy the flimsy 1/4-inch stapled junk from the store. We rip 1×2 cedar strips and screw them in a diamond or square pattern. This is where the vine will spend most of its life. It needs to be rugged. I also chamfer all the edges with a router to prevent water from pooling on flat surfaces. This architectural detail also makes the structure look like it was built by a pro, not a weekend warrior with a circular saw. It matters. Detail is everything.
Phase 3: Botanical Integration and Soil Microbiology
Building the arbor is only half the battle; the horticultural success depends on how you handle the root zone at the base of the posts. Most people plant the vine right against the post. This is a mistake. The concrete footing creates a localized alkaline environment that can stress acid-loving plants. I plant the vines at least 18 inches away from the post and lean them toward the structure. This gives the root flare room to expand without being constricted by the concrete. You also need to consider the soil pH and drainage. Climbing vines like Clematis prefer “cool feet and a warm head,” meaning they need mulch over the roots but plenty of sun on the foliage. I always amend the planting hole with organic compost and a slow-release 10-10-10 fertilizer to establish a strong nitrogen cycle. Avoid high-nitrogen fertilizers for flowering vines like Wisteria, as this will encourage leaf growth but stifle flower production. You want a balanced approach. Check your USDA hardiness zones. Don’t plant a Zone 8 vine in a Zone 5 climate and expect it to survive the first winter. It won’t.
What is the best wood for a garden arbor?
The best wood for a garden arbor is Western Red Cedar or Redwood due to their natural resistance to decay and insect infestation. These species contain high levels of thujaplicins, which act as natural fungicides, ensuring the structure remains sound even when covered in moisture-trapping foliage. For homeowners on a budget, pressure-treated Southern Yellow Pine is a viable alternative, provided it is treated with micronized copper azole (MCA) for safer residential use. Avoid using untreated Douglas Fir or Hemlock for outdoor vertical structures; they will fail within 5 years when exposed to soil moisture and climbing vine tendrils. I have seen it happen a hundred times. A client wants to save $200 on lumber and ends up spending $3000 three years later to replace the whole thing. It is a fool’s errand. Invest in cedar. It smells better, looks better, and outlasts the competition every single time.
“Vines like Wisteria floribunda can develop trunks 10 inches thick, exerting several hundred pounds of lateral pressure on structural supports during peak growth cycles.” – Cornell Cooperative Extension
The Installation Checklist for Professionals
- Verify underground utility lines via 811 before digging any footings.
- Use a laser level or transit to ensure all four post-bases are on the same plane.
- Apply a copper-based wood preservative to any end-cuts made in pressure-treated lumber.
- Pre-drill all holes in cedar to prevent splitting the grain during fastening.
- Install a drip-irrigation line at the base of each vine during the construction phase.
- Use temporary 2×4 bracing to keep the structure plumb while the concrete cures for 24-48 hours.
- Check the squareness of the top frame by measuring the diagonals; they must be identical.
Maintaining Your Investment: The Five-Year Cycle
An arbor is not a “set it and forget it” feature. The interaction between the wood and the vine creates a microclimate of high humidity. Every two years, you should inspect the structural joinery for any signs of loosening due to wood shrinkage. Check the base of the posts for soft spots. Every five years, I recommend a light power wash and a re-application of a high-quality oil-based stain. Avoid film-forming stains like acrylics; they will peel and trap moisture against the wood. You want a penetrating oil that lets the wood breathe. When pruning your vines, make sure you are not letting them grow under the shingles or into the joints of the wood. This can physically pry the structure apart over time. Prune for airflow. Thin out the interior of the vine every spring to prevent powdery mildew and other fungal issues. A healthy vine is a light vine. A neglected vine is a structural hazard. Keep your shears sharp and your eyes open. This is how you manage a high-end landscape.
![2026 Pollinator Garden Setup [Bee-Friendly]](https://lawnmajesty.com/wp-content/uploads/2026/09/2026-Pollinator-Garden-Setup-Bee-Friendly.jpeg)