
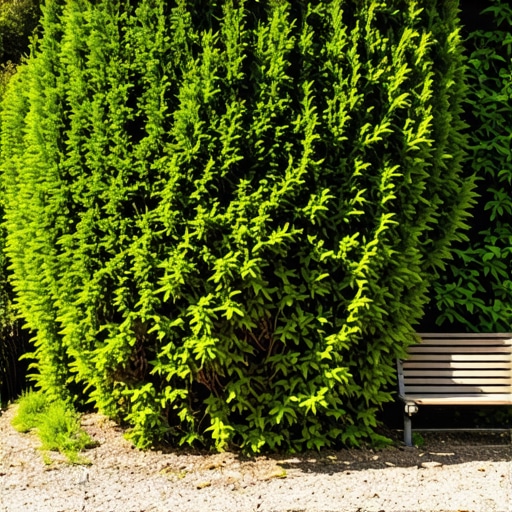
How to create privacy with fast-growing hedges
Why Site Engineering Trumps Plant Selection for Privacy Screens
Creating privacy with fast-growing hedges requires precise soil grading, root-space calculation, and drainage management to ensure the living wall does not succumb to root rot or wind-throw. Without a structural soil assessment, expensive nursery stock will likely fail within three seasons due to compaction or poor hydrology.
I always drill into my new crew members: if you do not fix the soil grading first, every plant you put in the ground is just expensive compost. This is the cornerstone of technical landscaping. I have seen too many rookies slap a row of 7-foot Green Giants into a trench of heavy clay and wonder why the needles turn copper by July. They did not account for the bulk density of the soil. When you excavate a trench in clay, you essentially create a bathtub. Water sits in that trench, oxygen is displaced, and the roots literally drown. Before you even look at a plant catalog, you must understand the topographical flow of your yard. If the grade slopes toward your proposed hedge line, you are building a swamp, not a screen. We use transit levels to ensure we have at least a 2 percent pitch away from the root zones. If the site is flat, we install French drains or raised berms. This is not gardening: it is civil engineering with biological components. We are managing hydrostatic pressure and anaerobic conditions before we ever touch a shovel to a root ball.
Selecting the Right Species: Growth Rates and Structural Integrity
Choosing privacy hedge species involves balancing annual growth rates against long-term maintenance costs and local USDA hardiness zone resilience. Species like Green Giant Arborvitae offer rapid verticality, while Skip Laurels provide dense, broadleaf coverage in shaded understories or tighter footprints. You must select based on the soil pH and light exposure of your specific micro-climate.
| Species | Growth Rate (ft/year) | Spacing (on-center) | Soil Preference |
|---|---|---|---|
| Thuja Green Giant | 3 to 5 | 5 to 8 feet | Well-drained loam |
| Leyland Cypress | 3 to 4 | 8 to 10 feet | Acidic to neutral |
| Skip Laurel | 1.5 to 2 | 3 to 4 feet | Moist, well-drained |
| Emerald Green Arborvitae | 1 | 2 to 3 feet | Consistent moisture |
How much modified gravel do I need for a hedge base?
While hedges do not sit on a gravel base like a patio, you need 2 to 3 inches of coarse organic matter or expanded shale mixed into the backfill to prevent soil subsidence and improve pore space. For adjacent hardscaping, a standard 6 inch compacted 2A modified gravel base is required to prevent the weight of the mature hedge from shifting nearby pavers.
Site Prep and Drainage Engineering
Root systems require a specific ratio of air to water within the soil pores. In a typical suburban lot, the soil is so compacted from construction equipment that the bulk density exceeds 1.6 grams per cubic centimeter. This is where roots stop growing. We use air-spades to decompact the soil in a 20-foot radius of the hedge line. We are looking for a granular structure that allows for capillary action. If the soil is heavy clay, we do not just add sand: that creates concrete. We add high-quality compost and biochar to build soil aggregates. This is about long-term survival, not just the first season.
“A retaining wall doesn’t fail because of the stone; it fails because of the water trapped behind it.” – Hardscape Engineering Axiom
The same logic applies to your hedges. If you plant a hedge at the base of a retaining wall without proper weep holes and a gravel chimney, the hydrostatic pressure will push the wall over as the root system expands. We calculate the maturity weight of the hedge. A 20-foot tall Thuja can weigh over 500 pounds and act as a massive sail in the wind. The root system must be deep and wide enough to anchor that mass. We use structural soil mixes under adjacent walkways to allow roots to grow without lifting the hardscape. This involves a mix of angular crushed stone and loam that provides both load-bearing capacity and air pockets for root respiration.
What is the best spacing for fast growing privacy hedges?
Spacing depends on the genetic mature width of the cultivar: for Green Giant Arborvitae, space them 5 to 6 feet apart for a dense screen, while Leyland Cypress requires 8 to 10 feet to avoid foliar fungal diseases caused by poor airflow between the branches. Do not crowd them to get instant privacy; you will regret it when the center branches die back from lack of light.
The Installation Process: Avoiding the Death Spiral
Most DIYers plant trees too deep. This is a fatal error. The root flare, where the trunk expands into the roots, must be 1 to 2 inches above the finished grade. If you bury the flare, the bark stays moist, gas exchange is blocked, and the tree develops girdling roots that will eventually strangle it. We use a sharp-shooter shovel to shave the sides of the planting hole, ensuring the soil interface is not glazed. Glazed soil acts like a ceramic pot, preventing roots from penetrating the native earth. We also remove all twine, wire cages, and at least the top third of the burlap. Burlap today is often treated with chemicals to prevent rot: if you leave it on, it will not decompose, and it will wick moisture away from the root ball like a candle wick.
- Step 1: Call 811 for utility marking to avoid hitting gas or electric lines.
- Step 2: Excavate a trench 3 times wider than the root ball but no deeper.
- Step 3: Amend the backfill soil with 20 percent organic matter to improve cation exchange capacity.
- Step 4: Position the trees, ensuring the best side faces the primary viewing angle.
- Step 5: Backfill in 6-inch lifts, tamping lightly with your feet to remove large air pockets without over-compacting.
- Step 6: Install a 12-gauge copper wire drip line with 2 GPH emitters at the base of each tree.
“Soil compaction is the single most restrictive factor for tree root growth in the urban environment.” – Penn State Extension
Maintenance and Post-Planting Care
The first 18 months are the establishment phase. This is when the plant is most vulnerable. We do not use high-nitrogen fertilizers in the first year because we want the plant to focus on root development, not top-growth. We use a mycorrhizal inoculant to help the roots absorb phosphorus and water. Irrigation must be deep and infrequent. We want the water to penetrate 12 inches deep to force the roots to chase the moisture down. Frequent, shallow watering creates a lazy root system that will fail during a drought. We also apply a 3-inch layer of triple-shredded hardwood mulch, but we keep it 4 inches away from the trunk. No mulch volcanoes. It will rot the bark. You must monitor for bagworms and spider mites, especially in the heat of August. If you see browning from the inside out, check your soil moisture levels with a tensiometer. It is usually either too much water or not enough. There is no middle ground in a poorly engineered site.
![Building a 2026 Raised Bed for Under $50 [DIY]](https://lawnmajesty.com/wp-content/uploads/2026/07/Building-a-2026-Raised-Bed-for-Under-50-DIY.jpeg)
![5 Vertical Garden Layouts for Small 2026 Patios [DIY]](https://lawnmajesty.com/wp-content/uploads/2026/05/5-Vertical-Garden-Layouts-for-Small-2026-Patios-DIY.jpeg)